
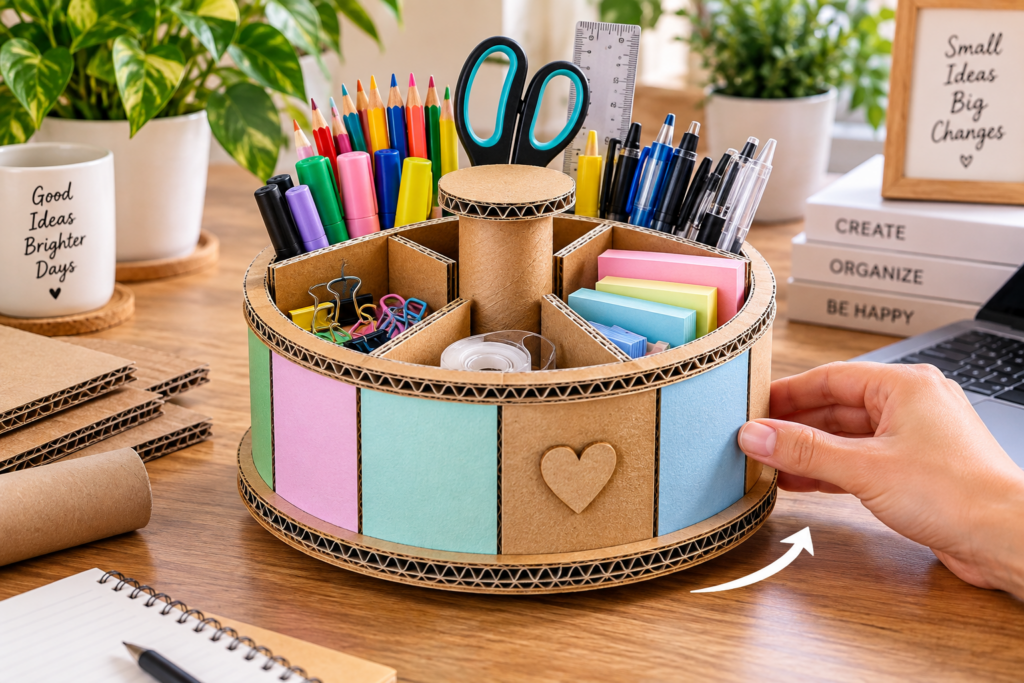
Cardboard boxes tend to pile up quickly after deliveries, online orders and household purchases. Most eventually end up in the recycling bin—but a few sturdy pieces can become something surprisingly useful.
With corrugated cardboard, a cardboard tube, glue and a few basic craft supplies, you can make a rotating desk organizer with separate compartments for pens, pencils, scissors, sticky notes and other small office supplies.
The important part is getting the rotating base right. Simply gluing a tube between two cardboard circles may look convincing in a photo, but it doesn’t automatically create a smooth spinning mechanism. This version focuses on making the project practical, sturdy and genuinely usable.
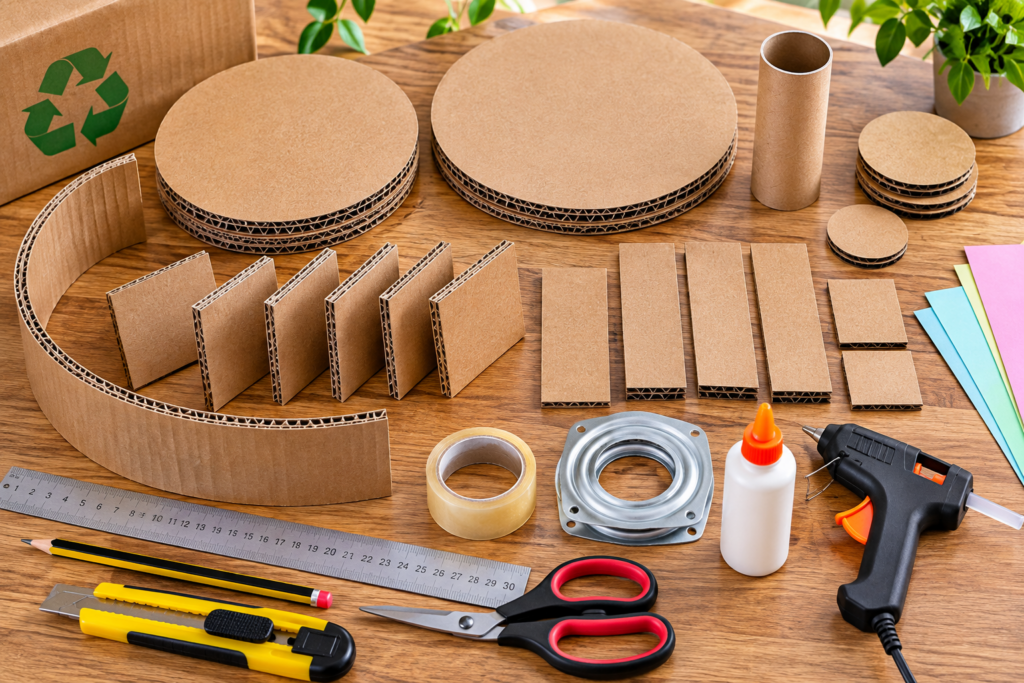
✂️ What You’ll Need
Before cutting anything, gather your materials.
Materials
- Sturdy corrugated cardboard
- One strong cardboard tube
- Craft or PVA glue
- Hot glue, optional for quick assembly
- Colored paper, kraft paper or paint for decoration
- Two large cardboard circles for the organizer body
- Smaller cardboard circles for reinforcement
- Cardboard strips for the outer wall
- Cardboard rectangles for compartment dividers
- A suitable rotating mechanism
Tools
- Metal ruler
- Pencil
- Compass or round object for tracing
- Craft knife
- Cutting mat
- Scissors
- Glue gun, if using hot glue
⚠️ Safety: A craft knife can easily slip through corrugated cardboard. Always cut away from your hands, use a cutting mat and supervise children closely. An adult should handle difficult cuts.
📏 Step 1: Decide the Size of Your Organizer
You don’t need complicated measurements, but planning before cutting will save a lot of frustration. For a medium-sized desk organizer, a practical starting point is approximately:
- Base diameter: 10–12 inches (25–30 cm)
- Organizer height: 4–6 inches (10–15 cm)
- Center tube: about 1.5–2.5 inches (4–6 cm) wide
These dimensions are only a guide. If you want to store tall scissors and rulers, make some sections deeper or add a taller central holder. For pens, markers, clips and sticky notes, shorter compartments are usually easier to access.
⭕ Step 2: Cut and Reinforce the Circular Base
- Trace two identical large circles onto sturdy corrugated cardboard and cut them carefully.
- Instead of using only one thin cardboard circle, glue the two circles together. If your cardboard is relatively thin, add another layer.
Why use several layers? The organizer will eventually carry the weight of scissors, markers, pens, rulers, notebooks and other desk accessories. A single sheet can bend or warp. When stacking corrugated cardboard, changing the direction of the corrugation between layers can also help create a more rigid panel. Place the glued base under a flat weight while it dries to help prevent warping.
🔄 Step 3: Make It Actually Rotate
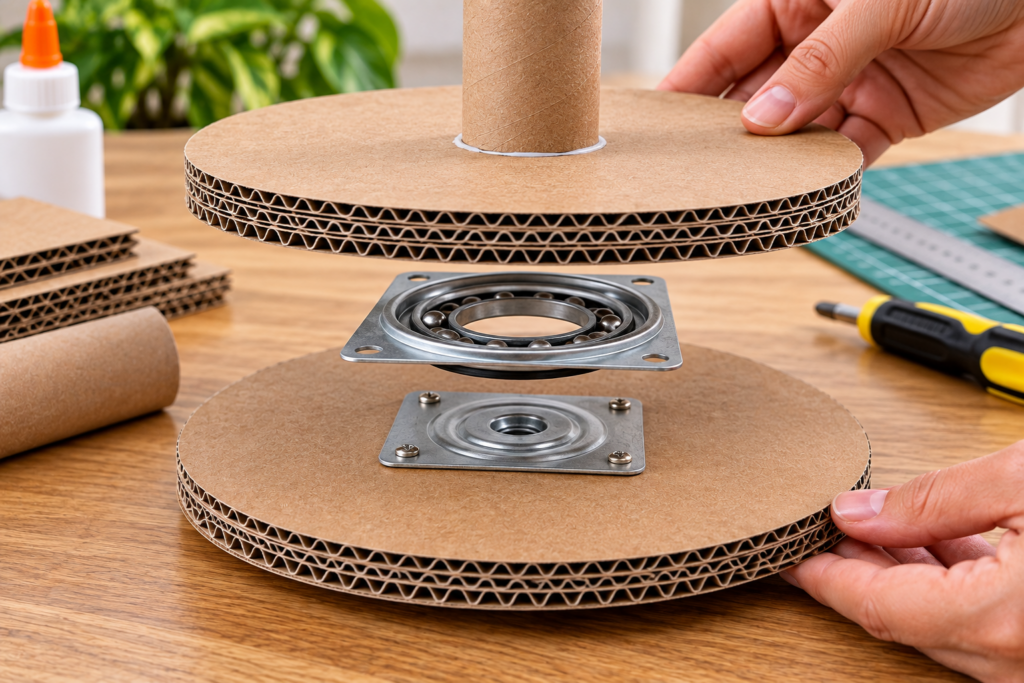
This is the most important difference between a decorative viral craft and a functional rotating organizer. A cardboard tube attached to the center can provide structural support, but if everything is glued together, the organizer won’t magically spin. You need two parts that can move relative to each other.
- Option 1: Use a Small Lazy Susan Bearing (Recommended)This is the easiest and most reliable solution. Attach an appropriately sized rotating bearing between the stationary bottom base and the organizer platform above it following the manufacturer’s instructions. Once assembled correctly, the upper organizer should rotate while the bottom remains on the desk.
- Option 2: Use a Simple DIY PivotIf you want the project to remain primarily cardboard-based, you can experiment with a central pivot between two reinforced circular bases. The upper platform needs enough clearance to rotate without rubbing heavily against the lower base. This version can work for a lightweight organizer, but don’t expect it to spin as smoothly or last as long as a proper bearing.
🧱 Step 4: Add the Center Support
Now you can begin constructing the organizer itself. Position the cardboard tube vertically in the center of the upper platform. Before gluing it, use a ruler to locate the center accurately.
Why? If the organizer is badly off-center, it may feel unbalanced when you rotate it. Once you’re happy with the position, secure the tube firmly and reinforce the connection with additional cardboard pieces around the base of the tube.
🗂️ Step 5: Create the Dividers
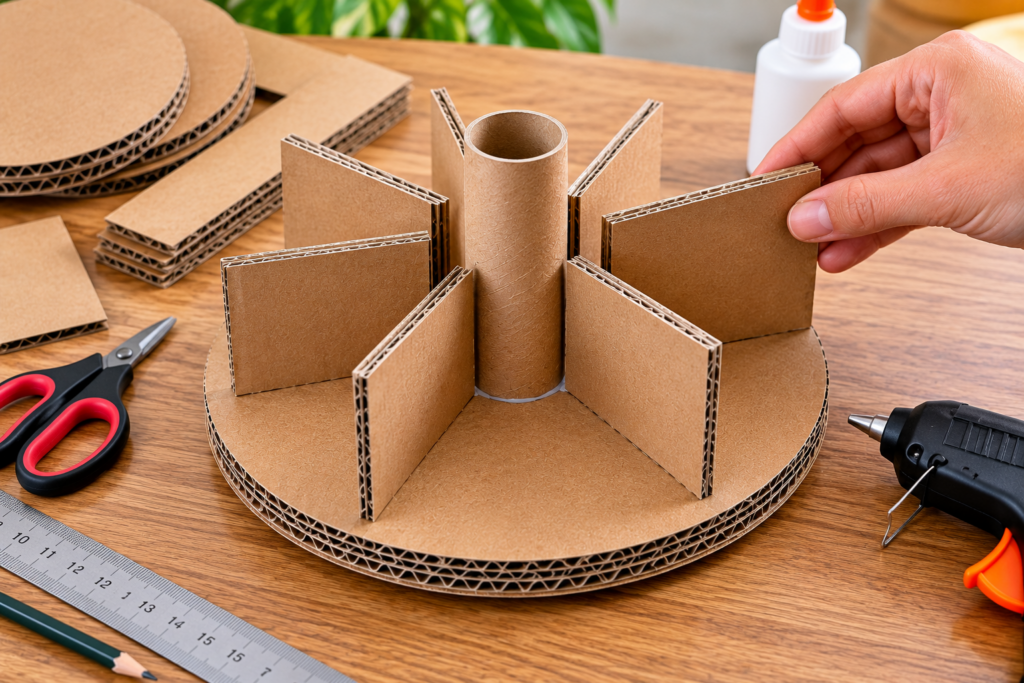
This is where your pile of cardboard starts looking like a real organizer.
- Cut several rectangular pieces of equal height.
- Arrange them radially around the center support, almost like slices of a pie to create sections for pens, pencils, markers, scissors, sticky notes, and clips.
- Don’t glue immediately. Arrange everything first and decide whether the compartment sizes actually make sense for the items you use.
- Once you’re satisfied, glue each divider securely to the base and, where appropriate, to the center structure.
🧩 Step 6: Make Different-Sized Compartments
Perfect symmetry looks attractive, but it isn’t necessarily the most useful design. Think about what will actually go inside:
- A narrow compartment can hold pens and pencils.
- A wider one can accommodate sticky notes or small notebooks.
- Scissors may benefit from a taller section.
- Paper clips and pushpins need a much smaller space.
Design the organizer around your desk—not around perfect geometry. That’s one of the easiest ways to turn a decorative DIY project into something you’ll actually use.
🟤 Step 7: Add the Outer Wall
- Cut a long strip of corrugated cardboard tall enough to form the outside wall of your compartments.
- Carefully bend it around the circular base. Corrugated cardboard may resist a tight curve, so work gradually rather than forcing it (you can score or gently flex the cardboard at regular intervals without cutting completely through it).
- Glue the strip around the perimeter and hold it in position until secure. Make sure the outer wall does not extend downward far enough to rub against the stationary rotating base, otherwise friction can prevent smooth rotation.
🔝 Step 8: Reinforce the Top
A circular top ring can make the organizer look much cleaner while strengthening the outer wall. Trace a circle matching the outside diameter, then cut away the center to create a ring. Glue it over the top edge of the organizer to help keep the outer wall aligned while hiding some exposed cardboard edges. You can also place a small decorative or functional circle on top of the central tube.
🎨 Step 9: Decorate the Organizer
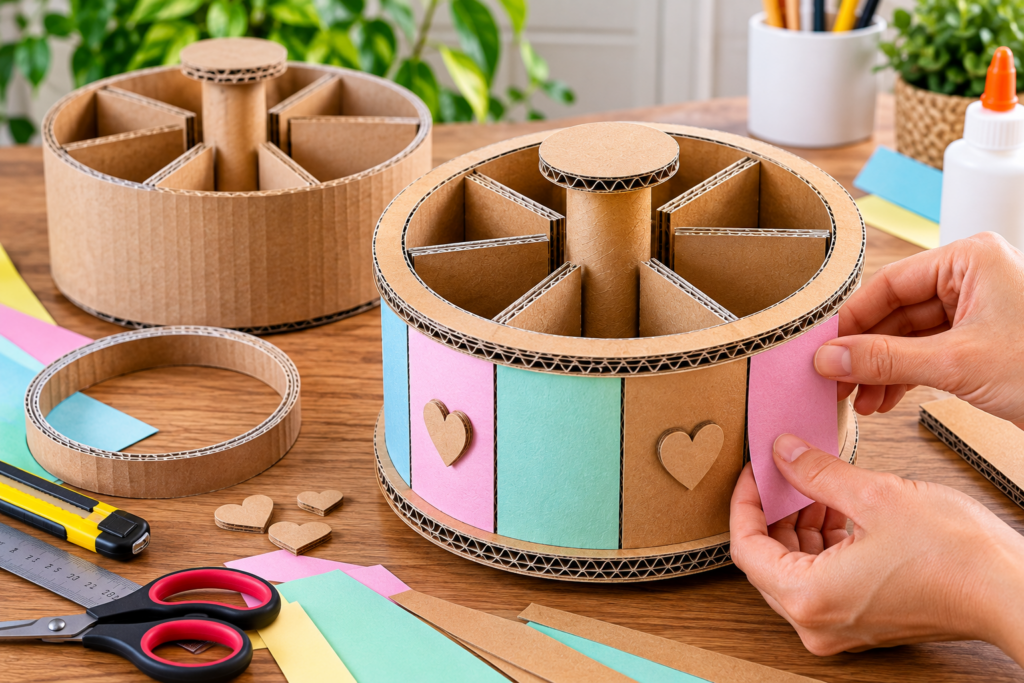
Now comes the fun part. You can leave the exposed corrugated cardboard visible for a natural recycled look, or decorate individual compartments using:
- Colored craft paper
- Leftover wrapping paper
- Acrylic paint
- Kraft paper
- Patterned paper
- Labels
For a clean design, use only two or three coordinating colors rather than covering every section differently. You can also leave the cardboard edges visible to emphasize that the organizer was made from recycled packaging.
🖇️ Step 10: Organize Your Desk
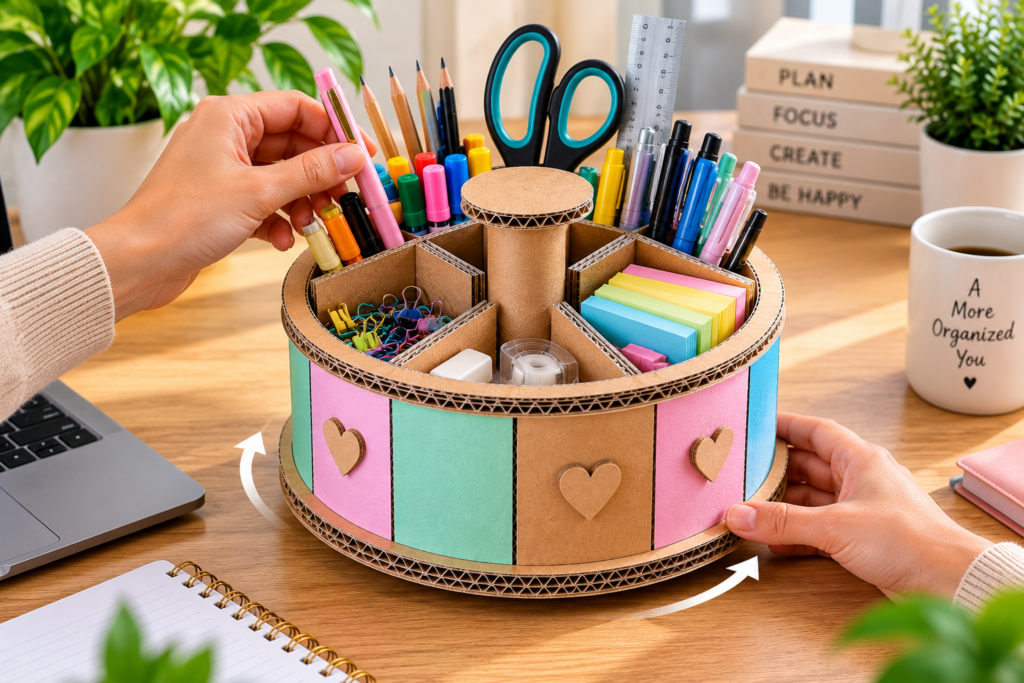
Wait until all glue has fully dried before loading the organizer. Then distribute items around it. Try not to place every heavy object—such as large scissors and thick markers—in the same compartment; a more balanced weight distribution will make the organizer easier to rotate. Give it a gentle spin and bring different compartments toward you without lifting the entire organizer!
💡 7 Tips for a Better Cardboard Organizer
- Choose strong corrugated cardboard: Thin cereal-box cardboard isn’t ideal for the main structure. Save it for decorative panels instead.
- Reinforce the bottom: The base carries almost everything, so this is not the place to save cardboard.
- Measure before gluing: A slightly crooked divider is difficult to correct once strong glue sets.
- Test the rotation early: Don’t completely decorate the project before discovering that the base doesn’t spin properly. Build and test the rotating mechanism first.
- Keep the weight balanced: Very uneven loading can make a lightweight cardboard organizer less stable.
- Protect the bottom of your desk: If necessary, add felt pads or another suitable non-scratch material beneath the stationary base.
- Don’t overload it: This is still a cardboard craft. Use it for normal desk supplies—not heavy tools or large books.
❌ Common Mistakes to Avoid
- Gluing everything to one base: If the upper organizer and bottom base are permanently glued together, there is nothing left to rotate.
- Using one thin cardboard circle: It may sag once the compartments are loaded.
- Making every compartment tiny: The organizer might look impressive but become frustrating to use.
- Forgetting clearance: If the upper walls rub against the desk or stationary base, rotation will become difficult.
- Decorating before testing: Always test stability and movement first. Pretty paper won’t fix a bad pivot.
♻️ Why Cardboard Is Great for DIY Projects
One advantage of cardboard is that it’s inexpensive and easy to customize. A shipping box that no longer has a purpose can provide enough material for the base, dividers, outer walls, reinforcement pieces, and decorative details.
This project won’t replace commercial storage in every situation, but it’s a creative way to reuse clean, sturdy cardboard before recycling it. And because you’re building the organizer yourself, you can customize every compartment around the supplies you actually own.
🛠️ Can You Make It Without a Rotating Base?
Absolutely. If you don’t have a bearing and don’t want to experiment with a cardboard pivot, simply make a stationary desk organizer. Follow essentially the same construction process but use one strong reinforced base. You’ll still get the compartment storage without having to engineer the rotating mechanism. In fact, for a children’s craft project, the stationary version may be simpler and more practical.
🎯 What Can You Store Inside?
A cardboard desk organizer works especially well for lightweight supplies such as:
- Pens and pencils
- Markers
- Highlighters
- Scissors
- Sticky notes
- Paper clips
- Binder clips
- Erasers
- Small rulers
- Craft brushes
⚠️ Avoid: Wet products or anything that could leak. Cardboard and water are not good friends.
❓ Frequently Asked Questions
- What type of cardboard works best?Clean, sturdy corrugated shipping-box cardboard is generally the best choice for the structural parts.
- Does the cardboard tube make the organizer rotate?No. The tube can provide central structural support, but rotation requires a pivot or bearing that allows the upper platform to move independently from the lower base.
- Do I need a Lazy Susan bearing?Not necessarily. A lightweight DIY pivot can be attempted, but a proper rotating bearing generally provides smoother and more reliable movement.
- Can children make this project?Children can help with measuring, decorating and assembly, but an adult should handle craft knives, difficult cutting and hot glue.
- Can I paint cardboard?Yes. Use relatively light coats and allow them to dry thoroughly. Too much moisture can warp cardboard.
- How do I make the organizer stronger?Use multiple layers for the base, reinforce important joints and choose sturdy corrugated cardboard.
- Can I make it without plastic or metal parts?Yes, particularly if you make the stationary version. A fully DIY cardboard pivot is also possible, although it may not rotate as smoothly as a purpose-made bearing.
🌳 The Bottom Line
Before putting your next sturdy shipping box straight into the recycling bin, take another look at it. With careful cutting, reinforcement and a little creativity, ordinary cardboard can become a custom desk organizer with compartments designed around your own supplies.
And if you want it to rotate, remember the most important part of the project: Don’t just add a center tube—build a real pivot between the stationary base and the organizer. That small detail is what turns an attractive social-media craft into something that can actually work on your desk.