
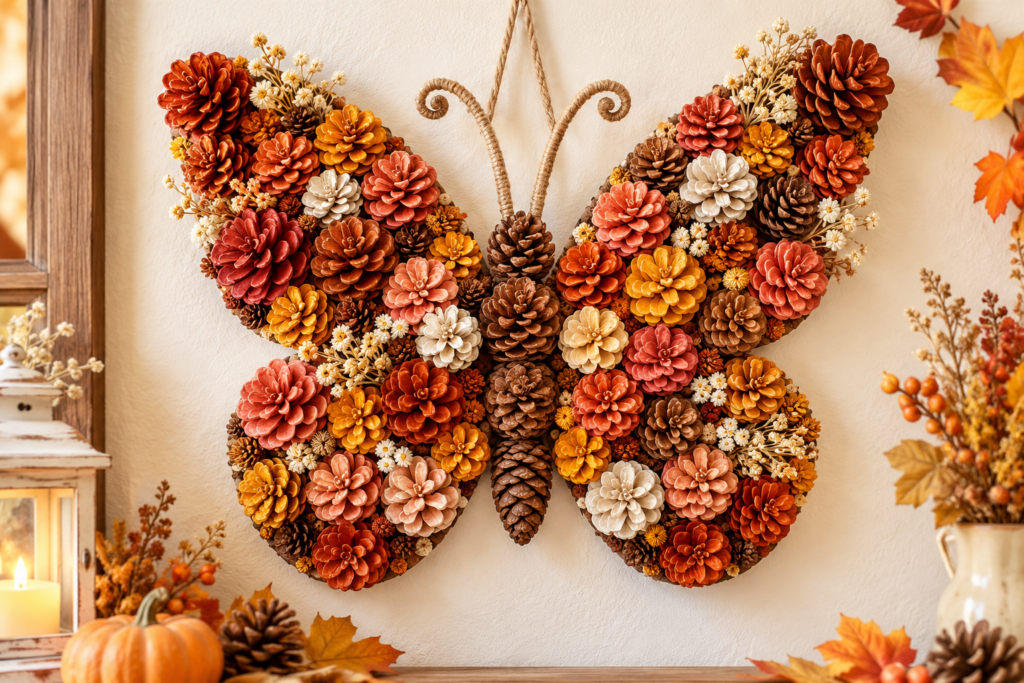
Pinecones are one of those natural materials we often walk past without giving them a second thought. But with a little paint, cardboard, and creativity, they can become a surprisingly beautiful piece of seasonal decor.
This pinecone butterfly craft combines warm autumn colors, natural textures, and a simple butterfly-shaped cardboard base. The finished decoration looks intricate, but the basic technique is actually quite straightforward: paint the pinecones, arrange them over the wings, glue them in place, and add a few finishing details.
It’s a lovely project for fall decorating, nature-inspired crafts, or simply giving collected pinecones a second life.
The key to success? Choose reasonably uniform pinecones, test your color arrangement before touching the hot glue gun, and use sturdy cardboard for your base.
🍂 Why This Pinecone Butterfly Is Such a Beautiful Fall Craft
What makes this project special is the combination of shapes and colors. Small pinecones naturally resemble layered flower petals when viewed from above. By painting them in shades of terracotta, coral, ochre, and cream, you can arrange them almost like a floral mosaic across the butterfly’s wings.
Leaving several pinecones natural creates contrast and keeps the decoration connected to its woodland origins. The result can work beautifully as:
- 🍁 Fall wall decor
- 🦋 Nature-inspired home decoration
- 🚪 Seasonal door or entryway decor
- 🎁 A handmade autumn gift
- 🌲 A creative way to use collected pinecones
And because you’re making the cardboard base yourself, you can adjust the butterfly to almost any size.
🧺 What You’ll Need
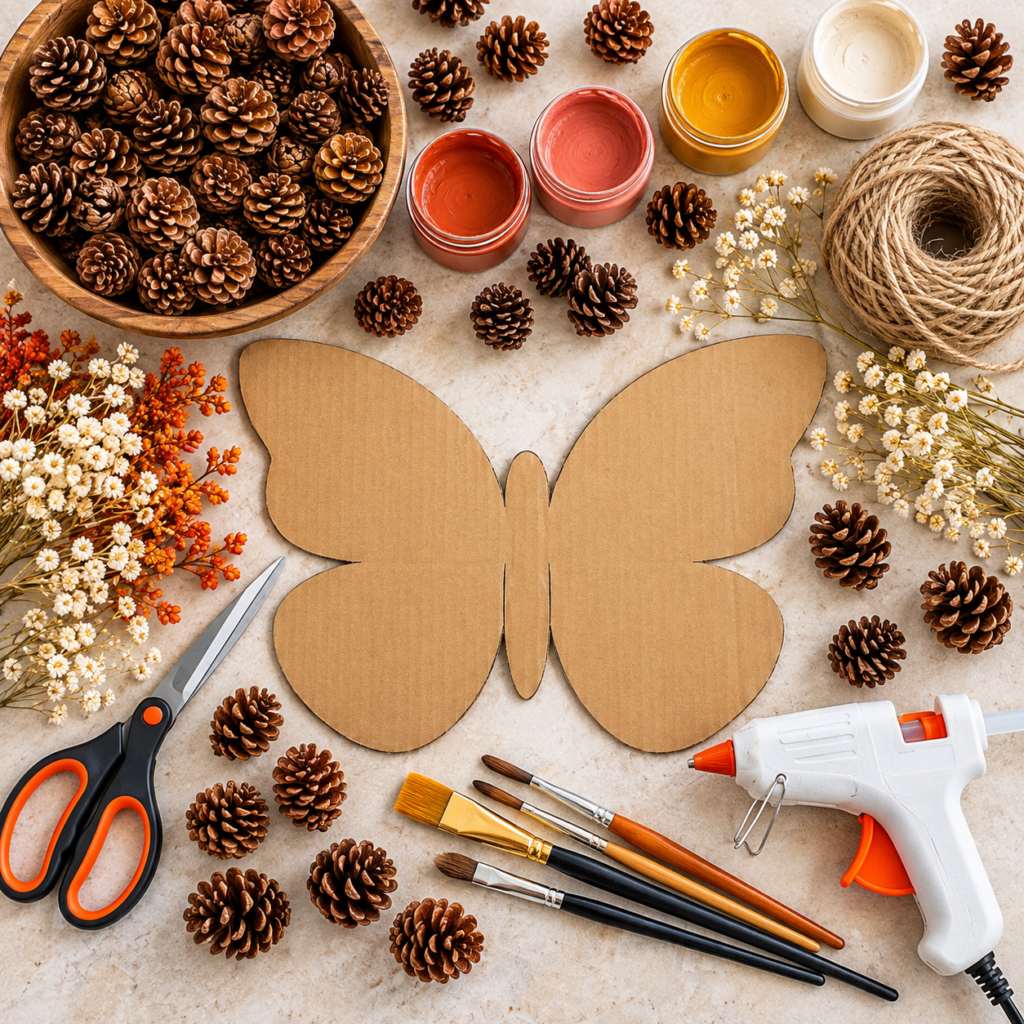
For a medium-sized butterfly similar to the example, gather:
- 📦 Sturdy cardboard
- 🌲 Around 40–45 small, dry pinecones
- 🎨 Acrylic paint in terracotta, coral, ochre, and cream
- 🖌️ Paintbrushes
- ✂️ Strong scissors or a craft knife
- 🔥 Hot-glue gun and glue sticks
- 🧵 Jute twine
- 〰️ 2 short pieces of flexible wire
- 🌼 A few tiny dried flowers
- ✏️ Pencil and paper (optional, for a template)
💡 Tip: Try to collect small pinecones of roughly similar size. A few larger or differently shaped ones are fine for accents, but relatively uniform pinecones make filling the wings much easier.
🌲 Step 1: Prepare Your Pinecones
If you’ve collected the pinecones outdoors, don’t glue them onto your project immediately. First, inspect them carefully and remove:
- Loose dirt
- Pine needles
- Leaves
- Cobwebs
- Damaged pieces
A dry brush can help get into the spaces between the scales. Make sure your pinecones are completely dry before painting or gluing them; moist pinecones aren’t ideal because paint and glue may not adhere as well.
🦋 Step 2: Make the Butterfly Base
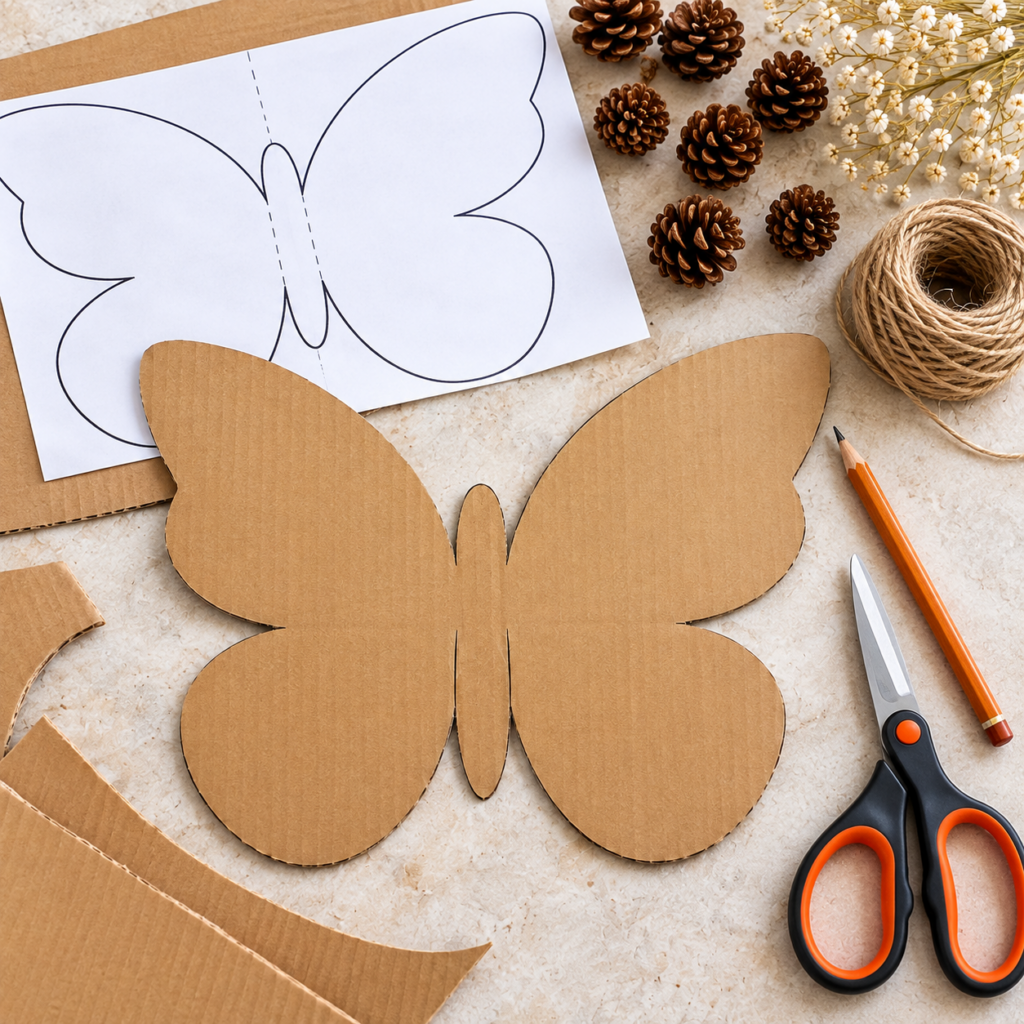
Now create the foundation of your decoration. Draw a large butterfly shape onto sturdy cardboard. You want:
- Two upper wings — relatively large and rounded
- Two lower wings — slightly smaller
- A narrow central body
✂️ Easy Template Trick: If drawing a symmetrical butterfly freehand feels difficult, fold a large piece of paper in half, draw one side of the butterfly, cut it out, and unfold it. You’ll have a symmetrical template that you can trace onto your cardboard. Carefully cut out the shape.
⚠️ Safety Note: If the cardboard is too thick for scissors and you’re using a craft knife, work on a protected cutting surface and keep fingers away from the cutting path. Adults should handle this part when making the project with children.
🎨 Step 3: Choose Your Fall Color Palette
This is where the project starts becoming beautiful. For a warm autumn look, use colors such as:
- 🧡 Terracotta
- 🌸 Muted coral
- 💛 Ochre/mustard
- 🤍 Warm cream
- 🤎 Natural brown
You don’t need to paint every pinecone. Leaving some completely natural adds depth and prevents the butterfly from looking too uniform.
🖌️ Step 4: Paint the Pinecones
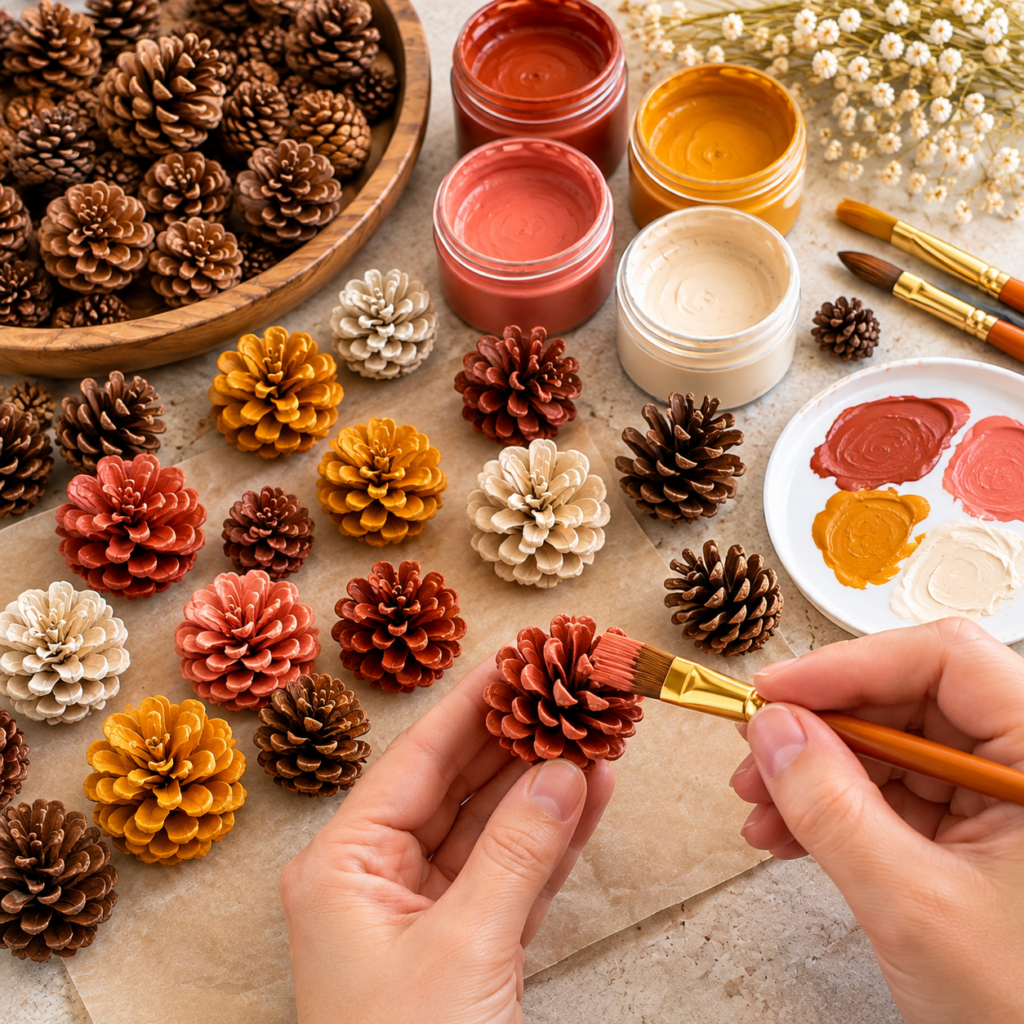
Hold each pinecone carefully and brush acrylic paint over the visible outer scales. You can choose between two different effects:
- Bold look: Cover most of the visible pinecone.
- Rustic look: Lightly brush paint over the tips of the scales so that some natural brown remains visible underneath.
Prepare several pinecones in each color, place them somewhere safe, and allow the paint to dry completely before assembling the butterfly.
🧩 Step 5: Plan the Design BEFORE Gluing
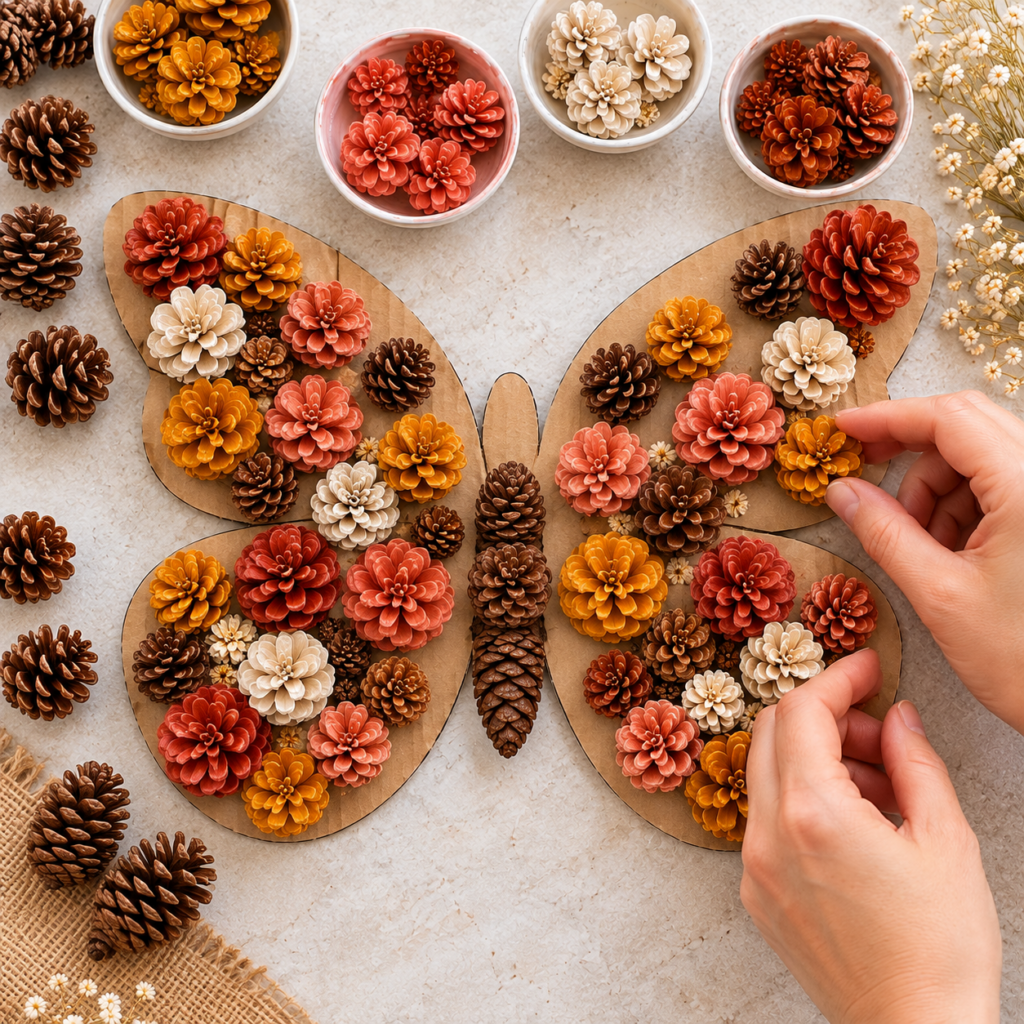
Don’t reach for the glue gun yet. This is probably the most useful trick in the whole project.
- Place your cardboard butterfly flat on a table.
- Begin arranging the painted pinecones over the wings without gluing them.
- Start with the larger pinecones, then fill smaller spaces with smaller ones.
- Try distributing the colors across both sides (e.g., if you place an ochre pinecone near the outer edge of the left wing, place another ochre pinecone in approximately the same area on the right).
It doesn’t need to be perfectly symmetrical; a little variation actually makes the finished craft feel more organic.
🌼 Step 6: Create a Floral-Mosaic Effect
Continue filling the wings until most of the cardboard disappears underneath the pinecones.
Alternate coral $\rightarrow$ terracotta $\rightarrow$ cream $\rightarrow$ ochre $\rightarrow$ natural brown rather than placing all pinecones of the same color together. This creates the rich, mosaic-like appearance that makes the finished butterfly so attractive. You can also leave tiny gaps for the dried flowers you’ll add later.
🔥 Step 7: Glue the Pinecones to the Wings
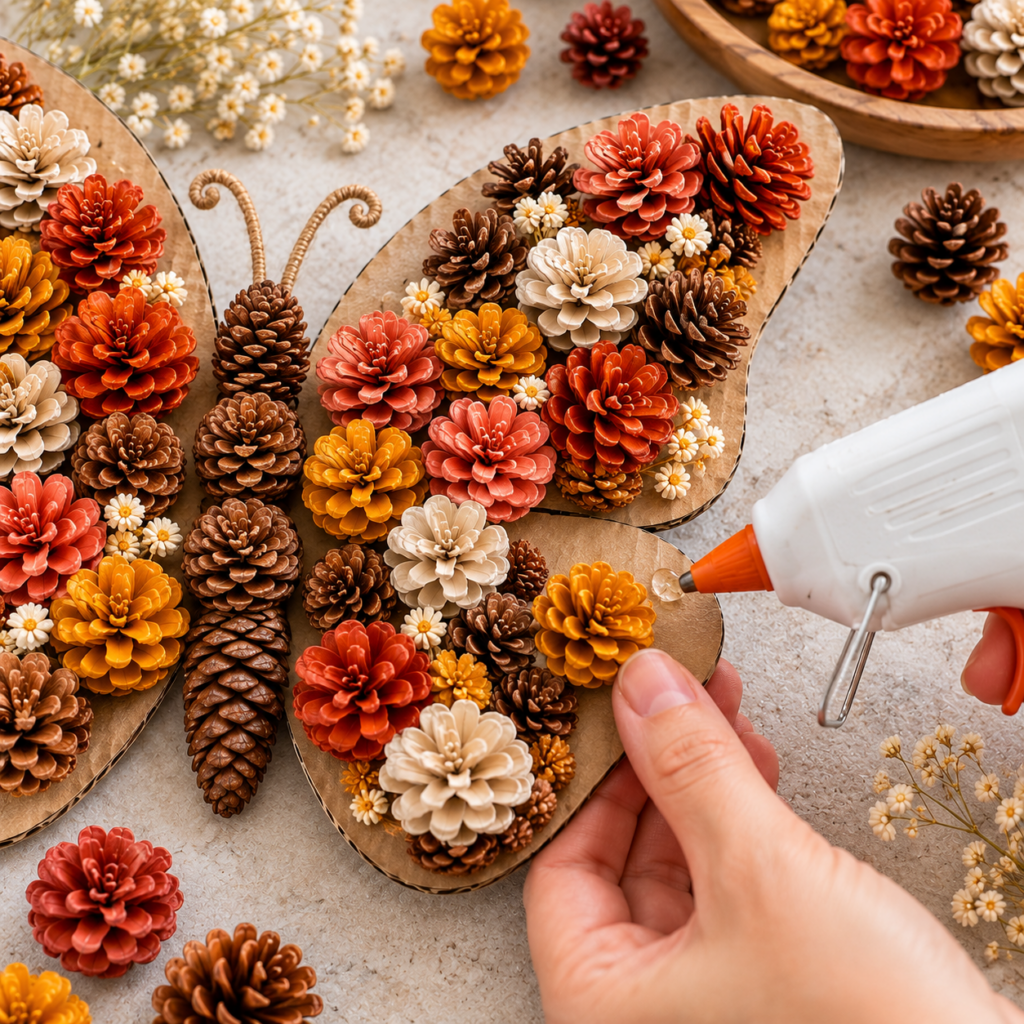
Once you’re happy with the arrangement, begin gluing. Rather than removing everything at once, work in small sections so you don’t forget your design.
- Lift one pinecone.
- Apply hot glue to the area where it will make secure contact with the cardboard.
- Press it firmly into position and allow the glue to set.
- Continue until both wings are covered.
⚠️ Important: Pinecones have uneven surfaces, so make sure each one has enough contact with the cardboard to remain secure. For a wall decoration, you don’t want pinecones falling off later.
🤎 Step 8: Make the Butterfly’s Body
The center should look different from the colorful wings. Arrange several natural brown pinecones vertically down the middle of the butterfly. This creates a recognizable body while also separating the two colorful wings. A longer pinecone can work particularly well toward the lower portion of the body. Glue everything securely in place.
🌿 Step 9: Add the Antennae
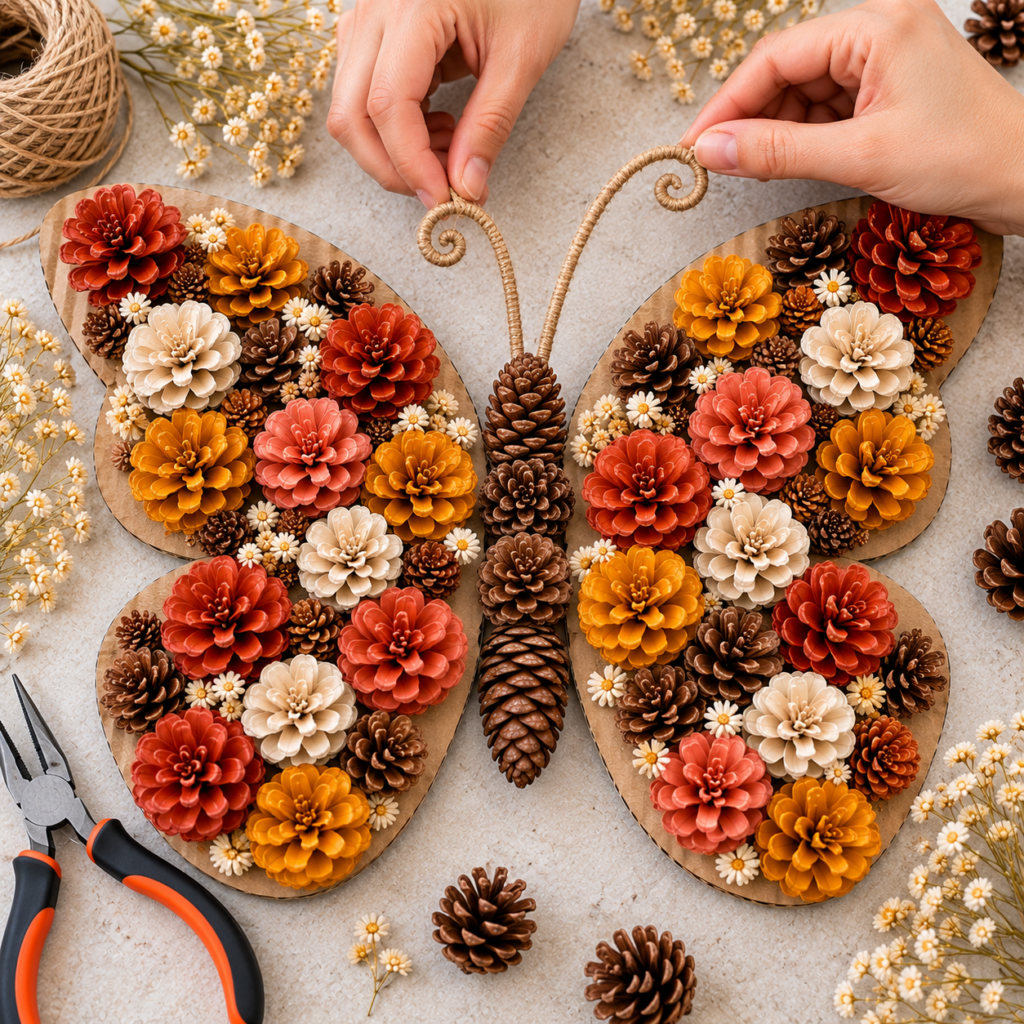
- Take your two pieces of flexible wire and shape each one into a gentle curve.
- For a more rustic appearance, you can wrap the wire with jute twine before attaching it.
- Create a small curl at the end of each antenna if you like.
- Secure both pieces behind the upper part of the butterfly’s body.
Now the butterfly shape should become instantly recognizable.
🌼 Step 10: Add Tiny Dried Flowers
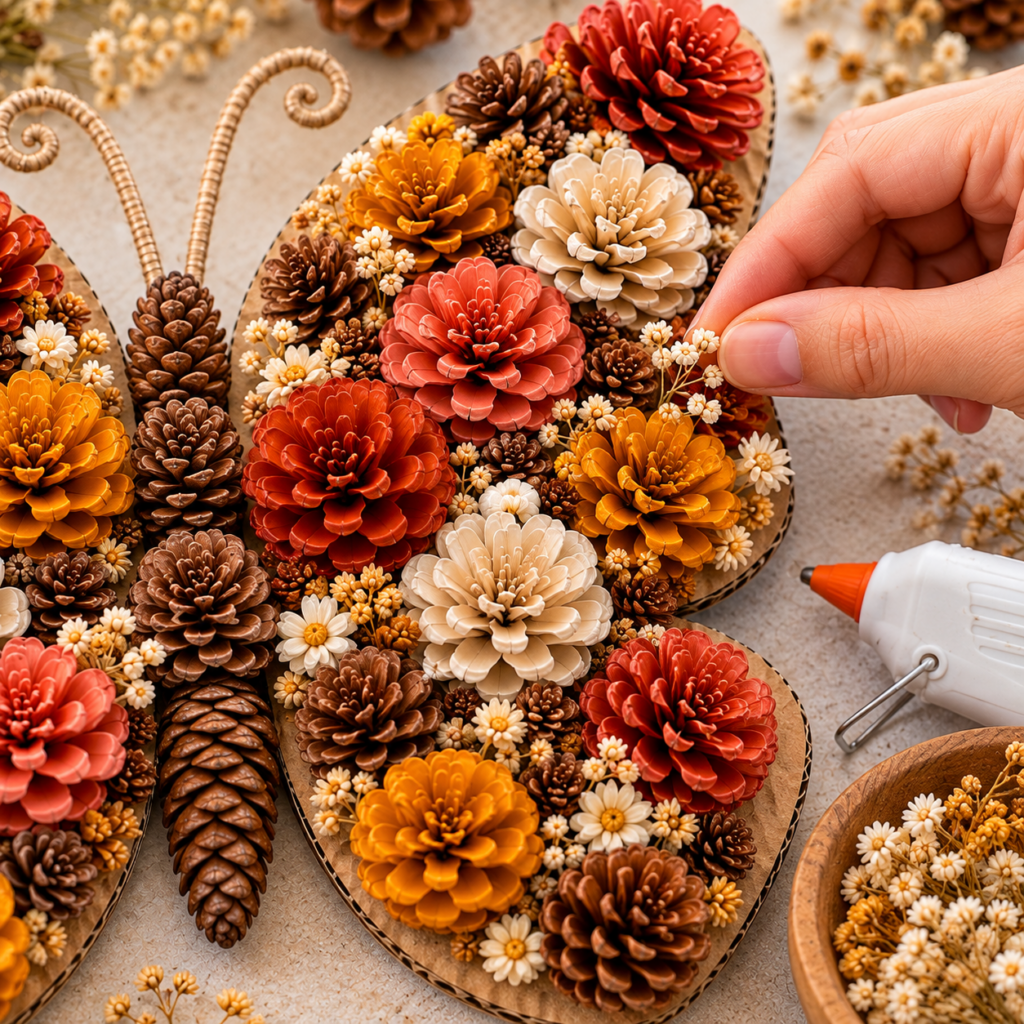
This step is optional, but it adds a lovely finishing touch. Tuck a few small dried flowers between selected pinecones. Don’t add too many—the pinecones should remain the star of the project. Small cream or white flowers work particularly well because they contrast beautifully with the darker autumn colors.
🧵 Step 11: Add the Hanging Loop
Turn the butterfly over carefully. Cut a piece of sturdy jute twine and form a loop, then attach it securely to the upper back of the cardboard.
Remember that dozens of pinecones can make the finished decoration heavier than it looks, so the hanging loop needs to be firmly attached. Before putting it on the wall, gently test the hanger while supporting the butterfly underneath.
🦋 The Finished Result
Once everything is secure, your ordinary collection of pinecones has become a large decorative butterfly filled with warm autumn color.
From a distance, the individual pinecones almost resemble clusters of flowers. Up close, you can still see all of their beautiful natural texture. That’s what makes this craft so interesting: it doesn’t try to hide the original material—it transforms it.
🎨 4 Beautiful Variations to Try
Once you understand the basic technique, you don’t have to copy the same color palette every time:
- 1. Soft Cottage Butterfly: Cream, dusty pink, muted peach, and natural brown with delicate dried flowers for a softer look.
- 2. Deep Autumn Butterfly: Rust, burgundy, burnt orange, mustard, and dark brown for traditional fall warmth.
- 3. Winter Butterfly: Cream, white, pale gold, and natural pinecones with a very light touch of white paint on the tips for a frosted appearance.
- 4. Completely Natural Butterfly: Skip the paint altogether, use pinecones in different natural shades, and add dried grasses, seed heads, or tiny flowers.
💡 What If You Don’t Have 45 Pinecones?
You can simply make a smaller butterfly. Another option is to use pinecones only around the edges and center of the wings while allowing some painted cardboard to remain visible. Think of around 45 small pinecones as a guide, not a strict requirement.
⚠️ Common Mistakes to Avoid
A few simple details can make a big difference:
- Don’t glue before arranging: Always test your entire design first.
- Don’t use damp pinecones: Let natural materials dry completely before crafting.
- Don’t make color placement too random: A little visual balance between the left and right wings makes the shape much clearer.
- Don’t use weak cardboard: Thin cardboard may bend under the weight of dozens of pinecones.
- Don’t forget the final weight: Use a strong hanging loop and an appropriate wall hook.
- Be careful with hot glue: Both the glue and the metal tip of a glue gun can cause burns.
♻️ Can You Use Other Natural Materials?
Absolutely. The same cardboard-base technique could be adapted using combinations of acorns, small seed pods, dried flowers, tiny twigs, dried leaves, nutshells, or dried grasses. You could even use the technique to create other shapes such as an owl, heart, wreath, flower, or autumn tree.
❓ Frequently Asked Questions
- Do I need to paint the pinecones?No. Painting creates the colorful floral effect, but natural pinecones can produce a beautiful rustic butterfly too.
- What paint works best?Acrylic craft paint is a practical option because it’s easy to apply and available in many colors.
- Can children make this craft?Children can help paint pinecones, arrange colors, and design the wings. An adult should supervise or handle craft-knife and hot-glue-gun steps.
- How many pinecones do I need?For a medium-sized decoration, around 40–45 small pinecones is a useful starting estimate. The actual number depends on the size of your butterfly and pinecones.
- Can I hang it outside?The project described here uses cardboard and ordinary craft materials, so treat it primarily as indoor decor. Moisture could damage the cardboard and other decorative elements.
- Can I make it without hot glue?A strong craft adhesive may work, but it will generally take longer to set. Because pinecones are irregular and relatively bulky, make sure whatever adhesive you choose is appropriate for both cardboard and natural materials.
✨ Final Thoughts
Sometimes the prettiest seasonal decorations start with materials that cost almost nothing. A handful of pinecones, a piece of cardboard, some warm-colored paint, and a little creativity are enough to create a beautiful fall butterfly that looks far more elaborate than the basic technique suggests.
The key is simple:
Collect and dry pinecones $\rightarrow$ cut a sturdy butterfly base $\rightarrow$ paint and choose a balanced autumn palette $\rightarrow$ arrange everything before gluing $\rightarrow$ add natural details like jute and dried flowers.
So the next time you spot a pile of pinecones on an autumn walk, you might want to collect a few. They could become your next piece of fall decor! 🦋🍂