
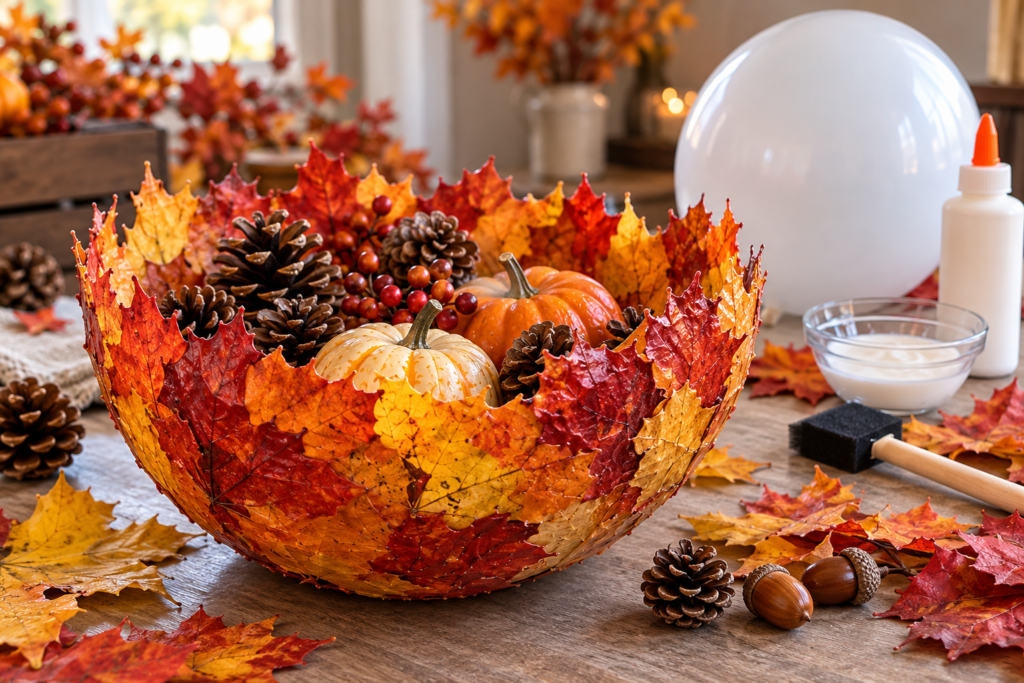
Autumn brings some of the most beautiful colors of the year. Red, orange, golden yellow, and burgundy leaves cover gardens and sidewalks—but instead of letting all of them disappear, you can turn a few flexible leaves into a charming piece of DIY fall decor.
This simple autumn leaf bowl uses a balloon as a temporary mold. The leaves are overlapped with craft glue, allowed to dry completely, and then separated from the balloon to create a lightweight decorative bowl.
It’s inexpensive, customizable, and especially pretty filled with pinecones, artificial mini pumpkins, acorns, or other lightweight autumn decorations.
The most important part? Choose flexible leaves, overlap them well, and don’t remove the balloon until the project is completely dry.
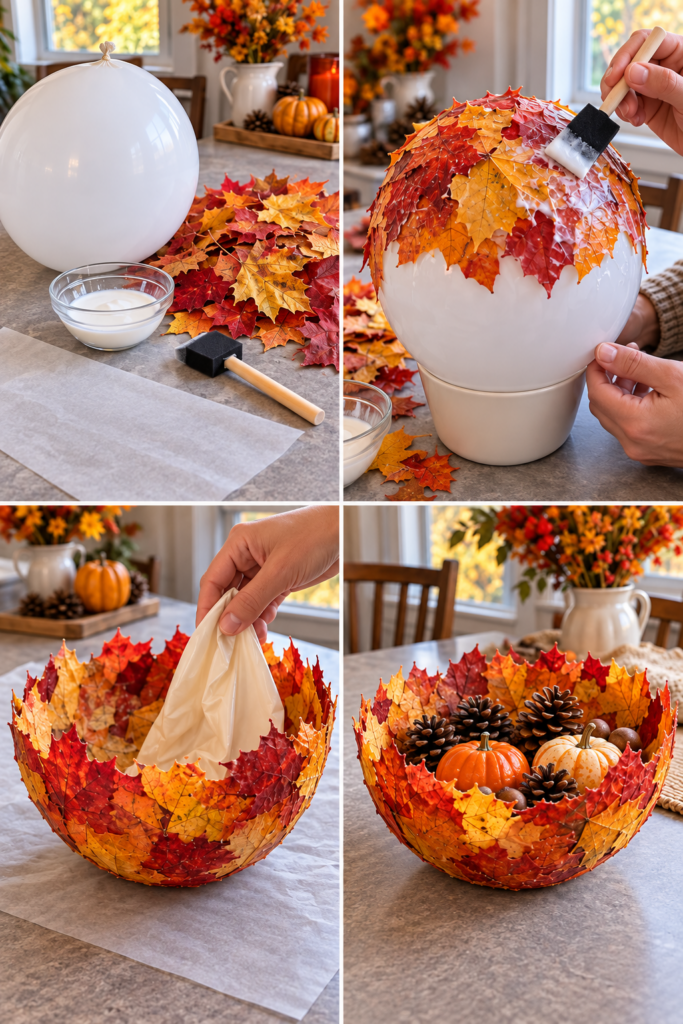
🍁 What You’ll Need
You only need a few basic craft supplies:
- 🍂 Flexible autumn leaves in different colors
- 🎈 1 balloon
- 🧴 White craft or decoupage glue suitable for the materials you’re using
- 🖌️ Foam brush
- 🥤 Small cup or bowl to support the balloon
- 📜 Parchment or wax paper to protect your table
- ✂️ Small scissors (optional)
That’s all you need.
Which autumn leaves work best?
- Look for leaves that are colorful but still reasonably soft and flexible.
- Leaves that have become extremely dry and crispy can crack when bent around the curved surface of the balloon.
- Relatively flat leaves are also easier to work with. If they have thick, stiff stems, carefully trim those away before starting.
💡 Tip: Collect more leaves than you think you’ll need. This gives you plenty of options when arranging the different colors and shapes.
🎈 Step 1: Prepare the Balloon
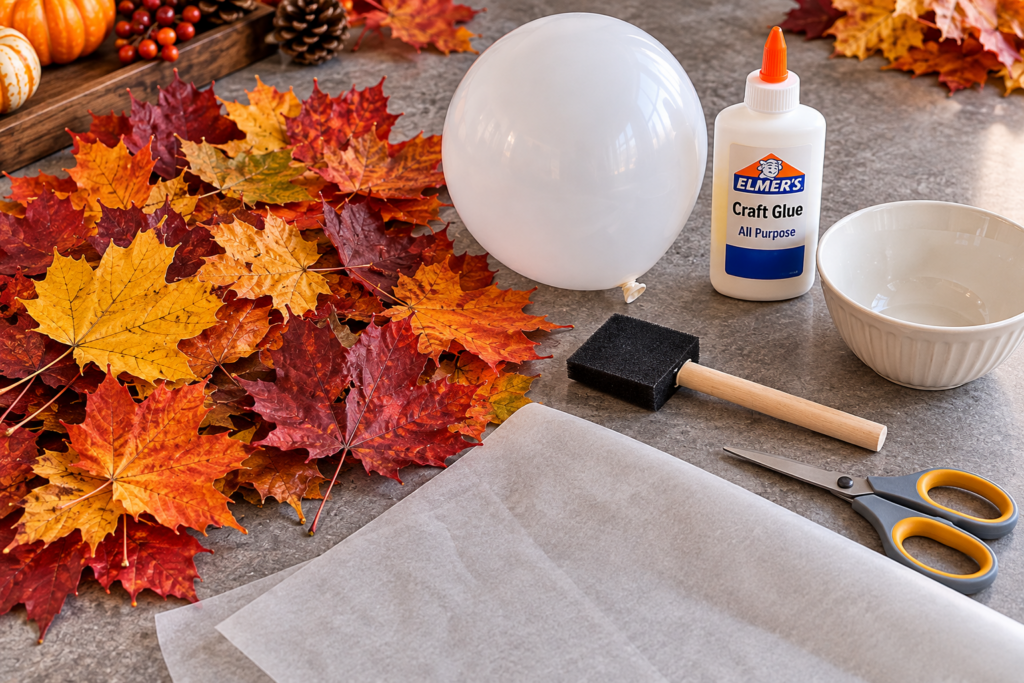
- Inflate a balloon to approximately the size you’d like your finished bowl to be. A medium-sized balloon works particularly well because it’s large enough to create a useful centerpiece without becoming difficult to handle.
- Place the balloon knot-side down inside a cup or small bowl. The container acts as a stand and prevents the balloon from rolling around while you’re working.
- Protect the table underneath with parchment or wax paper before bringing out the glue.
🍂 Step 2: Prepare and Arrange the Leaves
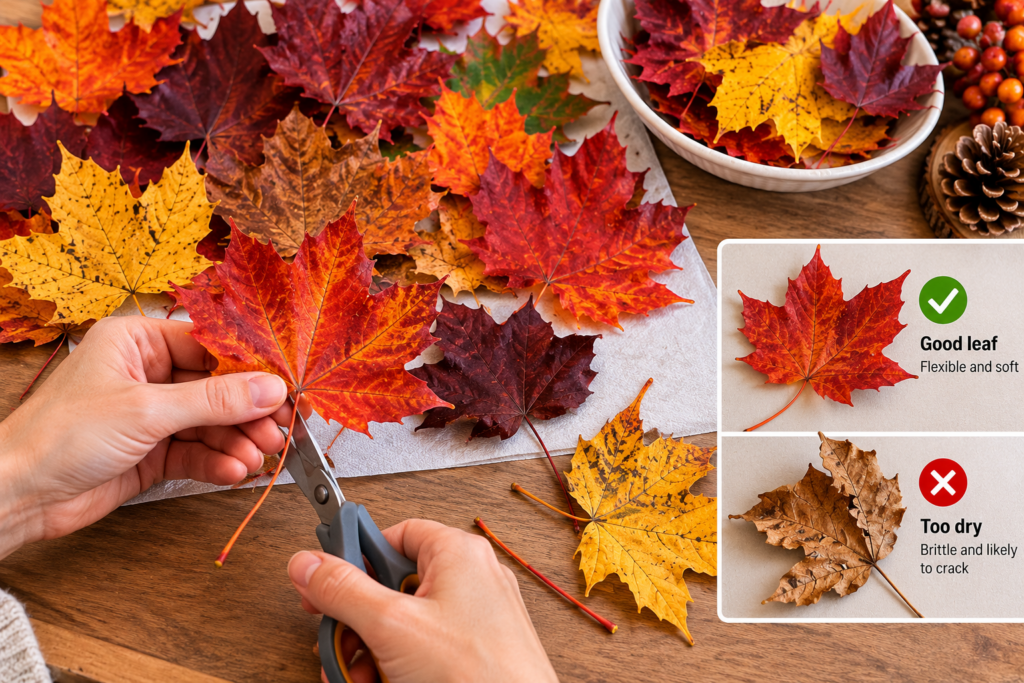
Before applying any glue, spread your leaves across the table. Combining several autumn shades creates a particularly attractive result:
- ❤️ Deep red
- 🧡 Orange
- 💛 Golden yellow
- 🤎 Brown
- 🍷 Burgundy
Gently flatten curled leaves with your fingers and remove particularly thick stems if necessary. You can also roughly plan where your favorite leaves will go before you begin. Don’t worry about achieving perfect symmetry. Natural differences in shape, veins, and color are what make this fall craft interesting.
🖌️ Step 3: Start Attaching the Leaves
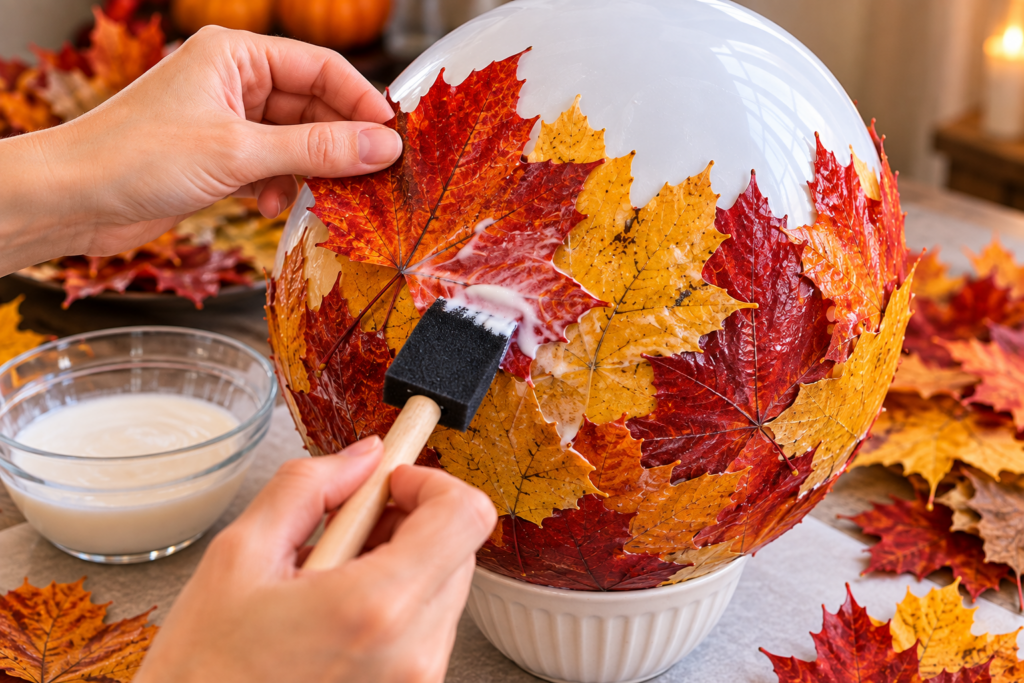
Use a foam brush to apply your craft glue according to the adhesive manufacturer’s directions.
- Begin near the top of the balloon. Remember that this area will eventually become the bottom of your finished bowl.
- Position the first leaf and gently smooth it against the curved surface.
- Add another leaf beside it, then another.
🍁 Overlap is the key: Avoid placing every leaf separately with gaps between them. Instead, allow the edges of neighboring leaves to overlap generously. The overlapping areas help connect the individual leaves into one structure.
Continue working outward from the center until you’ve covered approximately the portion of the balloon needed to create the bowl shape. If a leaf refuses to follow the curve of the balloon, don’t force it—replace it with a softer or smaller one.
🍁 Step 4: Reinforce Weak Areas
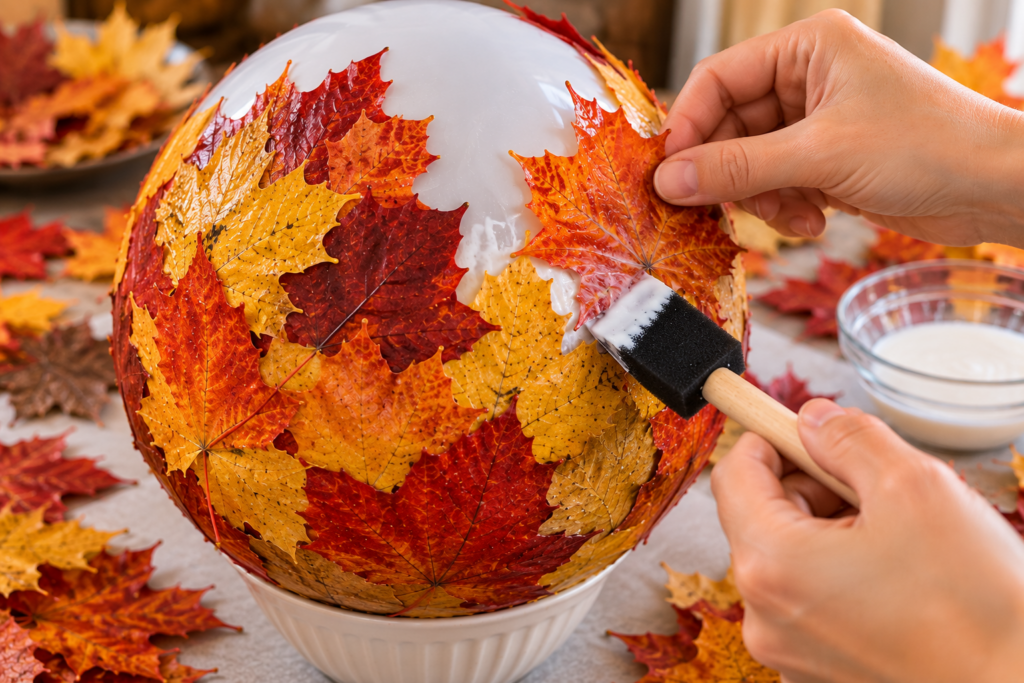
Once the basic shape is covered, inspect your work carefully. Look for:
- Visible gaps
- Very thin areas
- Poorly connected leaves
- Weak sections around the rim
- Areas that don’t feel well supported
Add more overlapping leaves where additional strength is needed. You don’t necessarily need to cover the entire project with the same number of complete layers. What matters most is creating good connections between neighboring leaves and reinforcing fragile areas. Avoid leaving unnecessarily thick pools of glue.
At this stage, the bowl may look cloudy or messy. Don’t judge the final appearance yet—the adhesive still needs to dry.
⏳ Step 5: Let Everything Dry Completely
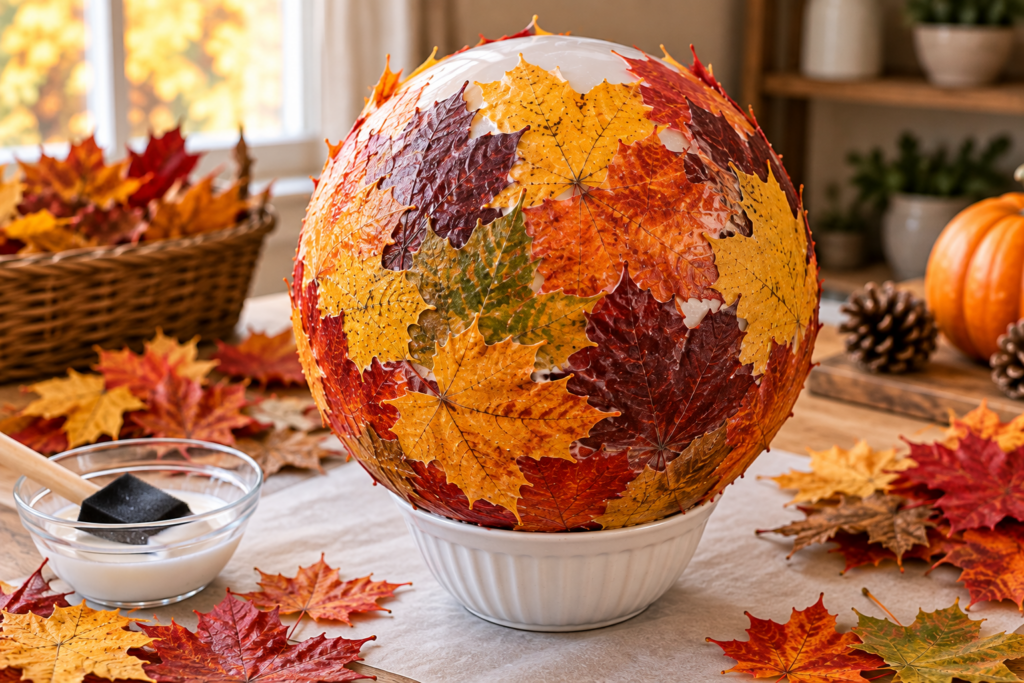
Now comes the easiest—and perhaps most important—part. Leave it alone.
The leaves and adhesive must become completely dry and firm before the balloon is removed. Exact drying time varies according to:
- The adhesive
- How much glue you used
- The thickness of the leaf structure
- Room temperature and humidity
Follow the drying guidance provided with your craft glue. If any section still feels soft because the adhesive hasn’t dried, wait longer.
⚠️ Don’t rush this step. Deflating the balloon while the structure is still damp can cause the bowl to bend, separate, or collapse.
🎈 Step 6: Deflate the Balloon Slowly
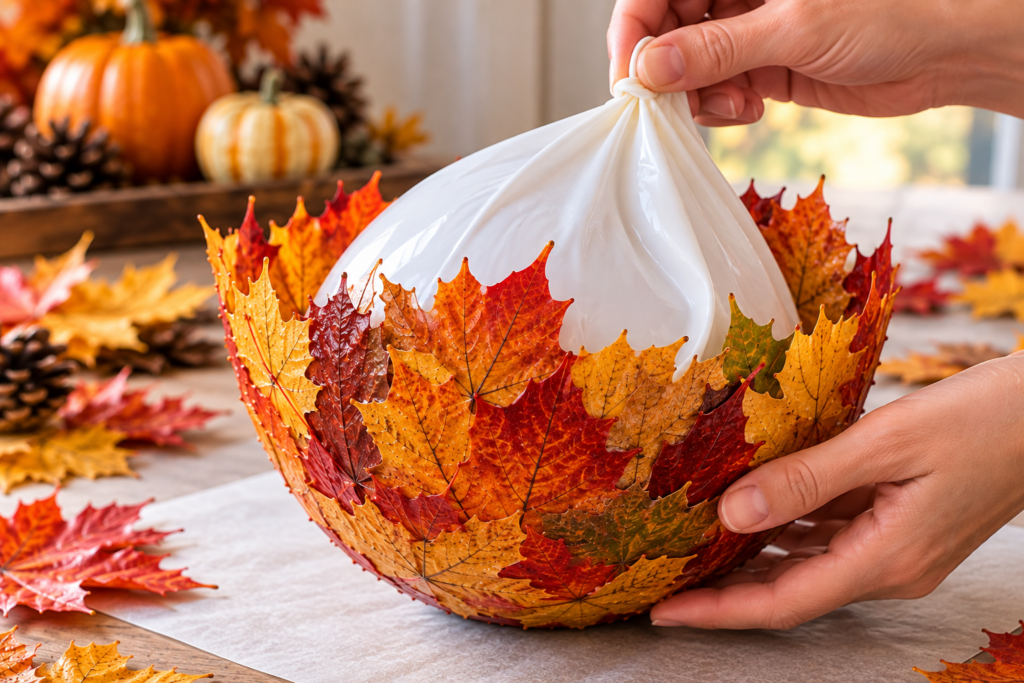
Once the leaf structure feels completely dry and stable, you can remove the mold.
- Rather than dramatically popping the balloon, release the air slowly.
- As the balloon gradually shrinks, watch how it separates from the dried leaves. Some sections may release immediately, while others may remain slightly attached.
- If this happens, gently loosen the balloon rather than pulling forcefully on the leaves.
- Continue until the balloon has been completely removed.
You should now have a freestanding bowl made from overlapping autumn leaves. 🍂
✂️ Step 7: Check and Finish the Rim
Take a close look at the finished bowl. The rim doesn’t need to be perfectly straight. In fact, allowing the natural leaf shapes to form the edge often makes the finished project more attractive.
If you notice a loose leaf or weak section, reinforce it with another suitable leaf and a small amount of craft glue, then allow the repaired area to dry completely again. Your DIY autumn leaf bowl is finished!
🎃 How to Decorate Your Autumn Leaf Bowl
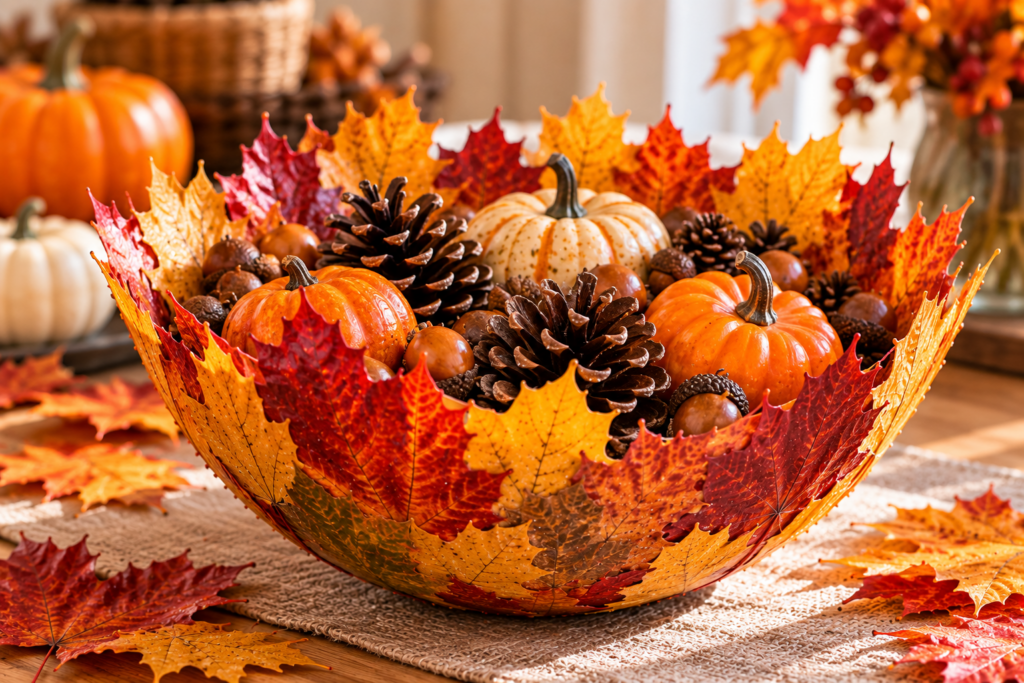
Now comes the fun part. Because the bowl itself already has plenty of autumn color, you don’t need much to turn it into a centerpiece. Try filling it with lightweight, dry seasonal decorations such as:
- 🌲 Small pinecones
- 🎃 Artificial mini pumpkins
- 🍂 Dried decorative leaves
- 🌰 Acorns
- Artificial berries
- Dried seed pods
- Lightweight fall ornaments
Place the finished arrangement on a dining table, coffee table, shelf, mantel, or entryway console. You could also leave the bowl empty and let the colorful leaves become the decoration themselves.
⚠️ Important: This Is a Decorative Bowl
The finished project may resemble a normal bowl, but it’s made from leaves and craft adhesive. Treat it as a decorative object rather than household tableware.
- Keep it away from 🔥 candles and open flames, ♨️ hot objects, and 💧 water/excessive humidity.
- Avoid heavy objects or unpackaged food unless specifically approved for food contact.
🍂 5 Reasons Your Autumn Leaf Bowl Might Collapse
The technique is simple, but a few small mistakes can make the finished structure fragile:
- Your leaves are too dry: Very brittle leaves don’t bend easily and may crack. (Fix: Choose flexible leaves that follow the curve.)
- The leaves don’t overlap enough: Individual leaves barely touch, causing separation. (Fix: Overlap neighboring leaves generously.)
- You remove the balloon too early: A surface that looks dry isn’t dry underneath. (Fix: Wait until the structure is completely firm.)
- Some areas are too thin: A few leaves create the shape visually but lack structural support. (Fix: Inspect and reinforce obvious gaps.)
- You pull the balloon out too quickly: Aggressive removal damages the bowl. (Fix: Deflate slowly and gently loosen attached sections.)
🌿 Can You Make a Leaf Bowl With Artificial Leaves?
You can experiment with artificial autumn leaves as well. They’re convenient because they’re available in consistent colors and won’t become brittle in the same way.
However, artificial leaves can be made from different fabrics, plastics, and coated materials, so not every craft adhesive will bond to them equally well. Test your chosen glue on one artificial leaf first. Natural leaves, on the other hand, provide unique veins, shapes, imperfections, and color variations that give each bowl its own character.
💡 Creative Variations to Try
Once you’ve made your first bowl, you can easily experiment with the design:
- 🍁 Red & burgundy bowl: Use mostly dark red and burgundy leaves for a dramatic fall centerpiece.
- 🍂 Golden autumn bowl: Combine yellow, orange, and light brown leaves for a warm traditional look.
- 🌿 Woodland bowl: Mix several natural shades and add pinecones to the finished display.
- 🎈 Mini leaf bowls: Experiment with smaller balloons to create little decorative pieces for shelves or table settings.
❓ Frequently Asked Questions
- Can I use completely dried leaves?You can try, but very dry leaves are more likely to crack when shaped around the balloon. Flexible leaves are generally easier.
- How many layers of leaves do I need?There’s no universal number. Focus on generous overlap, good connections, and reinforcement of thin areas rather than counting layers.
- How long should I let the bowl dry?Drying time depends on glue, humidity, temperature, and amount of adhesive. Follow your glue manufacturer’s directions.
- Why did my bowl lose its shape?The adhesive may not have been completely dry, or the leaves may not have overlapped sufficiently.
- Can I put fruit, snacks, or candles inside it?No. Reserve the bowl for dry, lightweight decorations only, and keep it away from open flames and heat sources.
✨ A Beautiful Way to Use Autumn Leaves
You don’t need expensive supplies to create charming seasonal decor. A handful of colorful leaves, a balloon, and suitable craft glue can become a completely different object with a little patience.
The process is simple:
Collect flexible leaves $\rightarrow$ prepare a balloon $\rightarrow$ overlap and glue the leaves $\rightarrow$ reinforce weak areas $\rightarrow$ let everything dry completely $\rightarrow$ slowly remove the balloon.
What remains is a colorful DIY autumn leaf bowl that can become a centerpiece for your fall decorating. Every combination of colors, leaf shapes, and patterns is different, so no two bowls will ever look quite the same! 🍂✨