
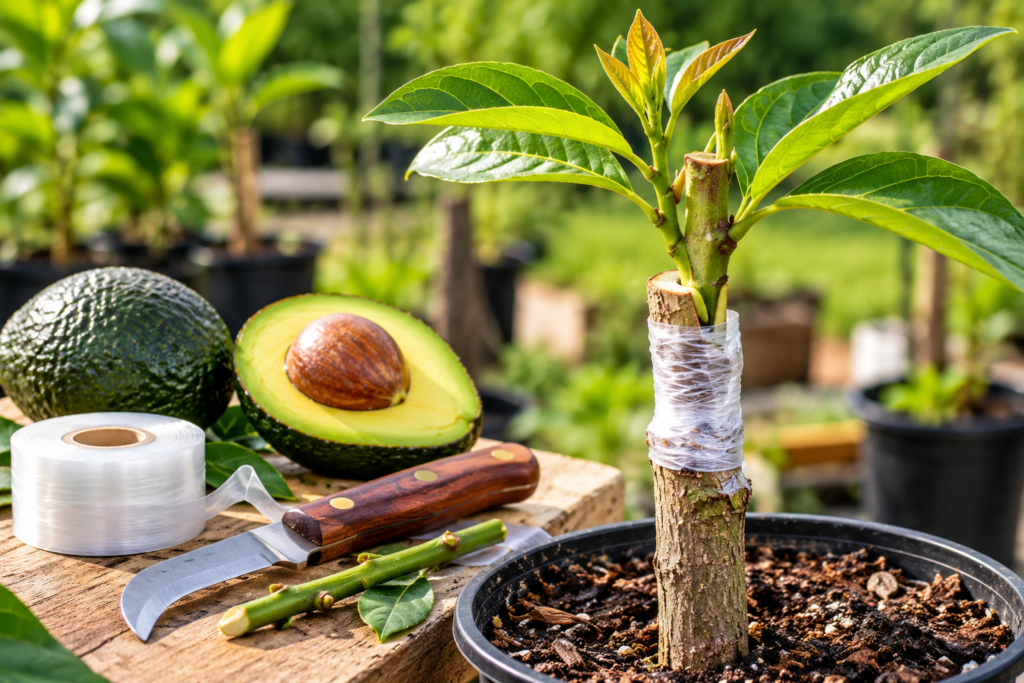
Growing an avocado tree from a seed can be rewarding, but there’s an important catch: the new tree usually won’t be genetically identical to the avocado that produced the seed. If you want to preserve the characteristics of a known avocado cultivar, grafting is one of the standard propagation methods used by growers.
Grafting joins two plants so they can grow as one. The rootstock provides the root system and lower portion of the plant, while a piece of the desired avocado variety—the scion—develops into the upper part of the tree.
In this beginner-friendly guide, we’ll focus primarily on a cleft or wedge graft, a straightforward technique that makes it easier to understand one of the most important principles of grafting: correctly matching the living tissues of the rootstock and scion.
Important: Grafting does not guarantee fruit within a few months. Success and eventual fruiting depend on the cultivar, rootstock, climate, growing conditions, tree health and aftercare.
🌱 Why Graft an Avocado Tree?
An avocado grown from seed is genetically different from its parent. In other words, planting the pit from a delicious avocado doesn’t guarantee that the resulting tree will eventually produce the same type or quality of fruit.
Grafting offers a different approach.
It is a form of asexual propagation that allows growers to preserve the identity and desirable characteristics of a selected avocado cultivar. The desired scion is combined with an established root system provided by the rootstock.
Another advantage is maturity. The scion comes from mature plant material rather than starting the fruiting portion of the tree from a juvenile seedling.
However, this should never be interpreted as a promise that a newly grafted avocado will produce fruit within a few months. The tree still needs time to establish itself and become large and healthy enough to support a crop.
✂️ What You’ll Need
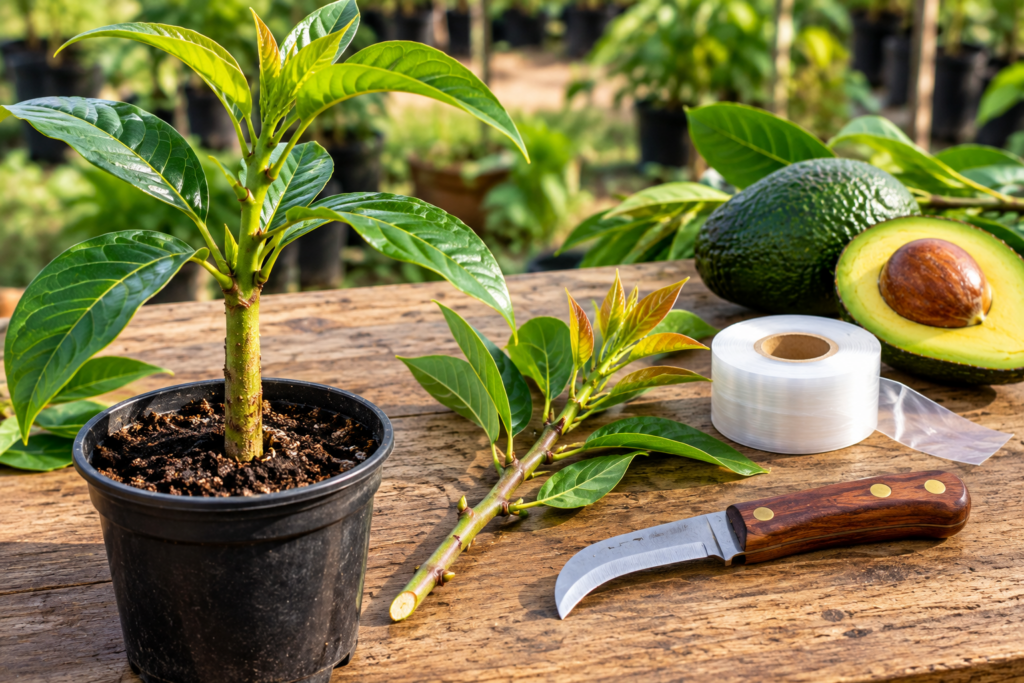
Before you begin, prepare:
- A healthy avocado rootstock
- A healthy scion from the cultivar you want to propagate
- A sharp grafting knife
- Grafting tape or another suitable stretchy wrapping material
- Suitable protective wrapping if needed
Clean, sharp tools are important. Smooth cuts help the two pieces fit together correctly, while freshly exposed plant tissue should not be allowed to dry unnecessarily.
⚠️ A Quick Safety Note
Grafting knives are extremely sharp.
Always make controlled cuts away from your hands and body. Don’t hold the stem in a position where a slipping blade could strike your fingers.
🥑 How to Graft an Avocado Tree Step by Step
1. Choose a Healthy Rootstock
- Start with a vigorous, healthy avocado seedling.
- The rootstock will provide the roots and lower portion of your grafted tree, so avoid plants that are obviously weak, badly damaged or under severe stress.
- For a small cleft graft, having a rootstock and scion of approximately similar diameter makes alignment considerably easier.
- A vigorous plant also has a better chance of supporting the healing process after grafting.
2. Select a Healthy Scion
- The scion is the piece that will eventually form the upper portion of your grafted avocado tree.
- Choose healthy plant material from the avocado cultivar you want to reproduce.
- Ideally, the scion should have healthy buds approaching growth but not yet fully opened. The guidance summarized in the source describes scions roughly pencil-width and approximately 3–4 inches long for the cleft/veneer approach discussed.
- Once collected, protect the scion from unnecessary drying while preparing the graft.
3. Prepare the Rootstock
- For a cleft graft, cut the top of the rootstock cleanly using a sharp tool.
- Next, make a straight vertical split down the center of the cut stem.
- The opening only needs to be deep enough to accommodate the wedge you will create at the base of the scion.
- The propagation guidance cited in the source describes a central cut of approximately ½ inch deep for its general cleft-grafting method, although dimensions can vary depending on the size of the plant material.
- Avoid unnecessarily crushing or damaging the stem while making the split.
4. Shape the Scion Into a Wedge
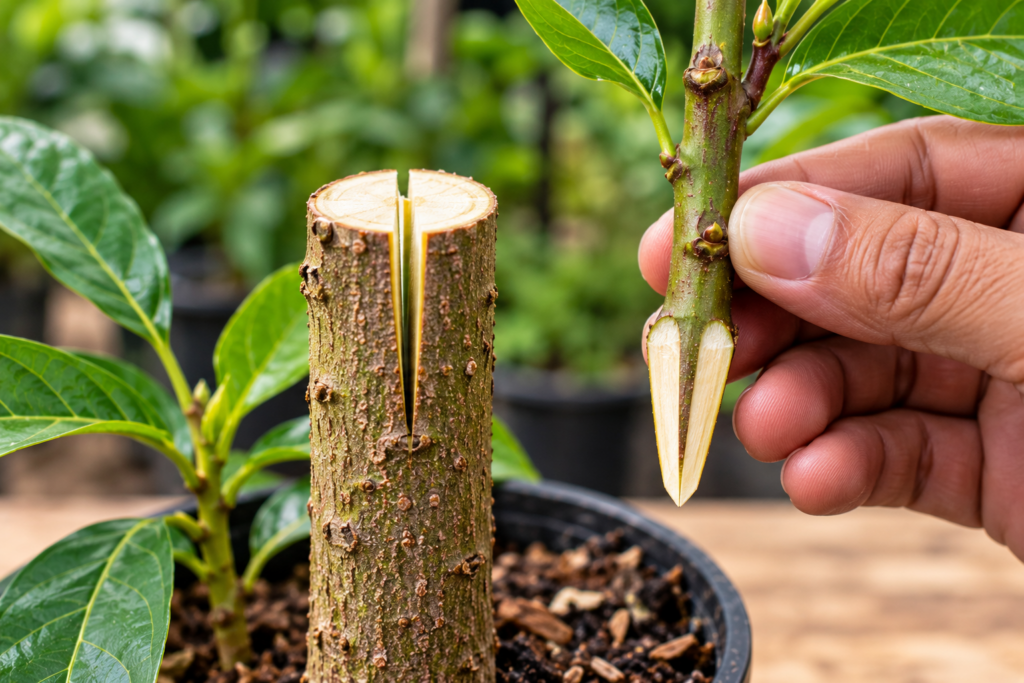
- Now prepare the bottom of the scion.
- Using your sharp grafting knife, make smooth cuts on opposite sides to create a narrow wedge.
- For the small-cleft method discussed in the source, opposite flat tapered cuts of approximately 1–2 inches are described.
- Try to create: Smooth surfaces → clean edges → good contact.
- Rough, ragged cuts make it harder to obtain the close tissue contact needed for a successful graft.
🌿 5. Insert the Scion and Align the Cambium
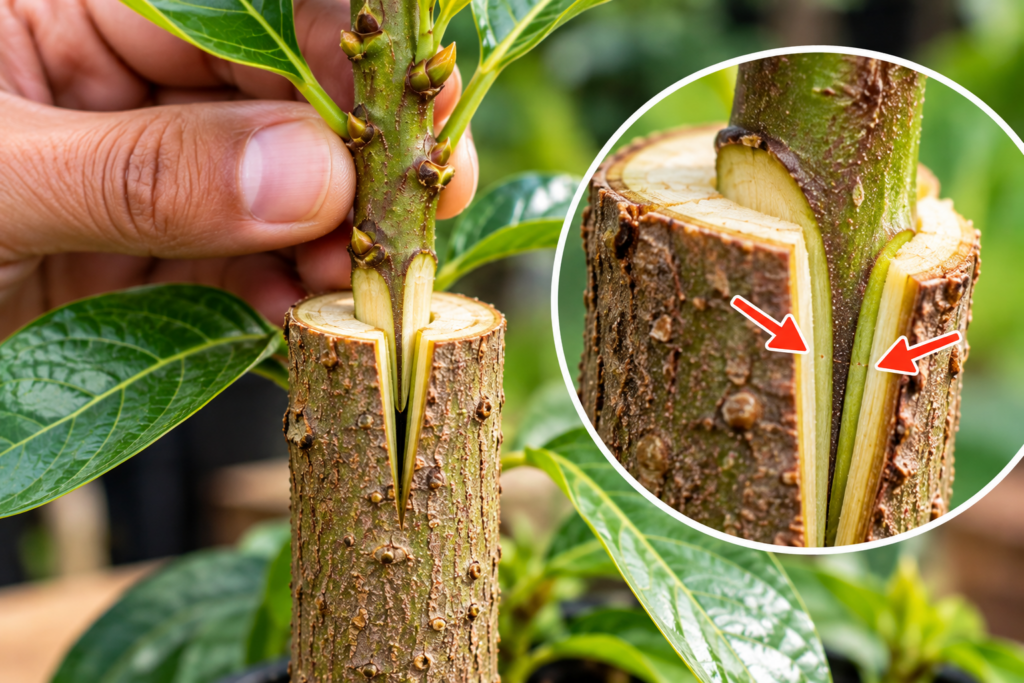
This is arguably the most important part of the entire process.
Carefully insert the wedge-shaped scion into the split in the rootstock.
Just beneath the bark is a thin layer of actively growing tissue called the cambium.
For the graft to unite successfully, the cambium of the scion needs to contact the cambium of the rootstock.
What if the Scion Is Smaller Than the Rootstock?
Don’t automatically place the smaller scion directly in the center.
If the diameters are different, concentrate on getting good cambium contact along at least one side. The source notes that unequal sizes can still be grafted when the cambium is appropriately aligned.
This small detail can make a major difference.
🌿 Why Cambium Alignment Matters
The graft doesn’t succeed simply because two pieces of wood are touching.
The cambium is living tissue involved in new growth. During successful grafting, healing tissue develops where compatible cambium layers meet, eventually creating a functional connection between the rootstock and scion.
Poor cambium contact is therefore one of the easiest ways for a graft to fail.
6. Secure the Graft
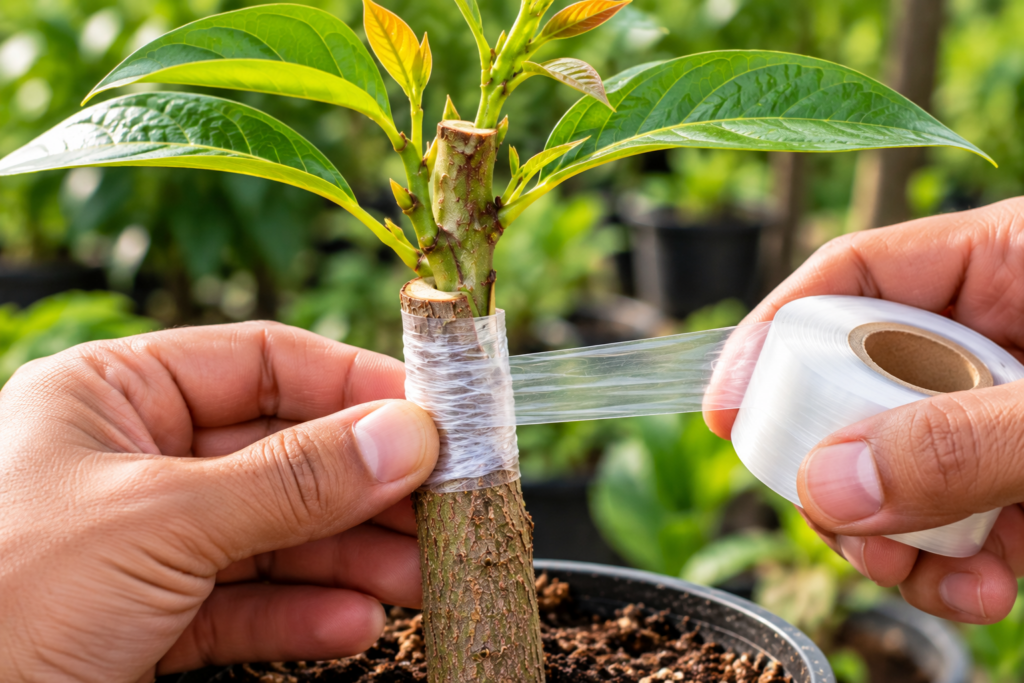
- Once the scion is positioned correctly, it needs to remain stable.
- Wrap the graft union firmly with grafting tape or another suitable grafting material.
- The wrapping serves two important purposes: Hold the pieces together + reduce moisture loss.
- The scion shouldn’t move around while the union is trying to heal. At the same time, avoid careless over-tightening.
- The goal is a firm, stable and protected graft union.
7. Protect the New Graft
- A freshly grafted avocado is vulnerable to drying and excessive sunlight.
- During the initial healing period, keep the plant in a protected environment. The propagation guidance referenced in the source recommends a shady, humid and protected area while the graft establishes.
- Some grafting approaches also use plastic, parafilm or another protective covering to help limit moisture loss.
- But there’s an important caution:
☀️ Plastic + Strong Direct Sun Can Be a Bad Combination
Don’t assume that a graft enclosed in plastic should sit in intense sunlight.
A cover can trap heat, so the plant should remain appropriately protected while the graft is vulnerable.
8. Watch for New Growth
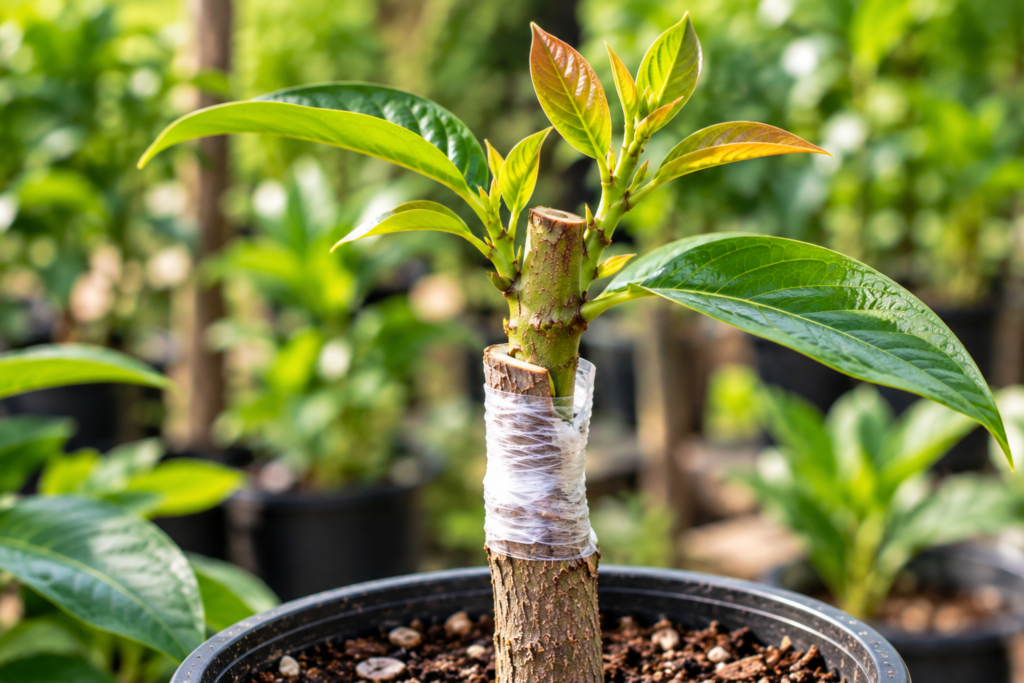
- Now comes the patient part.
- A successful graft should eventually begin producing growth from the scion.
- The source cites approximately 4–7 weeks for completion of the graft union under the cleft and veneer propagation conditions it discusses.
- However, don’t turn this into an exact countdown.
- Temperature, plant health, grafting technique and growing conditions can all influence the process.
- That’s why advice such as ❌ “Remove everything after exactly 3–4 weeks” is too rigid.
- Instead, inspect the graft and look for signs that a strong union has actually formed.
9. Remove the Wrapping at the Appropriate Time
- Once the graft has formed a strong union, grafting tape that isn’t intended to break down or safely stretch away should be removed at the appropriate time.
- Don’t simply wrap the graft and forget about it.
- As the stem grows and thickens, material that remains tightly wrapped around it can eventually become restrictive.
- Continue checking the graft as the plant develops.
10. Remove Competing Rootstock Shoots
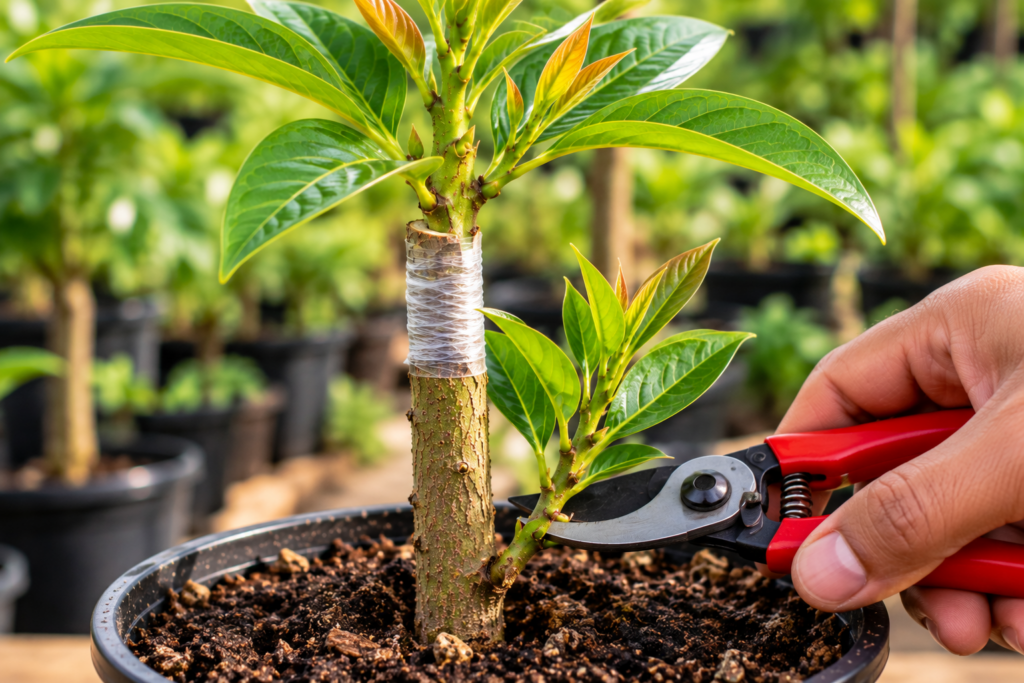
- After a successful graft, inspect the plant below the graft union.
- New shoots may emerge from the rootstock.
- Remove unwanted competing growth so that the selected scion remains the primary shoot. The avocado grafting guidance referenced in the article similarly recommends removing rootstock growth once the scion begins growing.
- If the scion grows rapidly and becomes tall or fragile, it may also benefit from temporary support.
☀️ Avocado Graft Aftercare
Getting the graft to take is only the beginning.
After healing under protected conditions, don’t immediately move the plant from shade into harsh full sunlight.
Instead, gradually acclimate it to stronger light.
The propagation guidance summarized in the source recommends progressively moving propagated plants from heavier shade toward stronger light rather than exposing them abruptly.
During establishment:
- Maintain appropriate soil moisture
- Avoid keeping the root zone waterlogged
- Protect the graft from physical damage
- Watch for pests and disease
- Remove competing rootstock shoots
- Gradually acclimate the plant to its permanent conditions
Think steady growth, not rapid forcing.
⏳ How Long Does an Avocado Graft Take to Heal?
One of the most important distinctions is: Healing ≠ Fruiting.
The propagation guidance referenced in the article gives approximately 4–7 weeks for completion of the graft union under the conditions described for its cleft/veneer approach.
New growth from the scion is encouraging, but it doesn’t mean you should immediately remove every form of support.
Wait until the union is sufficiently strong.
Actual healing time can vary depending on temperature, grafting technique, rootstock vigor, scion condition, humidity, and overall growing environment.
🥑 Will a Grafted Avocado Produce Fruit in 6–12 Months?
This is one of the biggest problems with some viral avocado-grafting graphics.
❌ Don’t promise fruit in 6–12 months.
The source article correctly warns that a newly grafted avocado cannot be guaranteed to flower and produce quality fruit within that timeframe.
Grafting uses mature cultivar material and can avoid starting the fruiting portion of the plant from a juvenile seedling, but that doesn’t create a universal fruiting deadline.
The tree still needs enough growth, energy and suitable environmental conditions to carry fruit.
A much more accurate statement is:
✅ A successful graft can preserve a known avocado cultivar, but the time to fruit varies with cultivar, rootstock, climate, tree size and growing conditions.
That’s less dramatic than promising avocados within a few months—but it’s much more useful to gardeners.
🚫 7 Common Avocado Grafting Mistakes
Even a carefully prepared graft can fail. These are seven mistakes worth watching for:
- Poor cambium alignment
- Using dull or dirty cutting tools
- Allowing freshly cut surfaces to dry
- Using weak or unhealthy plant material
- Letting the graft move before it has healed
- Exposing the new graft to excessive sun too quickly
- Allowing rootstock shoots to compete with the scion
Proper cambium contact and clean, even cuts are especially important.
And there’s another important lesson: Don’t expect every graft to succeed.
Grafting is a practical skill. Even when you follow the procedure carefully, not every graft union will take.
🌳 Cleft Graft vs. Other Avocado Grafting Methods
The wedge or cleft technique described above is not the only way to graft an avocado.
The source notes that cleft and veneer grafting are used for avocado propagation and also references whip grafting for relatively small-diameter avocado rootstocks.
The best technique can depend on rootstock diameter, scion size, growing environment, available material, and the propagator’s experience.
For beginners, however, the basic cleft/wedge concept is particularly easy to understand visually:
Cut → Shape → Align Cambium → Secure → Protect → Monitor
💡 Quick Tips for Better Grafting Success
Keep these principles in mind throughout the process:
- 🌱 Start healthy: Use vigorous rootstock and healthy scion material.
- 🔪 Keep cuts clean: Sharp tools create smoother surfaces.
- 💧 Don’t let the scion dry out: Work efficiently after exposing fresh tissue.
- 🌿 Align the cambium carefully: This is one of the most important parts of the graft.
- 🩹 Keep the union stable: Movement can interfere with healing.
- ☀️ Protect the fresh graft: Avoid immediately exposing it to harsh sunlight.
- 👀 Keep checking it: Monitor the wrapping, new growth and shoots developing below the graft.
❓ Frequently Asked Questions
- Can you graft an avocado tree?Yes. Grafting is an established method of avocado propagation and is used to combine a desired cultivar with a suitable rootstock.
- Can I graft onto an avocado tree grown from a seed?Yes. An avocado seedling can serve as rootstock. Seed propagation is commonly used to produce rootstocks that can later be grafted.
- Does the scion need to come from a known avocado variety?If your goal is to reproduce a particular cultivar, choose healthy scion wood from that known cultivar rather than assuming that a random seedling will reproduce the fruit characteristics of its parent.
- What’s the most important part of grafting?Cambium contact. The cambium of the scion and rootstock needs to make appropriate contact for a successful union to form.
- How long does an avocado graft take to heal?The propagation protocol discussed in the source gives approximately 4–7 weeks for completion of the graft union, although actual timing varies with conditions.
- Should I cover an avocado graft with plastic?Some grafting methods use plastic, parafilm or similar material to reduce moisture loss. If you use a cover, avoid excessive heat and adjust or remove the protection appropriately as the graft establishes.
- When should I remove the grafting tape?Remove non-degrading tape when the graft has developed a sufficiently strong union rather than automatically removing it on one exact date.
- Can I leave shoots growing below the graft?Unwanted shoots emerging from the rootstock can compete with the selected scion, so they should generally be removed as the graft establishes.
- When will my grafted avocado produce fruit?There is no universal timetable. Grafting can preserve a mature cultivar and avoids starting the fruiting portion of the tree from a juvenile seedling, but eventual fruiting depends on the cultivar, rootstock, climate, tree size, growing conditions and care.
- Does grafting guarantee success?No. Even when the technique is performed carefully, not every graft will establish successfully. Good plant material, clean cuts, proper cambium contact and careful aftercare improve the conditions for success, but they don’t guarantee it.
🌿 Final Thoughts
Grafting an avocado tree may look complicated at first, but the basic principle is surprisingly straightforward:
Choose healthy plants → Make clean cuts → Align the cambium → Secure the graft → Protect it → Monitor its growth.
A graft may begin showing encouraging signs within weeks, while developing a strong tree capable of carrying fruit takes considerably longer.
If you’re trying avocado grafting for the first time, focus on creating a healthy, well-aligned graft union rather than chasing promises of fruit within a few months.
Once that union succeeds, you’ve completed the most important step toward turning your rootstock and chosen avocado cultivar into one growing tree.