
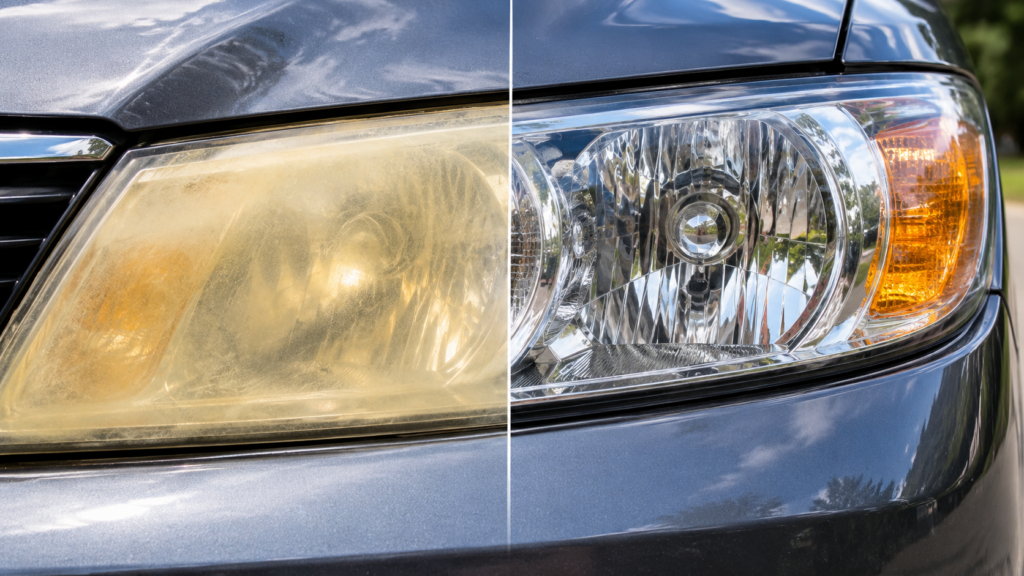
Cloudy, yellow or hazy headlights can make even a well-maintained car look much older. More importantly, badly deteriorated lenses can reduce the amount of useful light reaching the road.
The internet is full of surprising DIY remedies involving baking soda, vinegar, toothpaste and even lemon. Some of these methods may help clean the surface or temporarily improve very light haze, but they shouldn’t be confused with a true headlight restoration.
There’s also another possibility that’s often overlooked: sometimes the haze isn’t on the outside at all. Condensation or moisture can develop inside the headlight assembly, and that requires a completely different approach.
So, what actually works?
Let’s separate useful DIY tricks from the myths and look at the right solution for dirt, exterior oxidation and internal condensation.
☀️ Why Do Plastic Headlights Turn Yellow and Cloudy?
Most modern headlight lenses are made from durable plastic, commonly polycarbonate.
The lens starts life with protection against environmental exposure, but years of sunlight, weather, road contamination and normal wear can gradually degrade the exterior surface and its protective coating.
Eventually, you may notice:
- Yellow discoloration
- A milky or cloudy appearance
- Dullness
- Fine surface scratches
- Reduced clarity
When genuine exterior oxidation has developed, professional restoration systems don’t simply clean the lens. They use controlled abrasion and polishing to remove the deteriorated surface and restore clarity.
Before doing anything abrasive, however, always start with the gentlest option.
🧼 Method 1: Start With Soap and Water
Sometimes a headlight looks worse than it really is because its surface is covered with road film, dust, oily residue, insects and grime.
Before reaching for an abrasive product, give the headlights a proper wash.
What You’ll Need
- Warm water
- Mild soap suitable for automotive surfaces
- A clean microfiber cloth or wash mitt
- A second microfiber towel for drying
How to Do It
- Wash the lens thoroughly to loosen and remove surface dirt.
- Rinse well with clean water and dry it using a clean microfiber towel.
- Now inspect the headlight again.
If much of the dull appearance has disappeared, you may have been dealing primarily with surface contamination rather than severe oxidation.
Cleaning with soap and water is also an important first step before performing a more substantial restoration.
Important: Don’t assume every household cleaner is safe simply because it works well elsewhere. Polycarbonate and its coatings can be damaged by incompatible chemicals and solvents.
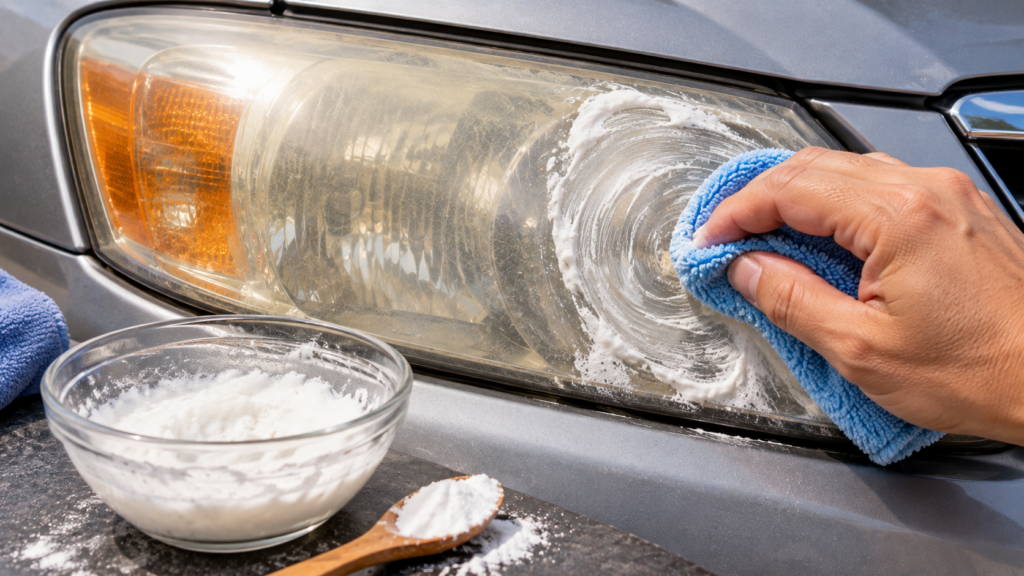
🥄 Method 2: Can Baking Soda Help Cloudy Headlights?
Baking soda is one of the most popular DIY headlight-cleaning tricks online. But is it really a miracle headlight restorer? Not quite.
Because baking soda particles can provide mild abrasive action, a carefully used paste may help remove some surface contamination or make very light surface dullness look somewhat better.
However, it shouldn’t be expected to restore a seriously oxidized lens or replace a proper headlight-restoration process.
A Cautious Way to Try It
- Mix a small amount of baking soda with enough water to create a soft paste.
- Apply it gently to a small, inconspicuous area of the lens using a damp microfiber cloth. Avoid aggressive scrubbing.
- Rinse the area thoroughly with clean water, dry it and inspect the result.
If you don’t see meaningful improvement, don’t simply scrub harder. The cloudiness may be caused by deterioration of the lens surface rather than removable dirt.
🧪 What About Baking Soda + Vinegar?
This popular combination looks impressive because it immediately starts fizzing. But those bubbles aren’t evidence that headlight oxidation is disappearing.
Vinegar is acidic while baking soda is alkaline. When they’re mixed, they undergo an acid-base reaction. For this particular job, there’s little reason to make vinegar part of a baking-soda paste.
If you want to cautiously test baking soda as a mild cleaning abrasive, water is the simpler choice.
Remember: This is a cleaning experiment for very light surface haze, not a substitute for proper restoration.
🦷 Method 3: Does Toothpaste Really Work on Headlights?
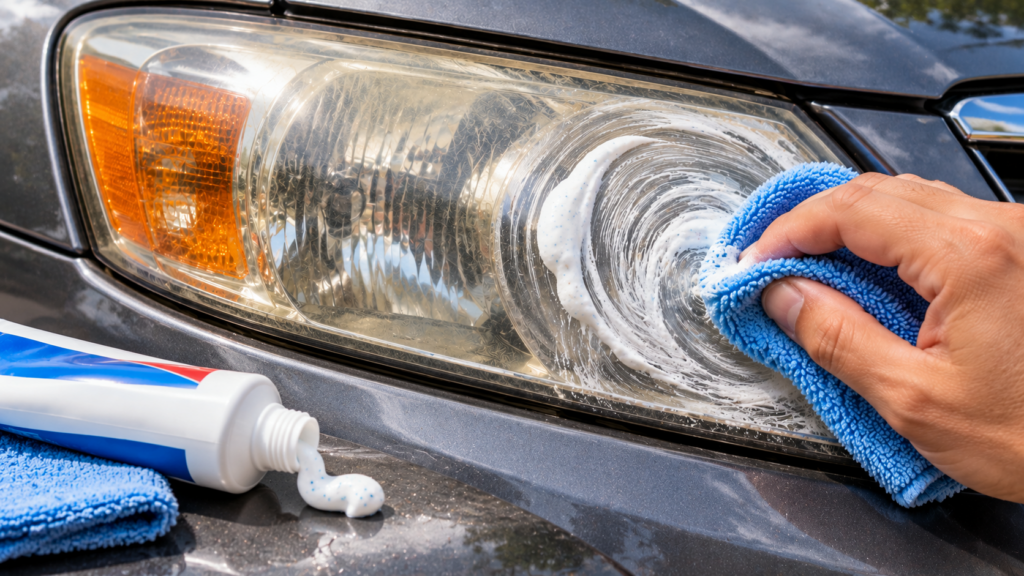
Toothpaste is another famous internet remedy for cloudy headlights. Unlike some completely random household hacks, there’s at least a logical reason why it can sometimes appear to work.
Certain toothpastes contain mild abrasive ingredients designed to polish teeth. As a result, an abrasive toothpaste may make a lightly hazy headlight appear somewhat clearer after gentle polishing.
However, there are important limitations:
- Toothpaste formulations vary considerably.
- It won’t reliably remove serious oxidation.
- It doesn’t restore deteriorated UV protection.
If you decide to experiment, test a small area first. Work gently with a microfiber cloth and rinse all toothpaste residue completely away afterward.
Think of toothpaste as a temporary DIY experiment for very light surface haze, not a complete headlight-restoration system.
🍋 What About Vinegar or Lemon Juice?
White vinegar and lemon juice appear in countless natural cleaning hacks. They’re useful household ingredients for certain cleaning jobs, particularly when compatible acids are needed to tackle some mineral deposits.
But a yellow headlight isn’t the same thing as a mineral-covered faucet. Exterior headlight yellowing is commonly associated with deterioration of the lens surface and its protective coating.
That’s why established headlight-restoration processes rely on controlled abrasion, polishing and protection rather than simply soaking the lens in vinegar or lemon juice.
The Better Approach
- For ordinary surface dirt: Start with compatible soap and water.
- For very light surface haze: A cautious mild cleaning test may improve the appearance.
- For genuine yellowing and oxidation: Move to proper headlight restoration.
I wouldn’t make vinegar or lemon juice the centerpiece of a headlight-restoration method.
✨ Method 4: The Reliable Fix for Heavily Oxidized Headlights
If washing makes almost no difference and the lens itself remains yellow, rough or cloudy, you’re probably beyond the simple household-cleaning stage.
A proper restoration generally follows this basic process: Clean → Protect surrounding paint → Remove the deteriorated surface → Refine/Polish → Protect the restored lens
This is where genuine restoration differs dramatically from viral baking-soda or vinegar hacks.
Step 1: Clean the Headlights
Wash the headlight thoroughly before beginning. Remove dirt, insects, road film and other contamination and allow the lens to dry. Starting with a clean surface reduces the chance of dragging dirt across the plastic during subsequent work.
Step 2: Protect the Surrounding Paint
Apply automotive masking tape around the perimeter of the headlight. This is particularly important when sanding or other abrasives will be used. Take your time around corners and edges so that surrounding painted surfaces remain protected.
Step 3: Remove the Oxidized Surface
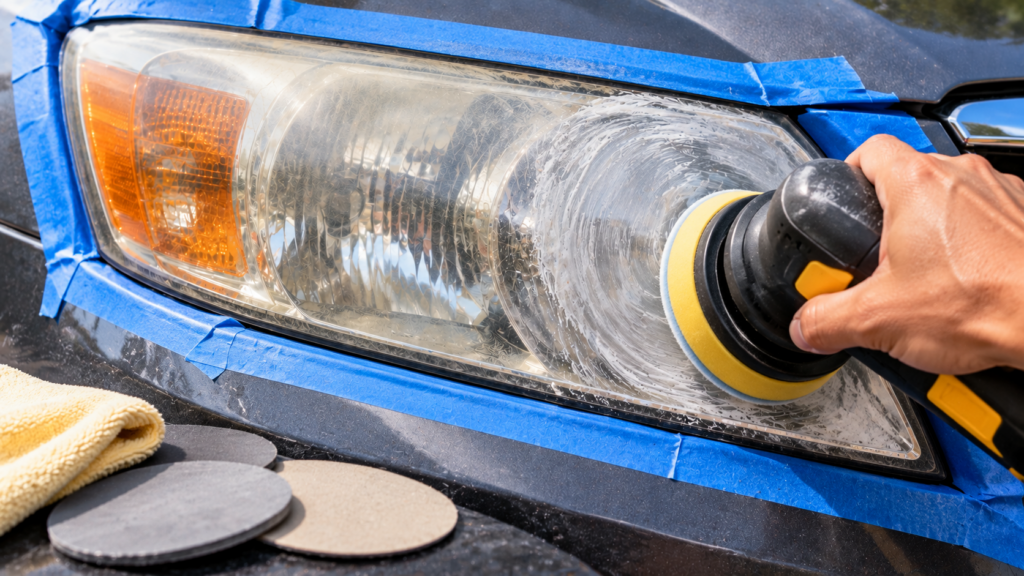
Use a purpose-made headlight-restoration system and follow its instructions carefully. Restoration systems commonly use controlled abrasive steps to remove the deteriorated outer surface. This is fundamentally different from merely washing a yellow lens.
Don’t improvise with extremely coarse sandpaper or random abrasive products. The abrasive sequence and technique matter.
Step 4: Refine and Polish
After the deteriorated surface has been removed, progressively finer abrasive steps refine the surface and remove scratches left by earlier stages. Polishing then helps restore transparency and gloss. Follow the sequence supplied with the restoration system you’re using rather than inventing your own grit progression.
Step 5: Restore UV Protection 🛡️
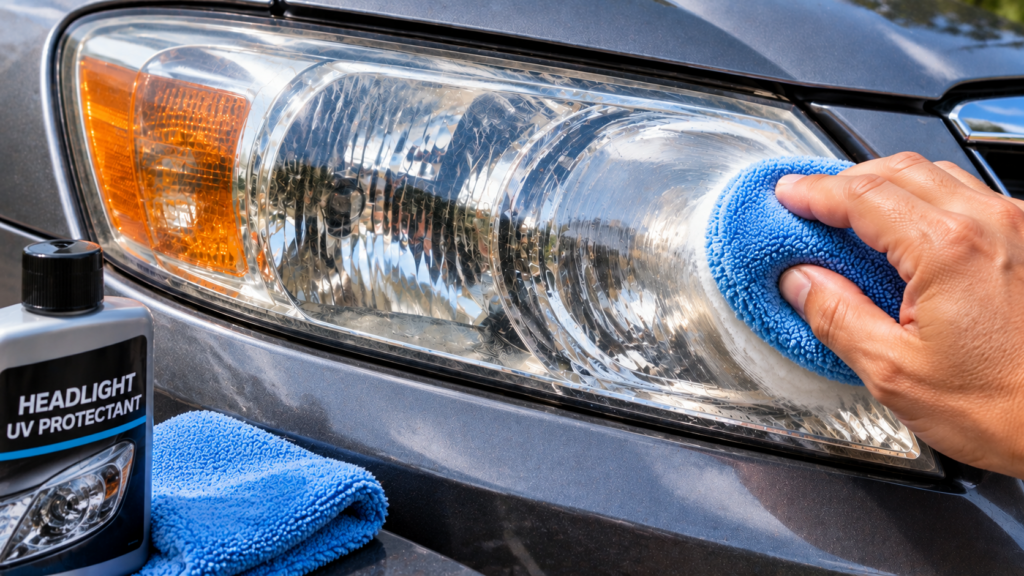
This is one of the most important — and frequently overlooked — parts of the process. Once deteriorated surface material has been removed, the restored lens needs appropriate protection.
Some purpose-made headlight-restoration systems include a dedicated UV-protective coating or protectant as the final step. Use a product specifically compatible with the restoration process and follow its application and curing instructions.
Don’t assume that cooking oil or another viral household “sealant” provides equivalent UV protection.
💧 What If the Cloudiness Is Inside the Headlight?
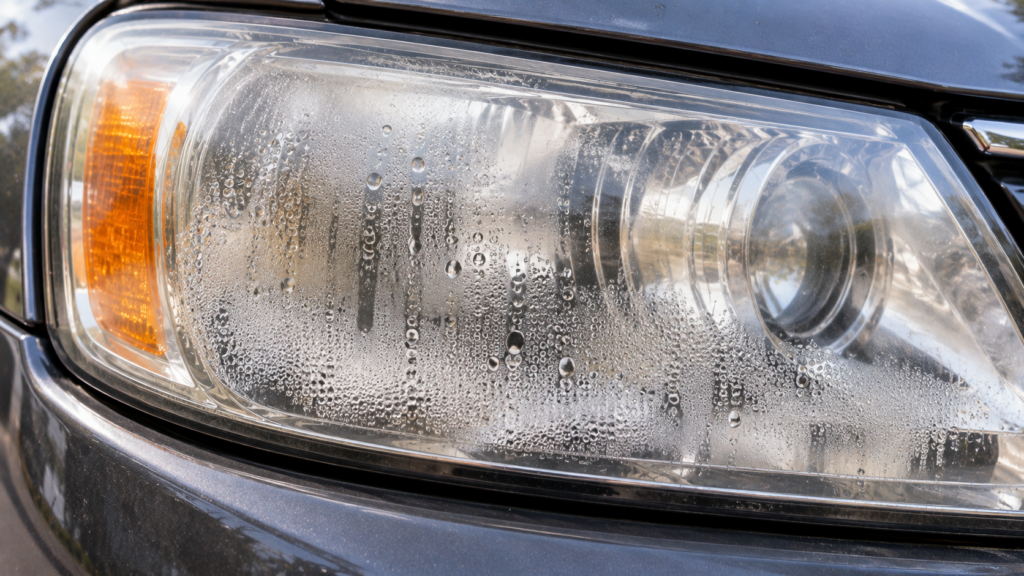
Sometimes you clean the exterior and discover that the haze hasn’t changed at all. Look closely.
If you can see condensation, water droplets or a misty film inside the headlight assembly, exterior polishing isn’t going to fix it. The problem is now inside the unit.
A small amount of temporary misting isn’t necessarily proof that the headlight has failed. Many headlamp assemblies are ventilated, and temporary condensation can sometimes occur with changes in temperature and humidity.
However, persistent condensation, large droplets or standing water deserves attention.
🔍 1. Inspect the Headlight Housing
Look carefully for:
- Cracks in the lens
- Damage to the housing
- Loose components
- Signs of previous impact
- Gaps around joints
Even a relatively small defect can potentially allow unwanted moisture into the assembly.
🔧 2. Check the Rear Bulb or Access Covers
Many headlights have removable covers at the rear for bulb or component access. If one isn’t seated correctly, moisture can potentially enter. Check that the covers are properly installed and inspect their seals for visible damage.
🟠 3. Inspect Rubber Seals and Gaskets
Look for rubber seals that are cracked, brittle, missing, folded, displaced, or improperly seated. A damaged gasket or seal may need to be replaced rather than simply pushed back into position.
🌬️ 4. Check the Headlight Vents
This part is important. Some headlight assemblies are designed with ventilation or breather systems to manage pressure and moisture. Make sure accessible vents aren’t obviously blocked or damaged.
Don’t permanently seal a factory vent simply because you think it’s allowing moisture inside. Blocking a ventilation system designed by the manufacturer can create additional condensation problems.
💨 5. Allow Trapped Moisture to Dry
If the vehicle’s instructions allow safe access to the headlight assembly, trapped moisture may need time to dry before everything is reassembled. Follow the vehicle manufacturer’s instructions when removing bulbs, access covers or other components.
Avoid improvised methods involving high-temperature heat guns or open flames, which could damage plastic components, wiring or seals. And never work on hot lighting components immediately after use.
🛠️ 6. Repair the Source of the Leak
Drying the headlight isn’t enough if water keeps entering. If inspection reveals a damaged gasket, loose access cover or another serviceable sealing component, repair or replace the defective part using an appropriate automotive procedure.
Simply removing the moisture without addressing its source may result in the same problem returning after rain or washing the car.
🚘 7. Know When Replacement or Professional Inspection Is Better
If the housing is cracked, water repeatedly returns, electrical components are affected or the source of the leak isn’t obvious, professional inspection may be the safest option. In some cases, repairing an individual seal is possible. In others, replacement of the headlamp assembly may be the more practical solution.
⚠️ Avoid the “Drill a Hole” Hack: You may find online tutorials recommending drilling additional holes into a headlight to remove condensation. That’s not a universal solution. Don’t randomly drill holes into the housing or permanently block factory ventilation openings. Both approaches can interfere with the headlight’s intended ventilation and sealing system.
🌿 3 Gentle Habits That Can Help Keep Headlights Looking Better
Household methods are generally more useful for routine maintenance than for reversing years of oxidation.
1. 🧼 Wash Your Headlights Regularly
Don’t let layers of road grime remain on the lenses for months. Whenever you wash your vehicle, gently clean the headlights with a product compatible with the lens and a clean microfiber wash mitt or cloth.
Regular washing won’t reverse UV damage, but it prevents ordinary contamination from making the lenses appear unnecessarily dull.
2. ☀️ Reduce Unnecessary Sun Exposure
When practical, park your vehicle in a garage, carport or shaded location. Sunlight isn’t the only factor affecting headlights, but reducing unnecessary UV exposure can help limit one contributor to exterior lens degradation. Of course, parking in the shade won’t reverse existing oxidation. Think of it as prevention rather than restoration.
3. 🛡️ Maintain the Protective Treatment
If you’ve restored your headlights, follow the maintenance instructions supplied with the protective coating or restoration system. Different products have different durability and reapplication requirements.
Don’t assume that ordinary household wax, cooking oil or another viral “sealant” provides the same protection as a product specifically intended for the application.
❌ 6 Popular Headlight Hacks to Be Careful With
Not every viral headlight trick is worth trying.
- Acetone and Strong Solvents: Avoid experimenting with aggressive solvents. Incompatible chemicals can damage polycarbonate or its surface coatings.
- Aggressive Household Scouring Powders: More abrasive doesn’t automatically mean better. Uncontrolled abrasion can create visible scratches and make the lens look worse.
- Random Coarse Sandpaper: Sanding can be an effective part of headlight restoration, but it needs to be performed as part of a controlled process with an appropriate abrasive progression and finishing stage. Simply grabbing coarse sandpaper and scrubbing the lens is a different story.
- Cooking Oil as a “Restorer”: Oil can temporarily change how a cloudy surface reflects light, potentially making the headlight appear shinier. But that doesn’t mean the oxidation has actually been removed. A temporary visual improvement isn’t the same as restoration.
- Baking Soda + Vinegar as a Miracle Cure: Fizzing looks impressive in a social-media video. It isn’t proof that an oxidized headlight is being restored.
- Skipping Protection After Major Restoration: If your restoration process removes deteriorated surface material, don’t simply polish the lens and forget about it. Follow the restoration system’s instructions for the appropriate final protective treatment.
🔍 Cleaning, Restoration or Internal Moisture? Try This Test
Not sure what your headlights actually need? Start by washing and drying one headlight thoroughly. Then inspect it carefully in good light.
- 🧼 It becomes noticeably clearer after washing: Surface dirt and road contamination were probably responsible for at least part of the dull appearance. (Solution: gentle cleaning and regular maintenance.)
- 🟡 It remains yellow or cloudy on the outside: If the deterioration appears to be on the exterior surface, oxidation may be the problem. (Solution: proper headlight restoration may be necessary.)
- 💧 You see droplets or haze inside: The problem isn’t something exterior polishing can remove. (Solution: inspect the housing, covers, seals and ventilation system and determine how moisture is entering or why it isn’t clearing.)
- 💥 The lens or housing is cracked or severely damaged: DIY polishing isn’t going to repair structural damage. (Solution: repair, professional inspection or replacement may be appropriate.)
❓ Frequently Asked Questions
Does Baking Soda Really Clean Cloudy Headlights?
Baking soda may help remove some surface contamination and could produce a modest cosmetic improvement on very light surface haze because of its mild abrasive action. It shouldn’t be considered a proven substitute for restoring a heavily oxidized polycarbonate lens.
Should I Mix Baking Soda With Vinegar?
There’s little reason to make this the preferred method. The familiar fizz comes from an acid-base reaction, but bubbles don’t mean headlight oxidation is magically disappearing. If you cautiously experiment with baking soda as a mild abrasive, water provides a simpler paste.
Does Toothpaste Work on Headlights?
Some abrasive toothpastes may temporarily improve the appearance of a lightly hazy surface. Results depend on the toothpaste formulation and condition of the lens. Toothpaste isn’t equivalent to complete restoration and doesn’t replace deteriorated UV protection.
Can I Use Vinegar on Cloudy Headlights?
I wouldn’t recommend vinegar as the primary solution for an oxidized polycarbonate headlight. Start with compatible soap and water for ordinary cleaning. If the lens itself has deteriorated, use an appropriate restoration process.
Can Lemon Juice Remove Yellowing?
Don’t expect lemon juice to reverse significant UV-related deterioration of the headlight surface. For ordinary dirt, use a compatible cleaning method. For genuine exterior oxidation, controlled restoration is the more appropriate approach.
Do I Really Need to Protect the Headlight After Restoration?
If you’ve performed a restoration that removes deteriorated surface material, the final protection stage matters. Some purpose-made headlight-restoration systems include a UV-protective coating or other protectant. Follow the instructions for the particular system you’re using.
How Long Will Restored Headlights Stay Clear?
There’s no universal answer. Durability depends on the restoration method, protective treatment, lens condition, climate, sun exposure and maintenance. Be cautious with DIY articles promising an exact number of months or years for every vehicle.
Is a Little Condensation Inside a Headlight Normal?
A small amount of temporary misting can sometimes occur in ventilated headlamp assemblies, particularly during changes in temperature or humidity. Persistent condensation, large droplets or standing water are more concerning and should prompt inspection.
How Do I Get Moisture Out of a Headlight?
First determine why the moisture is there. Inspect the housing, rear access covers, seals and ventilation system. If safe access is permitted by the vehicle manufacturer, the unit may need to dry before being reassembled. If moisture repeatedly returns, simply drying it isn’t enough — the underlying problem needs to be repaired.
Should I Drill a Hole in a Foggy Headlight?
Don’t randomly drill additional holes into the housing. Headlights can have intentionally designed ventilation systems, and modifying the housing may make moisture control or sealing worse.
Can I Fix Cloudiness Inside the Headlight by Polishing It?
No. Exterior polishing only treats the outside surface. If the cloudiness is inside the headlamp assembly, the source of the internal moisture or haze needs to be addressed instead.
🚗 The Bottom Line
Not every cloudy headlight has the same problem, and that’s why one viral household trick can’t fix them all.
- For dirt and mild surface contamination: 🧼 Clean gently with compatible soap and water.
- For very light exterior haze: 🥄 A cautious mild cleaning experiment may improve appearance, but don’t expect it to reverse genuine UV damage.
- For genuinely yellow and oxidized exterior lenses: ✨ Clean → Mask → Controlled progressive abrasion → Polish → Protect.
- And for condensation or water inside the headlight: 💧 Inspect → Find the moisture source → Check seals/covers/vents → Dry appropriately → Repair the underlying problem.
The smartest DIY approach isn’t finding the strangest ingredient in your kitchen. It’s identifying which type of cloudiness you actually have and using the appropriate solution.