
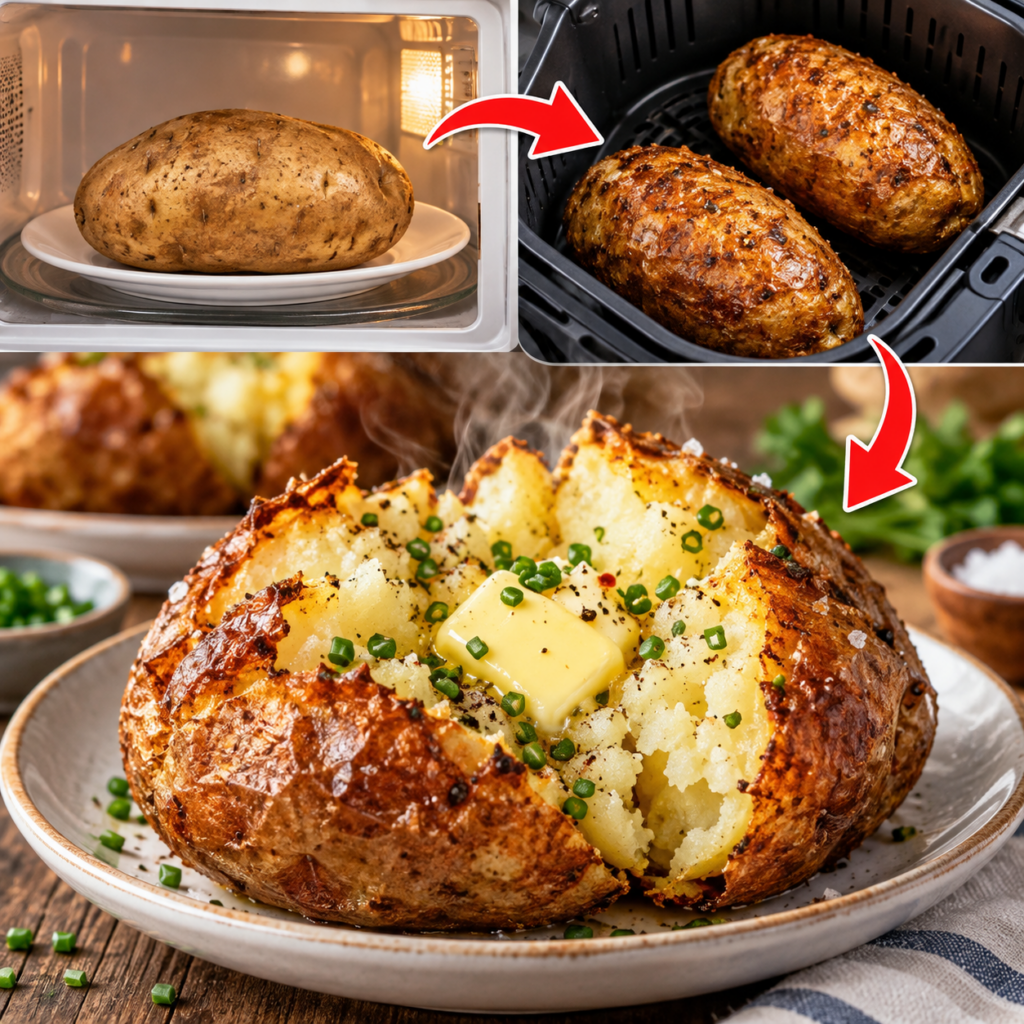
There’s nothing quite like a baked potato with crackly, golden skin and a hot, fluffy center. The problem? A traditional oven-baked potato can take a surprisingly long time.
That’s where this two-step method comes in.
Instead of relying entirely on the microwave—which cooks potatoes quickly but usually leaves the skin soft—you can microwave the potato first to cook the center, then finish it in the Air Fryer to crisp the outside.
The result is a practical shortcut that combines the strengths of both appliances:
Microwave = fast, tender center
Air Fryer = dry heat and crispier skin
And once you understand how to adjust the timing for the size of your potatoes, it’s remarkably easy.
🥔 Why Microwave a Potato Before Air Frying It?
A whole potato takes time to cook because heat needs to travel all the way to its center.
A microwave speeds up that process dramatically by heating water-rich food throughout its interior.
The downside is that microwave cooking creates plenty of moisture. That means the potato may become tender, but the skin generally doesn’t develop the dry, crisp texture associated with oven baking.
An Air Fryer solves a different part of the problem.
Its rapidly circulating hot air helps dry and brown the exterior.
So rather than asking one appliance to do everything, this method gives each appliance the job it does particularly well.
The basic idea
Step 1: Microwave until the potato is mostly tender.
Step 2: Lightly coat the skin with oil and salt.
Step 3: Finish in a hot Air Fryer until the outside is crisp and the center is completely tender.
It’s essentially a shortcut to a baked-potato-style result.
🛒 What You’ll Need
For 2 medium baked potatoes, you’ll need:
- 2 medium russet potatoes
- 1–2 teaspoons olive oil or another suitable cooking oil
- ¼–½ teaspoon coarse or kosher salt
- Freshly ground black pepper, optional
For serving, you can add:
- butter
- sour cream
- shredded cheese
- chopped chives
- Greek yogurt
- cooked bacon
- chili
- steamed broccoli
You don’t need all of these, of course. A little butter, salt and pepper is enough for a classic baked potato.
🥔 Which Potatoes Are Best?
For that classic baked-potato texture, russet potatoes are an excellent choice.
Their relatively high starch content helps produce a light, fluffy interior, while their thicker skin responds well to the dry heat of an Air Fryer.
You can use other potatoes, but the result will be different.
Yukon Gold potatoes, for example, tend to have a denser, creamier interior rather than the particularly fluffy texture associated with a russet.
Try to choose potatoes of similar size
This small detail makes cooking much easier.
If one potato weighs twice as much as another, they probably won’t finish cooking at exactly the same time.
🚿 Step 1: Wash and Dry the Potatoes
Because we’re going to eat that delicious crispy skin, clean it thoroughly.
Scrub the potatoes under running water to remove dirt.
Then dry them very well with a clean kitchen towel or paper towel.
This matters more than it may seem.
Surface moisture works against crispness. Starting with a dry potato gives the Air Fryer a head start.
🍴 Step 2: Pierce the Potatoes
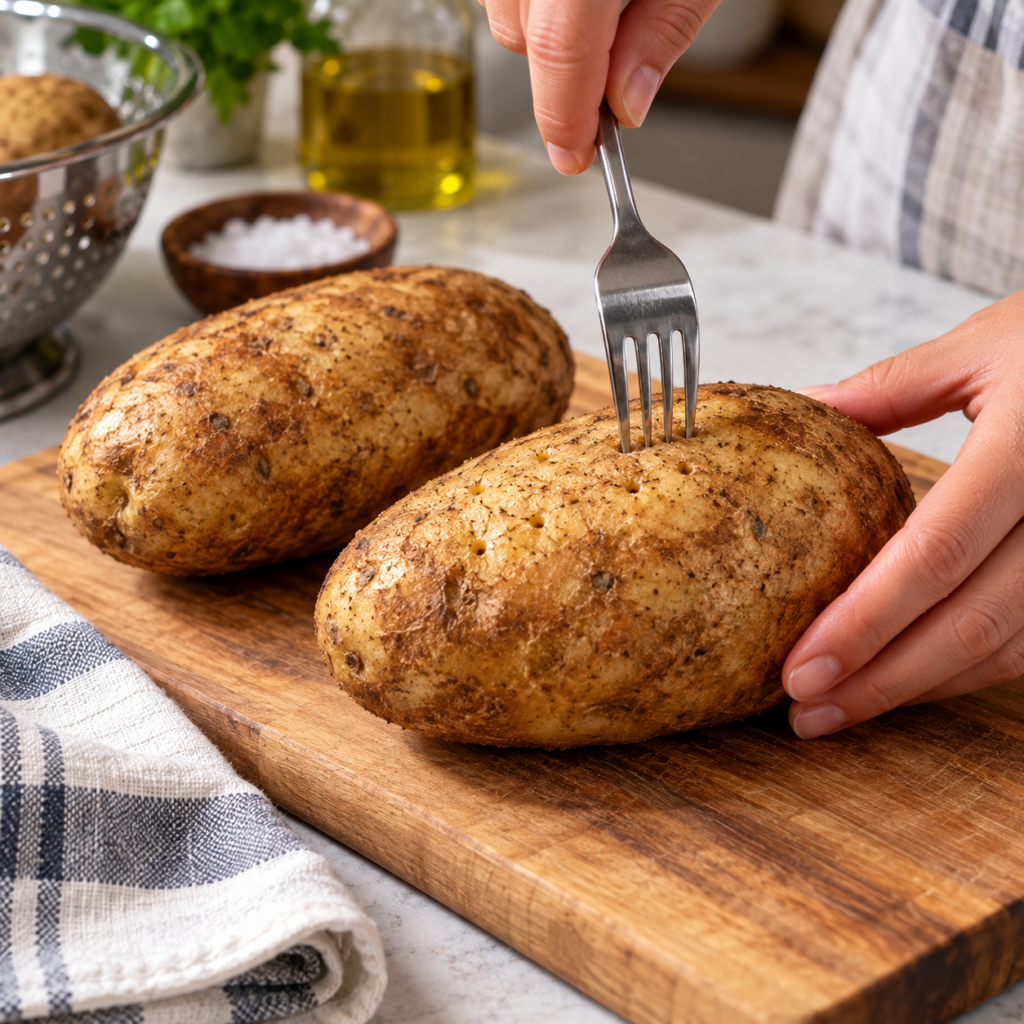
Use a fork to make several small holes around each potato before microwaving.
You don’t need to stab deeply or make dozens of holes.
A few piercings around the potato are sufficient to provide places for steam to escape during cooking.
⚡ Step 3: Microwave Until Mostly Tender
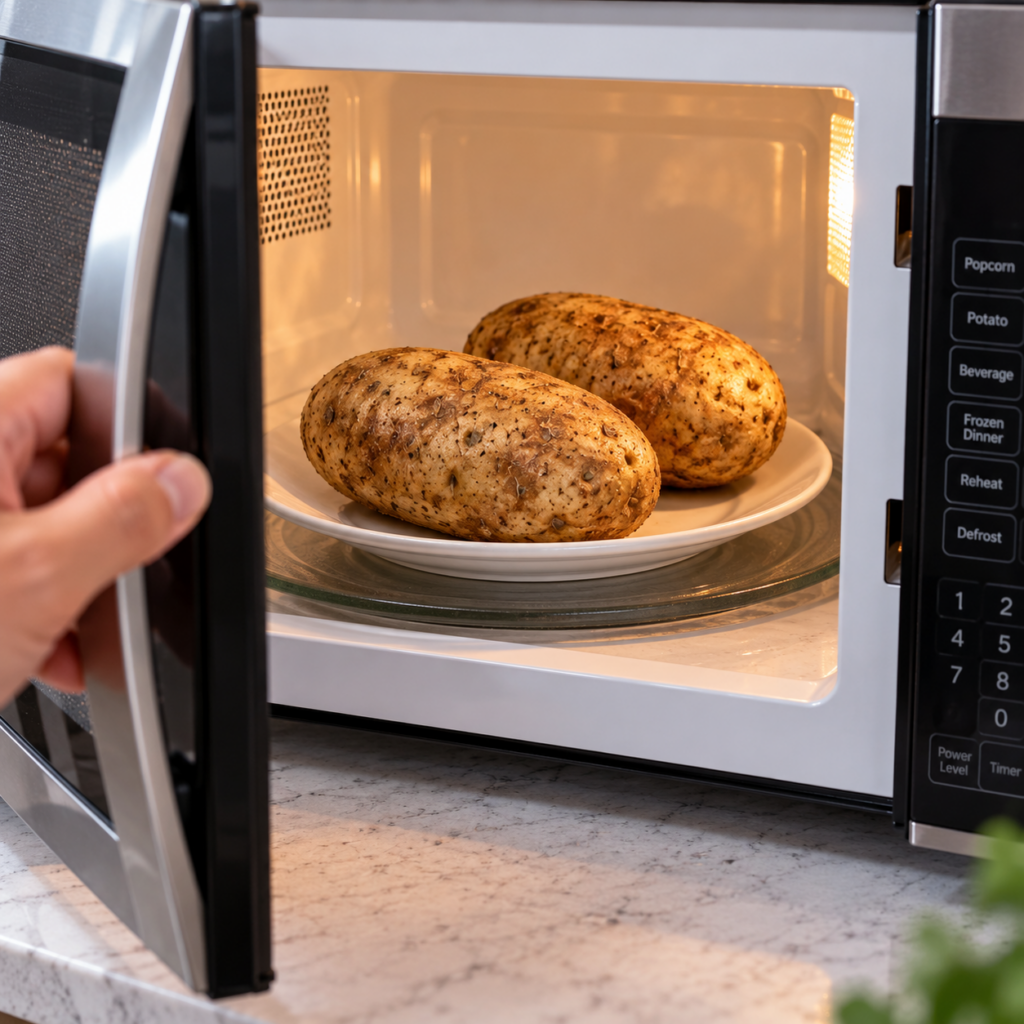
Place the potatoes on a microwave-safe plate.
For one medium potato, start with approximately 4–5 minutes on high.
For two medium potatoes, you may need roughly 6–8 minutes total, turning them halfway through.
But treat those times as starting points, not guarantees.
Microwave power, potato size and the number of potatoes all affect cooking time.
How do you know when it’s ready for the Air Fryer?
The potato should be mostly tender, but it doesn’t have to be completely finished.
A knife or fork should enter with relatively little resistance.
If the center is still very firm, microwave in short additional intervals.
💡 Better to check than blindly follow the clock.
A giant russet and a small potato shouldn’t receive exactly the same cooking time.
🌬️ Step 4: Let Excess Steam Escape
After microwaving, carefully remove the potatoes—the plate and potatoes can be very hot.
Let them sit briefly so some surface moisture can evaporate.
If the skin feels damp, gently pat it dry again.
This little step can help the exterior crisp more effectively.
🫒 Step 5: Add Oil and Salt
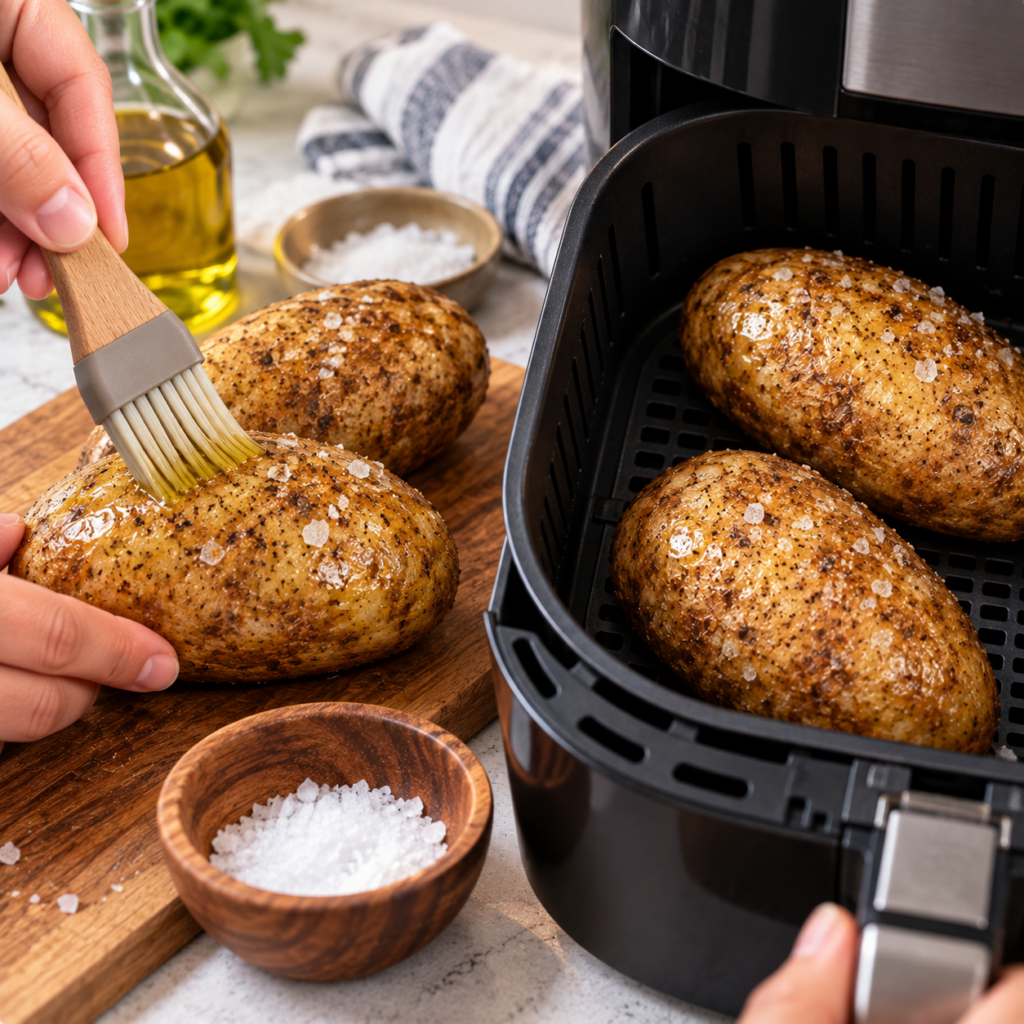
Now lightly rub each potato with oil.
You need only enough to create a thin coating over the skin.
Then sprinkle with coarse or kosher salt.
Why add the oil after microwaving?
For this method, we’re primarily using the oil to help the exterior brown and become more appealing during the Air Fryer stage.
Applying it immediately before air frying puts it where it’s most useful.
Don’t drown the potato in oil
More oil doesn’t automatically mean crispier skin.
A light, even coating is enough.
🔥 Step 6: Finish the Potatoes in the Air Fryer
Place the potatoes directly in the Air Fryer basket with some room for air to circulate around them.
A useful starting point is:
400°F / 200°C for approximately 8–15 minutes
Turn the potatoes partway through if needed for more even browning.
Why is this a range?
Because your potatoes have already been partially cooked in the microwave.
A smaller potato that is almost completely tender may need only a short crisping period.
A larger potato may require longer.
Air Fryers also differ significantly in airflow, basket design and heating behavior.
Start checking early rather than automatically cooking for the maximum time.
✨ How to Know When Your Potato Is Done
Don’t judge only by the skin.
The finished potato should have:
- dry, crisp-looking skin
- a tender center
- little resistance when pierced through the middle
If you use an instant-read thermometer, a fully cooked baked potato is often especially fluffy when its center is around 205–210°F (96–99°C).
Temperature isn’t essential, though. A skewer or thin knife can also tell you whether the center has softened completely.
🥔 The Trick for an Extra-Fluffy Center
Here’s a simple finishing step.
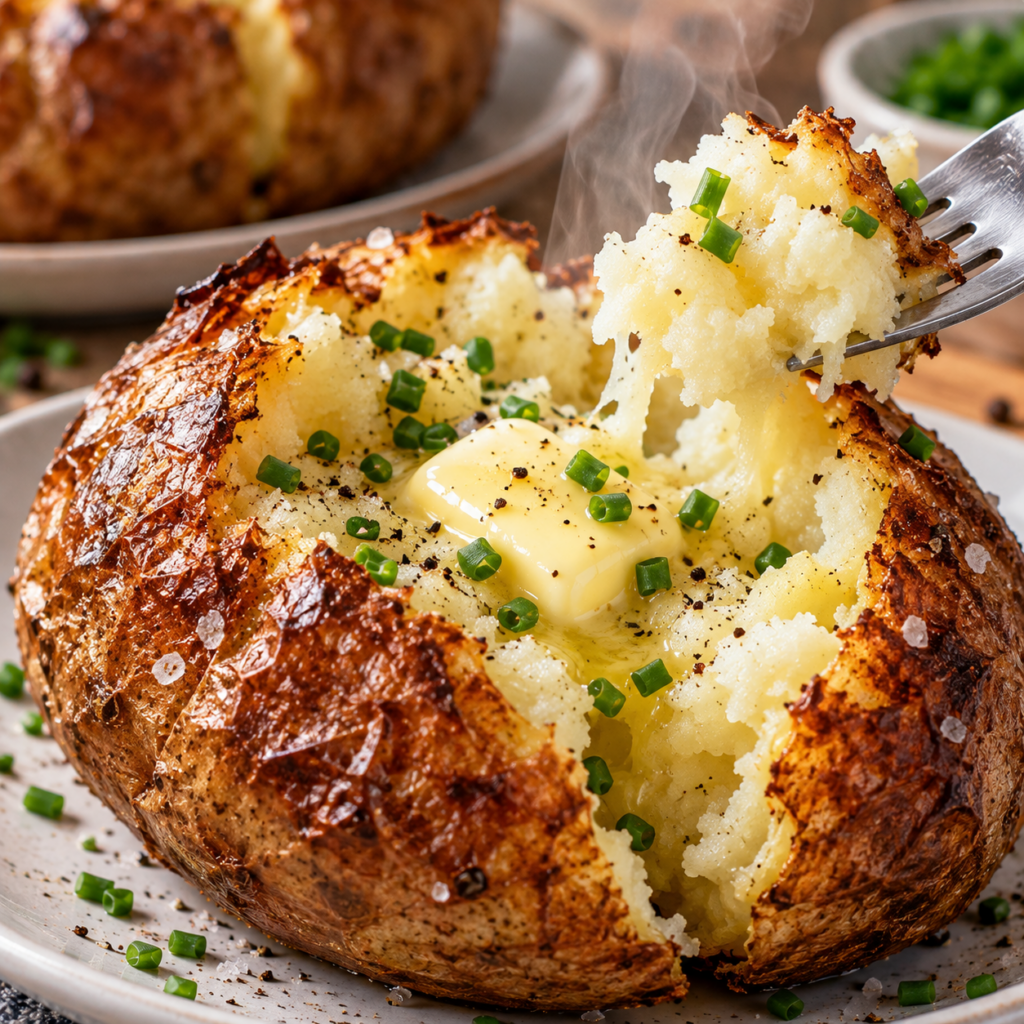
Once the potato is cooked, cut a slit lengthwise across the top.
Then gently push the ends toward one another so the center opens.
Use a fork to loosen the potato flesh.
Don’t mash it aggressively.
You’re trying to separate and fluff the interior.
Add butter immediately while the potato is steaming hot so it melts into all those fluffy pockets.
🔥 7 Tricks for Even Crispier Potato Skin
If crispy skin is your favorite part, these details make a difference.
1. Dry the potato thoroughly
Water on the exterior needs to evaporate before the skin can really dry and crisp.
2. Don’t overcrowd the Air Fryer
Hot air needs room to circulate.
If the potatoes are tightly packed together, the areas touching each other may not crisp as evenly.
3. Use only a thin coating of oil
You want the skin coated—not dripping.
4. Salt before air frying
Coarse salt adds flavor and gives the exterior that classic baked-potato appearance and texture.
5. Don’t wrap the potatoes in foil
If your goal is crispy skin, wrapping the potato traps moisture around the exterior.
That’s the opposite of what we’re trying to achieve.
6. Give the Air Fryer enough time to dry the skin
A potato can be completely cooked inside before the exterior is as crisp as you’d like.
If the center is done but the skin isn’t crisp enough, continue air frying briefly while watching closely.
7. Serve immediately
Crispy potato skin gradually softens as the potato sits and moisture migrates outward.
For the best texture, eat it while it’s hot.
⏱️ How Long Does the Whole Method Take?
For medium potatoes, the entire process can often be completed in roughly 15–25 minutes, depending on the potatoes and appliances.
That’s considerably faster than many conventional oven methods for whole baked potatoes.
A typical workflow might look like this:
Wash + prep: 2–3 minutes
Microwave: approximately 5–8 minutes
Air Fryer: approximately 8–15 minutes
Again, use texture rather than the clock as your final guide.
🥔 What About Very Large Potatoes?
Large russets need more microwave time because the center is farther from the surface.
Instead of immediately adding several minutes at once, microwave the potato for your initial period, turn it, test it, and then continue in 1-minute increments as necessary.
Once it’s mostly tender, move it to the Air Fryer.
This reduces the chance of severely overcooking the outer portion while you’re waiting for the middle to soften.
🧂 Do You Need to Soak the Potatoes First?
No.
Soaking is useful in some preparations involving cut potatoes, particularly when making fries or certain roasted potatoes.
But for whole baked potatoes, there’s no need to soak them before using this microwave + Air Fryer method.
Wash, scrub and dry them instead.
🧈 Should You Rub Butter on the Skin?
I prefer oil for the crisping stage.
Butter contains water and milk solids, whereas cooking oil is better suited to creating an evenly coated exterior at high heat.
Save the butter for the inside.
Once you split the hot potato open, that’s where butter really shines.
🧂 Should You Salt Before or After Cooking?
For baked-potato-style skin, I like adding coarse salt after microwaving and before air frying.
The oil helps it adhere to the exterior.
You can always add additional salt to the fluffy interior when serving.
🌿 Easy Flavor Variations
Once you master the basic method, changing the flavor is easy.
🧄 Garlic & Herb
After cooking, add:
- butter
- garlic
- parsley or chives
- black pepper
🧀 Cheesy Potato
Split the potato and add shredded cheddar.
Return it briefly to the Air Fryer just until the cheese melts.
🌶️ Chili Potato
Top with hot chili, shredded cheese and chopped green onions for a more substantial meal.
🥦 Broccoli & Cheese
Add steamed broccoli and melted cheese for an easy lunch.
🥛 Creamy Chive
Top with sour cream or Greek yogurt, chopped chives and freshly ground pepper.
♻️ Can You Reheat a Baked Potato in the Air Fryer?
Yes.
The Air Fryer is particularly useful when you want to reheat a potato without making the skin as soft as it can become in the microwave.
Refrigerated baked potatoes can be reheated at approximately 350°F / 175°C until hot throughout.
The exact time depends on size and refrigerator temperature, so check the center before serving.
🧊 How to Store Leftover Baked Potatoes
Don’t leave cooked potatoes sitting at room temperature for long periods.
Allow leftovers to cool reasonably promptly and refrigerate them in a covered container.
For food-safety purposes, a good general rule is to refrigerate cooked food within 2 hours.
Use refrigerated cooked potatoes within about 3–4 days.
Important note about foil
If you baked or served potatoes in aluminum foil, remove the foil before refrigerating them.
Store the potatoes properly chilled rather than leaving foil-wrapped baked potatoes at room temperature.
❌ 8 Common Mistakes to Avoid
1. Microwaving for exactly five minutes regardless of size
Five minutes may work beautifully for one potato and poorly for another.
Size matters.
2. Putting a soaking-wet potato in the Air Fryer
Extra surface moisture works against crispness.
Dry it first.
3. Using too much oil
You need a coating, not an oil bath.
4. Wrapping the potato in foil
Foil traps steam around the skin and works against the crispy exterior we’re trying to create.
5. Overcrowding the basket
Give the hot air space to circulate.
6. Relying entirely on cooking time
Different appliances cook differently.
Check tenderness.
7. Air frying a completely raw giant potato for only 12 minutes
The short Air Fryer time works because the microwave has already done much of the cooking.
Skipping that step completely changes the recipe.
8. Forgetting how hot the potato is
Steam can escape when you cut open a freshly cooked potato.
Handle it carefully and open it away from your face.
🤔 Microwave Only vs. Air Fryer Only vs. Both
Microwave only
Best for: maximum speed.
The potato becomes tender quickly, but the skin is usually relatively soft.
Air Fryer only
Best for: a more traditional baked texture when you have more time.
The skin can become beautifully crisp, but a whole raw potato generally needs considerably longer.
Microwave + Air Fryer
Best for: combining speed with crisp skin.
The microwave handles much of the interior cooking while the Air Fryer finishes the exterior.
For a busy lunch or weeknight dinner, this is the method I find most practical.
❓ Frequently Asked Questions
Can you microwave a potato before putting it in an Air Fryer?
Yes. It’s an effective way to shorten the overall cooking process.
Microwave the potato until mostly tender, then use the Air Fryer to finish cooking and crisp the exterior.
How long should I microwave a potato before air frying?
For one medium potato, around 4–5 minutes can be a useful starting point.
Two potatoes may require around 6–8 minutes.
However, microwave wattage and potato size vary considerably, so check tenderness and add short intervals when necessary.
What temperature should I use in the Air Fryer?
400°F / 200°C is a useful starting temperature for the final crisping stage.
Because the potato is already mostly cooked, the goal at this stage is primarily to finish the center and crisp the skin.
How long should a microwaved potato stay in the Air Fryer?
Approximately 8–15 minutes is a practical starting range for medium potatoes.
Start checking early.
Do I need to preheat the Air Fryer?
It depends on your appliance.
Some manufacturers recommend preheating for certain recipes, while others don’t require it.
Follow the instructions for your Air Fryer. If you preheat, your potato may crisp slightly sooner.
Why isn’t my potato skin crispy?
Common causes include:
- wet skin
- overcrowding
- insufficient Air Fryer time
- wrapping the potato in foil
- too much trapped surface moisture
Drying the potato and giving hot air room to circulate are particularly important.
Should I put oil on the potato before microwaving?
You can, but for this two-step method I prefer adding the oil after microwaving and immediately before air frying.
That keeps the process simple and puts the oil on the skin just before the crisping stage.
Can I cook more than two potatoes?
Yes, provided they fit in the Air Fryer basket without being tightly packed together.
Remember that microwaving several potatoes will generally take longer than microwaving one.
Can I use sweet potatoes?
Yes, although the texture and cooking time will differ.
The same basic concept works: partially cook the sweet potato in the microwave, then finish it in the Air Fryer.
Start checking early because size makes a significant difference.
Can I make this recipe without oil?
Yes.
The potato can still cook and the skin can dry in the Air Fryer without oil, although the finished exterior will have a somewhat different texture.
🥔 Final Takeaway
The viral idea behind this trick is actually very simple:
Let the microwave do what it does best, then let the Air Fryer do what it does best.
The microwave quickly gets the potato tender.
The Air Fryer then provides the intense circulating heat needed to dry, brown and crisp the skin.
For medium russet potatoes, start by microwaving until they’re mostly tender, lightly coat them with oil and salt, then Air Fry at around 400°F / 200°C for 8–15 minutes, checking early and adjusting for size and your particular appliance.
The result?
Crispy, salty skin on the outside and a hot, fluffy center inside—without waiting nearly as long as you might for a traditional oven-baked potato. 🥔✨