

You vacuum your floors, wipe down your countertops, scrub your bathroom, and dust your furniture. But when was the last time you actually cleaned your interior doors?
It’s one of those household chores that many people completely overlook.
Think about it: doors are touched throughout the day. Hands reach for the handles, fingers brush against the panels, and dust slowly settles into decorative grooves and along the frames.
Over time, those little marks can make an otherwise clean room look surprisingly neglected.
The good news? You don’t need expensive cleaning products or complicated homemade mixtures to clean most washable interior doors.
In fact, a little warm water, a few drops of mild dish soap, and a soft microfiber cloth may be all you need.
But there’s a catch: not every door should be cleaned the same way. What works beautifully on a washable painted door could damage unfinished wood or a delicate furniture finish.
Here’s how to clean your doors properly, avoid seven common mistakes, and keep them looking fresh without unnecessary chemicals or harsh scrubbing.
🧽 Why You Should Clean Your Interior Doors More Often
Doors may not look dirty at first glance, but they collect several types of everyday grime.
1. Fingerprints and Skin Oils
Every time someone opens or closes a door, natural oils from their hands can transfer to the surface.
These marks are especially noticeable around handles and on white or light-colored doors.
2. Dust and Household Particles
Decorative door panels, raised moldings, and upper edges are perfect places for dust to accumulate.
If you only clean the flat center of a door, you may miss the dirtiest areas.
3. Cooking Residue
Kitchen doors can collect a thin film of airborne cooking grease, especially when located near the stove.
Dust may stick to that residue, making the surface feel slightly tacky.
4. Scuff Marks
Shoes, bags, furniture, and everyday contact can leave marks on lower door panels.
Some marks can be removed with gentle cleaning, while others may be actual damage to the paint.
5. Moisture and Soap Residue
Bathroom doors can collect condensation, fingerprints, and splashes.
Excessive moisture is particularly problematic for wood-based doors and vulnerable edges.
The takeaway: Cleaning your doors occasionally can improve their appearance and prevent everyday grime from becoming more difficult to remove.
🫧 The Simple Door-Cleaning Solution I Recommend
Before reaching for vinegar, essential oils, baking soda, or strong cleaning sprays, try a simpler approach.
For many washable painted doors, PVC doors, and compatible sealed surfaces, a mild soap solution is sufficient for ordinary household dirt.
What You’ll Need
- 3 cups (approximately 750 ml) of warm water
- 2–3 drops of mild dish soap
- 2 clean microfiber cloths
- 1 small bowl or bucket
- A soft brush for decorative grooves, optional
- A dry towel for the surrounding floor
Important: Check the door manufacturer’s care instructions first. If you don’t know what finish your door has, test a small hidden area before cleaning the entire surface.
Why This Mixture Works
Warm water helps loosen everyday dirt and water-soluble residues.
Mild dish soap contains surfactants that help lift skin oils and light grease from compatible washable surfaces.
Microfiber cloths capture dust and dirt without requiring aggressive scrubbing.
The most important detail isn’t adding more ingredients.
It’s using very little moisture and drying the surface immediately afterward.
🚪 How to Clean Interior Doors Step by Step
Step 1: Start With a Dry Microfiber Cloth
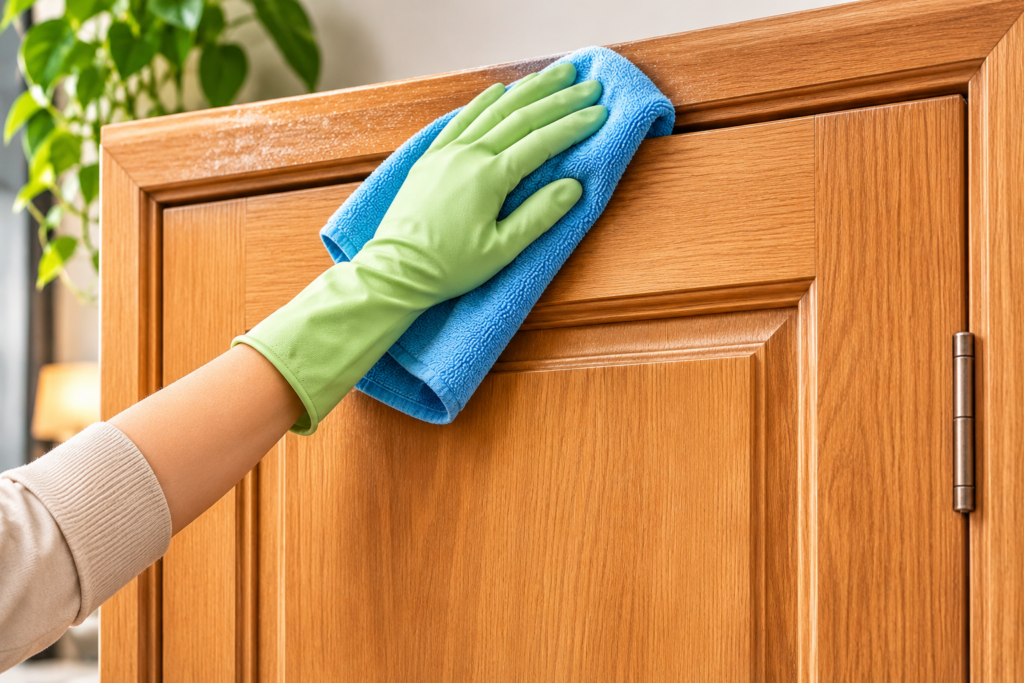
Before applying any cleaning solution, remove loose dust.
Wipe the door from top to bottom, paying special attention to:
- The upper edge of the door
- Raised panels and decorative grooves
- Door frames and trim
- Areas around the handle
- Lower corners and edges
For carved or detailed doors, use a soft, clean brush to loosen dust from narrow spaces.
Why this matters: Removing dry particles first reduces the chance of dragging grit across the finish when you begin wiping.
Step 2: Prepare Your Gentle Cleaning Mixture
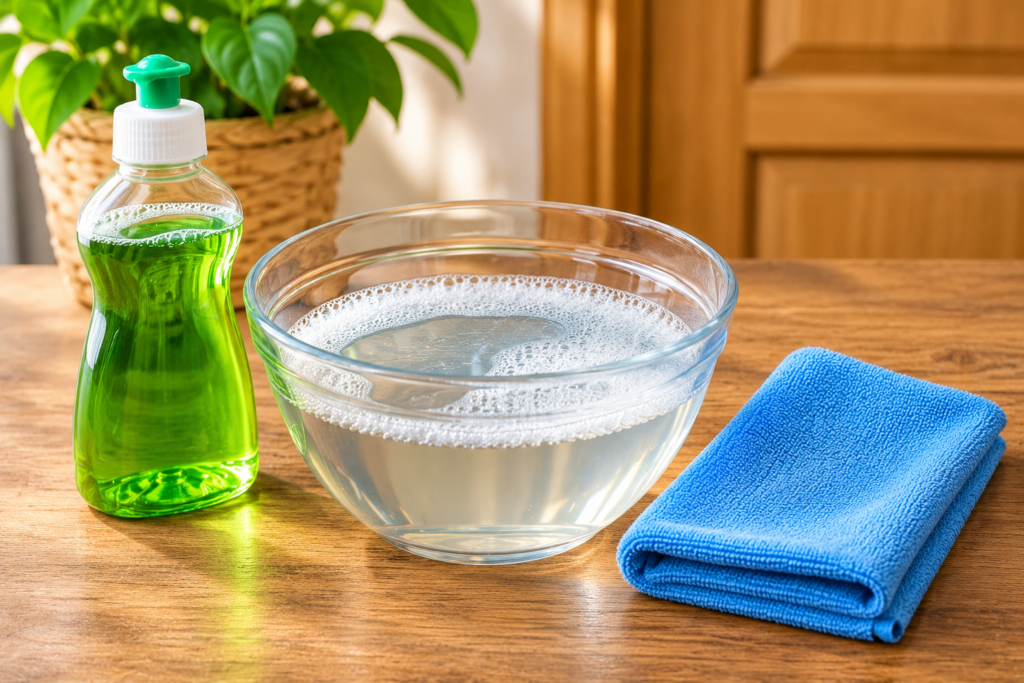
Fill a small bowl with approximately 3 cups of warm water.
Add 2–3 drops of mild dish soap.
Stir gently.
You don’t need thick foam or a heavily concentrated solution.
Too much soap can leave residue that makes the surface look dull or streaky.
Quick tip: If the mixture becomes excessively sudsy, dilute it with more water.
Step 3: Test a Hidden Area First
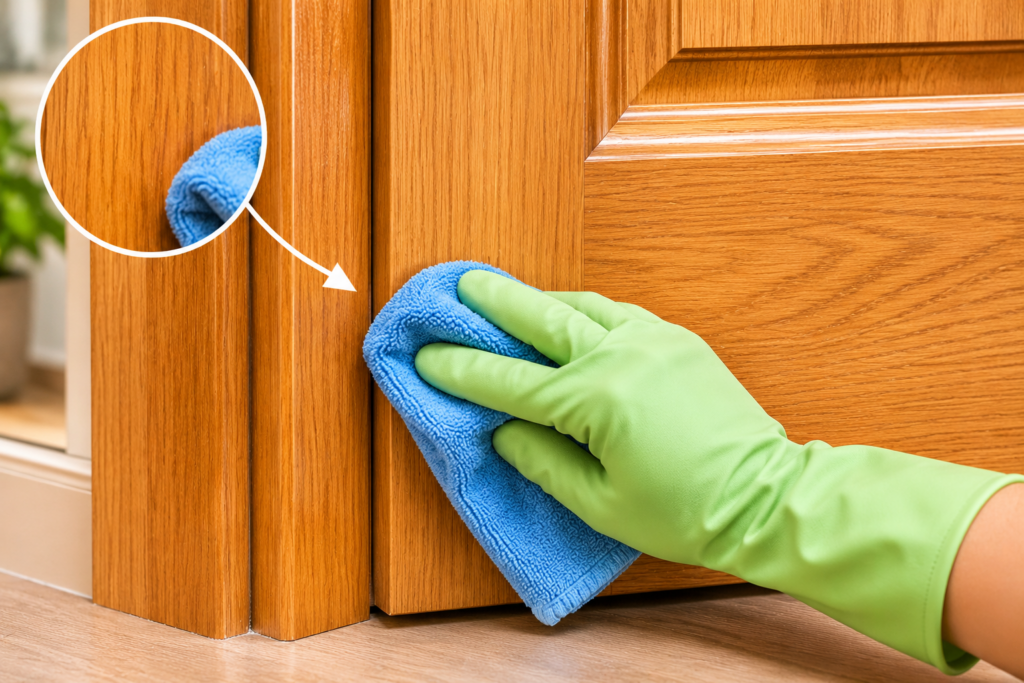
This step is particularly important for wooden, painted, or older doors.
Dip a microfiber cloth into the mixture and wring it out thoroughly.
Choose a small, inconspicuous area.
Gently wipe the surface and dry it immediately.
Check for:
- Color transfer
- Dullness
- Softening or tackiness
- Discoloration
- Changes in the finish
If anything unusual happens, stop and use a cleaning method recommended for that specific material.
Step 4: Wipe the Door Gently
Once you’ve confirmed the finish is compatible, wipe the door using a barely damp microfiber cloth.
Work from the top toward the bottom.
Use gentle pressure rather than scrubbing.
Pay particular attention to the area surrounding the door handle, where fingerprints often accumulate.
For stubborn grime, hold the damp cloth against the spot briefly before wiping.
Avoid soaking the surface or allowing water to run into joints, seams, or unfinished edges.
Step 5: Clean the Door Handle Separately

Door handles receive frequent contact and deserve extra attention.
For ordinary cleaning, use a product compatible with the handle’s finish.
Avoid acidic or abrasive cleaners on plated, brass, or other delicate hardware unless the manufacturer specifically permits them.
Cleaning is not the same as disinfecting.
If disinfection is necessary, use an appropriate registered disinfectant according to its label, including the required surface contact time.
Never mix disinfectants with vinegar, dish soap, or other cleaning products unless the manufacturer explicitly instructs you to do so.
Step 6: Remove Any Soap Residue
If needed, use a second microfiber cloth lightly dampened with clean water to remove remaining soap.
Again, wring it out thoroughly.
This helps reduce streaks and sticky residue.
For moisture-sensitive finishes, follow the manufacturer’s instructions instead of adding another wet-cleaning step.
Step 7: Dry the Door Immediately
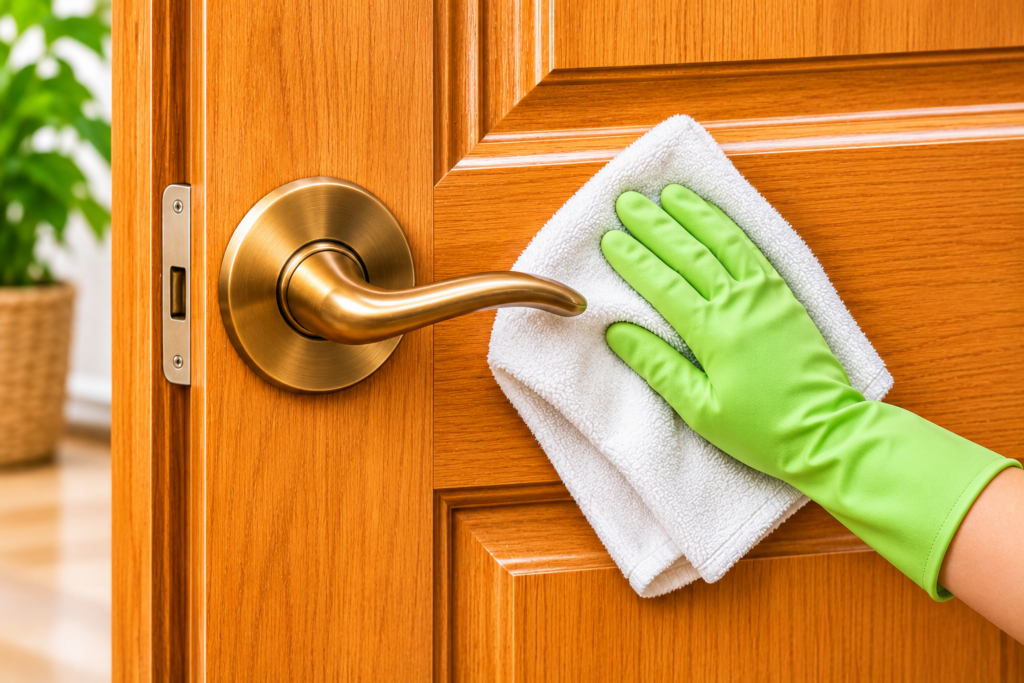
Finish by wiping the surface with a clean, dry microfiber cloth.
Pay attention to the bottom edge, corners, and areas around the handle.
Don’t leave the door wet to air-dry.
Excess moisture can damage vulnerable wood-based materials, particularly where protective finishes are worn or incomplete.
⚠️ 7 Door-Cleaning Mistakes That Can Damage the Finish
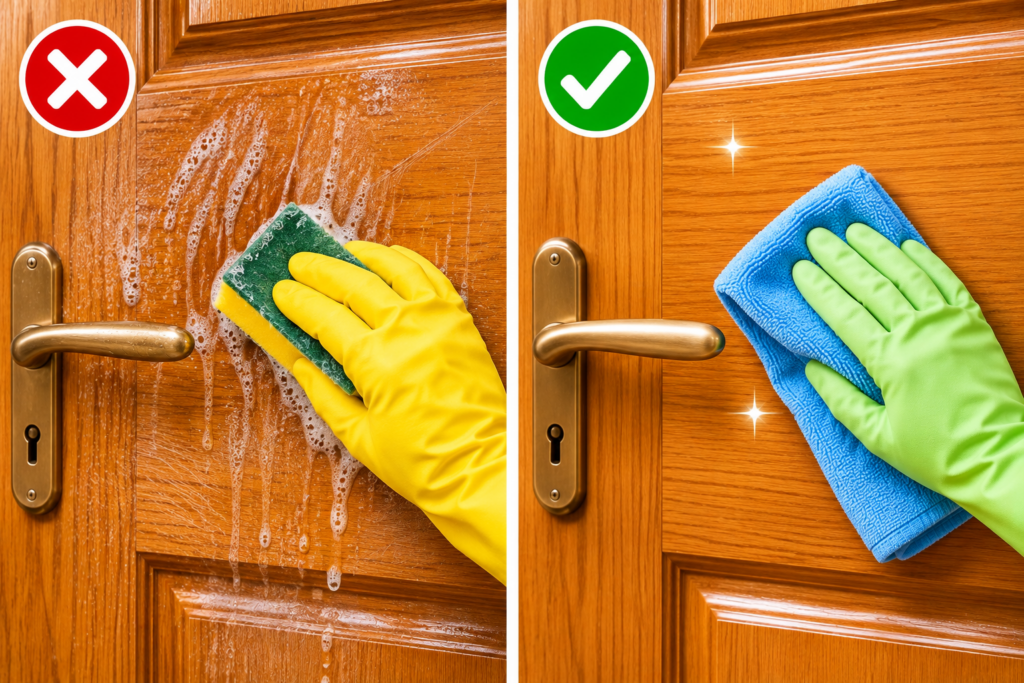
Many popular household cleaning tricks sound convenient, but some can create more problems than they solve.
Here are seven mistakes worth avoiding.
Mistake 1: Using White Vinegar on Every Door
White vinegar is frequently recommended as an all-purpose household cleaner.
However, its acidity can be unsuitable for certain paints, wood finishes, waxes, and surface coatings.
Repeated use may contribute to dullness or finish damage on susceptible materials.
Better alternative: Start with a manufacturer-approved cleaner or a very mild soap solution on washable surfaces.
Mistake 2: Adding Essential Oils to Cleaning Water
Lemon essential oil is sometimes added to homemade cleaning mixtures for fragrance.
But fragrance doesn’t necessarily improve cleaning performance.
Essential oils can leave residues, irritate sensitive skin, and may be incompatible with certain finishes.
They also don’t disperse evenly in plain water without a suitable formulation.
Better alternative: Skip essential oils entirely.
A clean door doesn’t need to smell strongly of lemon to be clean.
Mistake 3: Using Too Much Water
This is one of the biggest risks when cleaning wooden doors.
Excess moisture can enter seams, joints, or exposed edges.
Over time, vulnerable wood and engineered-wood materials may swell, warp, or deteriorate.
Better alternative: Use a well-wrung microfiber cloth and dry the surface immediately.
Mistake 4: Scrubbing With Abrasive Sponges
Rough sponges and abrasive cleaning pads may remove dirt, but they can also scratch paint or reduce the sheen of a finish.
Even melamine foam cleaning sponges can act as fine abrasives.
Better alternative: Use soft microfiber and gentle pressure.
If a mark doesn’t come off easily, check whether it’s dirt or damage to the paint.
Mistake 5: Applying Baking Soda Paste Without Testing
Baking soda is popular in DIY cleaning recipes.
However, its fine particles can scratch or dull certain glossy and delicate surfaces when rubbed aggressively.
Better alternative: Reserve abrasive methods for materials and finishes that are specifically compatible with them.
Mistake 6: Forgetting the Door Edges and Frame
Cleaning only the central panel leaves dust and fingerprints around the edges.
These neglected areas can make the door look dirty even after the main surface has been wiped.
Better alternative: Include the top edge, frame, trim, and handle area in your routine.
Mistake 7: Using One Cleaning Product for Every Material
A painted interior door, an unfinished wooden door, and a glass door have different maintenance requirements.
A cleaner suitable for one surface may damage another.
Better alternative: Identify the material and finish before choosing a cleaning method.
🪵 How to Clean Different Types of Doors Safely
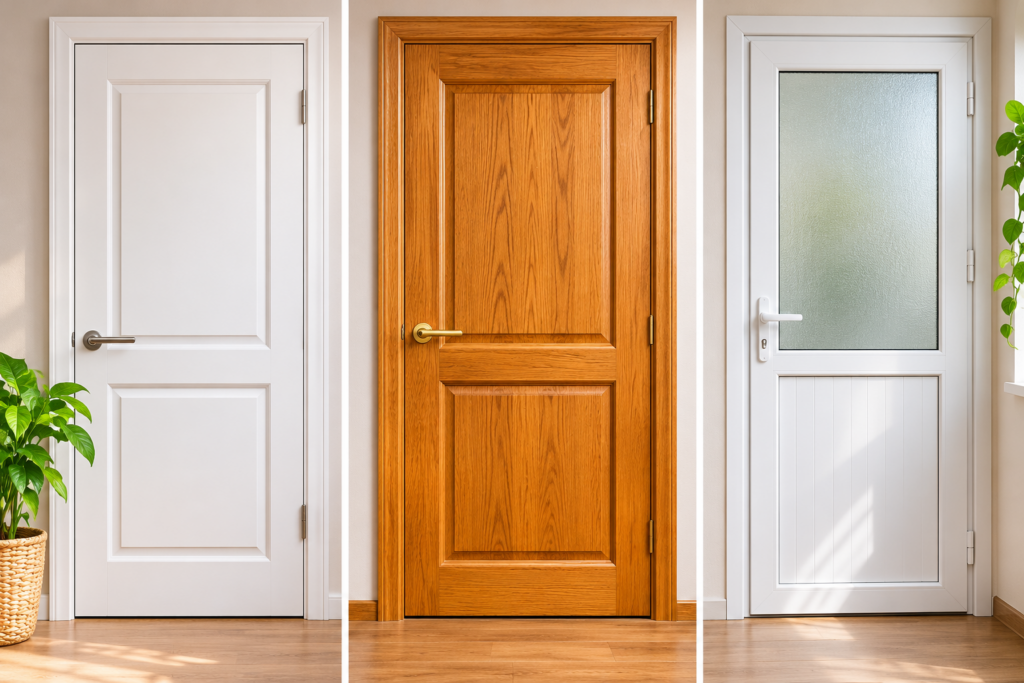
The best cleaning method depends on what your door is made of and how its surface is finished.
1. Painted Interior Doors
For washable painted surfaces, use a slightly damp microfiber cloth with a mild soap solution.
Avoid excessive scrubbing, particularly on matte or delicate paint finishes.
Some flat paints may show burnishing or shiny patches after rubbing.
If the paint is old, peeling, or damaged, cleaning may not restore its appearance.
2. Varnished Wooden Doors
Begin with dry dusting.
If the varnish is intact and the manufacturer permits damp cleaning, use a barely damp cloth with a compatible mild cleaner.
Dry immediately.
Avoid soaking the wood or using strong acidic and alkaline products.
3. Unfinished or Raw Wood Doors
Unfinished wood can absorb moisture readily.
For routine maintenance, use a soft dry cloth or brush.
Avoid applying a general water-based cleaning solution unless it is specifically recommended for the wood and intended finish.
4. Oiled or Waxed Wooden Doors
These finishes may require specialized maintenance products.
Ordinary detergents can interfere with certain protective treatments.
Follow the finish manufacturer’s instructions rather than using a universal homemade mixture.
5. PVC Doors
Many PVC surfaces can be cleaned with mild dish soap and warm water.
Use a soft cloth and rinse away residue when appropriate.
Avoid abrasive powders, strong solvents, and harsh scrubbing.
6. Glass Doors
Use a cleaner suitable for glass and the surrounding frame.
Apply the product to the cloth when possible, rather than spraying excessively near wooden trim or vulnerable seals.
Buff with a clean microfiber cloth to reduce streaks.
7. Metal Doors
For compatible painted or powder-coated metal surfaces, a mild detergent and soft cloth are often suitable.
Rinse lightly if recommended and dry thoroughly.
Avoid abrasive materials that could damage protective coatings.
✨ How to Remove Common Door Stains Without Harsh Chemicals
Different stains require slightly different approaches.
Fingerprints Around Handles
A mild soap solution on a washable finish is often enough.
Wipe gently, then remove any residue and dry.
Light Greasy Marks
Apply a small amount of diluted mild dish soap using a microfiber cloth.
For kitchen doors with persistent grease, use a cleaner approved for the finish.
Avoid applying undiluted degreasers without checking compatibility.
Dust in Decorative Grooves
Use a soft brush or dry microfiber cloth to loosen particles.
Then wipe with a barely damp cloth if the material permits.
Shoe Scuffs on Painted Doors
Start with a soft, slightly damp cloth.
If the mark remains, try a manufacturer-approved cleaner.
Avoid vigorous rubbing that could remove or polish the paint.
Sticky Residue
Do not immediately reach for acetone, alcohol, or adhesive remover.
These products may damage paint or varnish.
Choose an adhesive-removal method specifically compatible with the door’s finish, and test it first.
Yellowing on White Doors
Not all yellowing is dirt.
Some coatings change color over time because of aging, light exposure, or environmental conditions.
If gentle cleaning doesn’t improve the appearance, the discoloration may be within the finish itself.
Important: Strong cleaners cannot reliably reverse this kind of yellowing and may make the damage worse.
🗓️ How Often Should You Clean Your Interior Doors?
You don’t necessarily need to deep-clean every door each week.
A simple routine can help prevent buildup.
| Cleaning Task | Suggested Frequency |
|---|---|
| Wipe frequently touched handles | Weekly or as needed |
| Remove visible fingerprints | As needed |
| Dust door panels and frames | Every 2–4 weeks |
| Gently clean washable doors | Every 1–3 months, or as needed |
| Check bathroom doors for moisture | Regularly |
| Inspect wood finishes for damage | During routine cleaning |
These are practical housekeeping suggestions, not fixed hygiene requirements.
Homes with children, pets, heavy kitchen use, or frequently touched doors may benefit from more regular cleaning.
🌿 5 Simple Habits That Help Keep Doors Cleaner
A little prevention can reduce the need for intensive cleaning.
1. Keep a microfiber cloth nearby. Quickly removing fresh fingerprints is often easier than tackling accumulated grime.
2. Clean door handles during your regular household routine. They are among the most frequently touched parts of a door.
3. Control excess moisture in bathrooms. Use appropriate ventilation and wipe away condensation when necessary.
4. Avoid touching painted surfaces with greasy hands. Kitchen doors are particularly vulnerable to cooking residues.
5. Deal with scuffs promptly. A fresh mark may be easier to remove gently than one that has been rubbed into the surface over time.
These small habits help preserve the appearance of your doors without relying on strong cleaning chemicals.

❓ Frequently Asked Questions About Cleaning Doors
What is the best homemade cleaner for interior doors?
For many washable painted doors, a solution of approximately 3 cups of warm water and 2–3 drops of mild dish soap is a simple option.
However, always check the finish and test an inconspicuous area first.
Unfinished, oiled, waxed, or delicate doors may require different care.
Can I clean wooden doors with vinegar?
Vinegar is not a universal wood cleaner.
Its acidity can be incompatible with certain wood finishes and protective coatings.
Use a cleaner recommended for the specific wood finish instead.
How do I clean white doors without damaging the paint?
Start by dusting with a soft microfiber cloth.
If the paint is washable, gently wipe with a barely damp cloth and mild soap solution.
Avoid abrasive sponges, aggressive scrubbing, and excessive moisture.
Dry immediately.
How do I remove fingerprints from painted doors?
For washable paint, use a microfiber cloth lightly dampened with diluted mild dish soap.
Gently wipe the affected area, remove any soap residue if appropriate, and dry.
Can I use baking soda to clean doors?
Baking soda can be abrasive when rubbed against certain surfaces.
It may dull or scratch delicate paint and glossy finishes.
A mild nonabrasive cleaner is generally a better starting point.
Should I use lemon oil to polish wooden doors?
Only if the product is specifically formulated and recommended for the door’s finish.
Pure lemon essential oil is not a substitute for an appropriate wood-care product.
How do I clean dirty door frames?
Remove dust first with a soft brush or microfiber cloth.
If the frame has a washable finish, clean it gently with a compatible mild solution.
Pay attention to corners and decorative details.
Can I use a steam cleaner on wooden doors?
Steam cleaning is generally unsuitable for many wooden and wood-based doors because heat and moisture may damage finishes, joints, or panels.
Use steam only if the door manufacturer explicitly approves it.
Why do my doors look streaky after cleaning?
Streaks can result from excessive soap, residual cleaning products, or insufficient drying.
On compatible washable surfaces, use less detergent, remove residue with a barely damp cloth, and buff dry.
Can cleaning restore a scratched or faded door?
Cleaning can remove surface dirt, but it cannot repair deep scratches, peeling paint, worn varnish, or permanent discoloration.
These problems may require touch-up work or refinishing.
❤️ Final Thoughts: The Cleaning Task Most People Forget
It’s easy to spend time cleaning floors, countertops, and furniture while overlooking the doors we use every day.
But once you start noticing fingerprints around handles, dust in decorative grooves, and marks along the lower panels, it’s hard to ignore them.
Fortunately, keeping interior doors looking fresh doesn’t require an elaborate cleaning routine.
For many washable finishes, a soft microfiber cloth, a little warm water, and a few drops of mild dish soap are enough for ordinary dirt.
The real secret is knowing when to use moisture, when to avoid it, and how to protect the finish.
So the next time you’re cleaning your home, take a quick look at your doors.
You might be surprised by how much difference a few minutes of gentle cleaning can make.
Do you regularly clean your interior doors, or is this one household chore you’ve been forgetting? Share your favorite safe cleaning tip in the comments! 🚪✨