
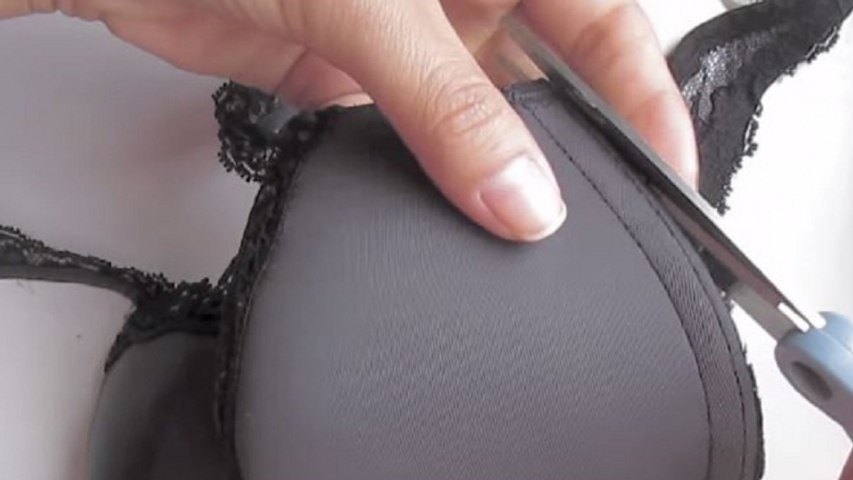
Have an old bra sitting in your drawer that you rarely wear? Before throwing it away, you may be able to transform it into something surprisingly useful.
Backless dresses, low-back tops and summer outfits look beautiful, but there’s often one frustrating problem: the bra band or straps remain visible. Specialty low-back bras exist, but they aren’t always comfortable, affordable or suitable for every outfit.
With an old bra, a needle and a little patience, you can experiment with a simple DIY low-back bra modification.
But there’s an important detail many viral tutorials leave out: this trick won’t magically turn every ordinary bra into a completely invisible backless bra. The result depends on the original bra, your body, the amount of support you need and the cut of your clothing.
Here’s how to do it carefully—and how to avoid ruining a perfectly usable bra. 👙✨
👗 What Does This Bra Hack Actually Do?
The basic idea is surprisingly simple.
Instead of removing large sections of the bra, you change the position or angle of the straps so they work better with a particular low-back or open-back garment.
For some dresses, this can make visible straps less noticeable while allowing you to continue using the cups and support of a bra you already own.
It also makes a great upcycling project: rather than experimenting on a brand-new specialty bra, you can practice on an older one that still fits properly.
The goal isn’t necessarily to create a professional backless bra. It’s to adapt an existing bra to a particular outfit.
✂️ What You’ll Need
Before starting, gather:
- An old bra that still fits comfortably
- Sharp fabric scissors
- A needle
- Strong thread
- Sewing pins or clips
- Fabric chalk or a washable marker
- Measuring tape
- A seam ripper, if available
A sewing machine is optional.
💡 Important: Choose a bra whose cups already fit correctly. Moving the straps cannot correct cups that are too large or too small.
🧵 How to Turn an Old Bra Into a Low-Back Bra
1. 👙 Start With the Right Bra
Don’t begin with your favorite expensive bra.
Choose an older bra that you don’t mind modifying but that is still structurally sound.
Check the:
- elastic
- straps
- cups
- seams
- hooks
A relatively simple bra is usually easier to modify than one covered in complicated lace, decorative straps or multiple structural seams.
If the elastic is already badly stretched, modifying the straps probably won’t restore the support you’ve lost.
2. 👗 Put the Bra On With Your Outfit
This is perhaps the most important step—and it happens before you cut anything.
Put on your bra and then the low-back dress or top you want to wear.
Stand in front of a mirror and identify exactly what’s visible.
Is it:
the shoulder straps?
the back band?
both?
Different dresses expose different parts of a bra, so there isn’t one modification that works for every garment.
Use washable fabric chalk to mark approximately where the straps would need to sit to become less visible.
3. ✂️ Carefully Detach the Straps
Now remove the bra.
Depending on its construction, you may be able to detach the straps using a seam ripper rather than simply cutting through them.
This is preferable because it preserves more of the strap.
If you do need scissors, leave enough material around the attachment point to sew the strap back securely.
⚠️ Don’t cut through the cups or the important structural seams surrounding them.
These areas contribute to the bra’s shape and support.
4. 📌 Reposition the Straps—But Don’t Sew Yet
Now comes the experimentation.
Move the detached straps into a position that works better with your dress.
Depending on the garment, adjusting the strap angle or attaching it slightly lower may make it less noticeable.
Use sewing pins or clips to hold everything temporarily.
Don’t make the modification permanent yet.
This is where many DIY projects go wrong: people cut and sew immediately without checking how the altered bra actually behaves when worn.
5. 👗 Try the Bra and Dress On Again
Carefully put on the temporarily pinned bra.
Then put your dress or top over it.
Check yourself from the front, sides and back.
Ask yourself:
Are the straps actually hidden?
Do the cups remain in the correct position?
Does the bra still feel supportive?
Is anything pulling or digging into your skin?
Does the modification work when you move?
Adjust the position until you find the best compromise between appearance, comfort and support.
💡 Don’t rush this stage. Five extra minutes of testing can save you from having to undo your stitching later.
6. 🧵 Sew the Straps Securely
Once you’ve found the correct position, carefully remove the bra without losing your markings.
Now sew the straps securely.
Use several passes of strong thread rather than relying on only one or two stitches.
Remember: bra straps experience tension every time you move.
For this reason, proper stitching is preferable to fabric glue for structural attachment points.
If you’re uncomfortable making a structural alteration yourself, a tailor may be able to perform the modification for you.
7. ✨ Finish Any Cut Edges
Don’t ignore the areas you’ve cut or opened.
Raw fabric edges may begin to fray after repeated wear and washing.
Where possible, fold the raw edge slightly inward and secure it with small stitches.
This gives the alteration a cleaner appearance and can help it last longer.
🚶 The Step Many Tutorials Forget: Test It While Moving
Looking good in front of the mirror isn’t enough.
Put on the completed bra and your outfit and spend a few minutes moving normally.
Try:
raising your arms, sitting down, walking around and bending slightly.
The bra should remain secure and comfortable.
If it shifts significantly, pulls painfully or causes the cups to move out of position, make another adjustment before wearing it for several hours.
This is especially important because changing strap positions can also change how tension is distributed across the bra.
⚠️ The Big Limitation: This Won’t Work With Every Backless Dress
This is where viral DIY videos can create unrealistic expectations.
Repositioning the straps doesn’t automatically turn an ordinary bra into a completely invisible backless bra.
A very deeply cut dress may still expose the back band or other structural parts of the bra.
Removing too much material to hide those sections can also significantly reduce support.
That’s why this project is better described as a DIY low-back bra modification rather than a universal backless-bra conversion.
It works best when the garment exposes only the areas that can reasonably be accommodated by repositioning the straps.
🚫 5 Mistakes That Can Ruin the Result
1. Cutting before trying the bra with your dress.
You need to know exactly which section is visible before changing anything.
2. Removing too much material immediately.
Be conservative. You can always remove more, but you can’t easily put fabric back.
3. Using weak glue on structural straps.
The straps are under tension. Secure stitching is generally the better option.
4. Focusing only on appearance.
A bra can look perfect while you’re standing still and become uncomfortable as soon as you move.
5. Experimenting on an expensive bra.
Your first attempt should ideally be made using an older bra.
👗 What If the DIY Trick Doesn’t Work?
Don’t keep cutting pieces away in an attempt to force the bra to fit the dress.
Some outfits simply require a different solution.
Depending on the garment and the support you need, alternatives can include a commercial low-back bra, convertible bra, adhesive cups, fashion tape or a garment with built-in cups.
Another interesting option is having a tailor add appropriate cups or support directly to the dress.
In some cases, altering the garment is more effective than altering the bra.
🌿 Why It’s Still a Clever Upcycling Project
Even when the transformation isn’t perfect, this is an interesting way to practice basic sewing and clothing alteration.
You’re taking something that might otherwise sit unused in a drawer and seeing whether it can serve another purpose.
And because you’re working with an older bra, you can experiment with measuring, pinning, repositioning and stitching without immediately risking an expensive new piece of lingerie.
That makes the project useful both as a fashion solution and as a small introduction to clothing upcycling.
❓ FAQ: DIY Low-Back Bra Hack
Can I really turn a normal bra into a backless bra?
Sometimes, but “low-back bra” is usually a more accurate description. The result depends heavily on the bra design and how much of the back your outfit exposes.
Can I use fabric glue instead of sewing?
Fabric glue may be suitable for some decorative details, but the main straps experience significant tension. Secure stitching is preferable for structural attachment points.
What’s the best bra for this project?
Use an older bra that still fits properly and has good elastic. A relatively simple construction will usually be easier for a beginner to modify.
Can I completely remove the back band?
Be very careful. The band provides a substantial part of the support in a traditional bra. Removing it fundamentally changes how the bra works and can make it unstable.
Will this work with a completely backless dress?
Not necessarily. A dress that exposes most of the back may require specialty lingerie, adhesive solutions or support incorporated directly into the garment.
Can I wash my modified bra normally?
Follow the original garment’s care label whenever possible. Hand washing in cool or lukewarm water is generally gentler on an altered bra and your new stitching.
Is this project suitable for beginners?
Yes. Start with an old bra, make small changes and pin everything before sewing permanently.
✨ Final Thoughts
Turning an old bra into a low-back version isn’t about grabbing scissors and hoping for the best.
The key is:
Measure → Pin → Try On → Adjust → Sew.
Careful repositioning can make an ordinary bra work much better underneath certain low-back dresses and tops, while preserving as much comfort and support as possible.
And if the modification doesn’t work with your particular outfit, don’t keep removing structural material. Sometimes a convertible bra, specialty low-back design or professionally altered dress will simply provide a better result.
But before throwing an old bra away, it’s certainly worth taking another look. With a few careful stitches, it may have one more useful life waiting for it. 👙✨