
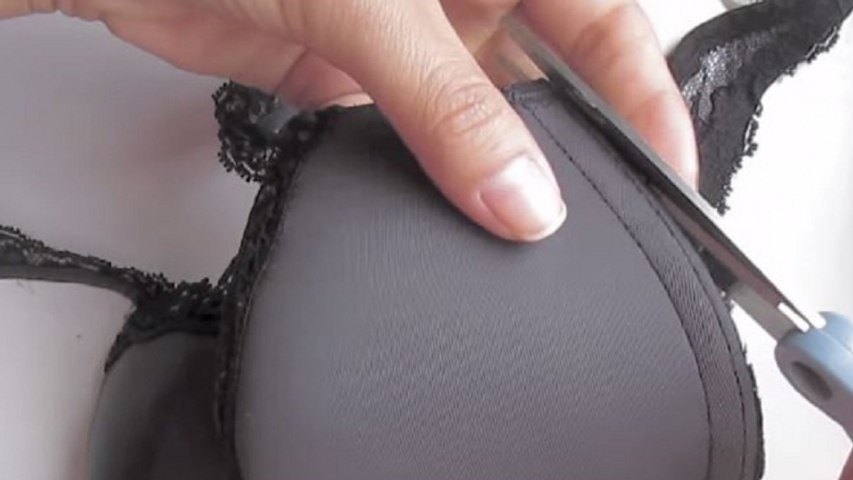
She Cuts Up an Old Bra and Creates Something Genius!
Have an old bra sitting in your drawer that you rarely wear? Before throwing it away, you may be able to give it a clever second life.
Backless dresses, low-back tops and summer outfits can look beautiful, but finding the right bra underneath them isn’t always easy. Traditional bands and straps can remain visible, while specialty bras aren’t suitable—or comfortable—for everyone.
With a little sewing and an old bra, however, you can experiment with a simple DIY low-back bra modification.
The important thing is to understand what this hack can—and cannot—do. It won’t magically make every bra invisible under every backless dress, but with the right bra and outfit, it can make the straps or band less noticeable and better positioned.
Here’s how to try it safely and get a cleaner result. 👙✨
👗 Why Transform an Old Bra?
There are several reasons this little wardrobe project has become such an appealing DIY idea.
Instead of purchasing another specialty bra, you’re repurposing something you may already own. You can also adapt the placement of the straps to a particular neckline or back design.
And perhaps most importantly, practicing on an old bra means there’s little risk if your first attempt isn’t perfect.
It’s a combination of upcycling, sewing and practical fashion in one small project.
✂️ What You’ll Need
For this DIY project, prepare:
- An old bra that still fits comfortably
- Sharp fabric scissors
- Needle and strong thread
- Sewing pins or clips
- Fabric chalk or washable marker
- Measuring tape
- A small seam ripper, if available
A sewing machine is optional.
💡 Tip: Choose a bra whose cups still fit correctly. Altering the straps won’t fix cups that are already too large or too small.
🧵 Step-by-Step: How to Modify an Old Bra
1. 👙 Choose the Right Bra
Start with a bra you don’t mind experimenting with.
A relatively simple design is usually easier to modify than one with lots of lace, complicated seams or decorative straps.
Check that the fabric, elastic and stitching are still in good condition.
If the elastic has already stretched significantly, the finished bra may not provide enough support.
2. 👗 Try It With the Outfit First
Before cutting anything, put on the bra and then the dress or top you want to wear.
Look carefully at exactly what’s visible.
Is the problem the shoulder straps?
The back band?
Both?
This step is important because different backless and low-back garments require different solutions.
Use washable fabric chalk to mark approximately where you’d like the straps or band to sit.
3. ✂️ Carefully Detach the Straps
Depending on the bra design, you may be able to remove the straps using a seam ripper rather than cutting straight through them.
This preserves as much strap length as possible.
If cutting is necessary, leave enough material near the attachment point for sewing.
⚠️ Don’t cut the cups or structural seams surrounding the cups.
These areas contribute to the bra’s shape and support.
4. 📌 Experiment With a New Strap Position
Here’s where the customization happens.
Temporarily reposition the straps according to the cut of your clothing.
Use sewing pins or clips to hold them in place before sewing.
For certain low-back designs, repositioning the straps lower or changing their angle may make them less visible.
But don’t sew them permanently yet.
5. 👗 Try Everything On Again
Put the modified bra on carefully, followed by your outfit.
Check the result from several angles.
Ask yourself:
Are the straps hidden?
Does the bra still feel secure?
Are the cups sitting correctly?
Is anything pulling uncomfortably?
Does the new strap position actually work with the dress?
Move the pinned straps until you find the best compromise between appearance and support.
This trial-and-error stage is much better than sewing first and discovering afterward that the placement doesn’t work.
6. 🧵 Sew the Straps Securely
Once you’re happy with the positioning, remove the bra and sew the straps securely.
Use several passes of strong thread rather than relying on one or two stitches.
Remember that bra straps are under tension when worn.
For that reason, sewing is preferable to fabric glue for structural attachment points.
If you’re unsure about your sewing skills, a tailor can usually make this type of small alteration quickly.
7. ✨ Finish the Cut Edges
Inspect any areas you’ve cut.
Loose or unfinished edges can begin to fray after repeated wear and washing.
Fold raw edges inward where possible and secure them with small stitches.
The result will look cleaner and should last longer.
8. 👗 Do the Final Outfit Test
Now try on the entire outfit one final time.
Move around rather than simply standing in front of the mirror.
Raise your arms, sit down, bend slightly and walk around.
The bra should remain comfortable and secure during normal movement.
If it shifts significantly, digs into your skin or feels unstable, adjust it before wearing it for several hours.
💡 Why This DIY Fashion Hack Is Worth Trying
One of the biggest advantages is cost. You’re experimenting with something you already own instead of immediately buying another piece of lingerie.
It’s also customizable. A commercial low-back bra has a predetermined shape, whereas an altered bra can potentially be adapted to a particular dress.
Then there’s the sustainability aspect. 🌿
Extending the useful life of clothing and accessories is a simple form of upcycling. Even if an older bra no longer works with your everyday wardrobe, it might still be useful for a special outfit after modification.
⚠️ Important: Not Every Backless Dress Will Work
This is where many viral versions of this hack exaggerate the results.
Repositioning straps doesn’t automatically transform an ordinary bra into a completely invisible backless bra.
If a dress exposes most of the back, the bra’s back band or other structural elements may still show.
And removing too much material can significantly reduce support.
The DIY approach is therefore best considered an option for certain low-back, open-back or unusually cut garments, rather than a universal replacement for specialty lingerie.
🚫 5 Common Mistakes to Avoid
- Cutting before testing the bra with the outfit. Always determine exactly what needs changing first.
- Removing too much fabric. Start conservatively—you can always remove more later.
- Using weak glue for load-bearing straps. Strong stitching is safer and usually more durable.
- Ignoring support. A modification may look great while standing still but shift once you start moving.
- Using your favorite expensive bra for the first attempt. Practice on an older bra until you’re confident with the technique.
👗 What If the DIY Bra Doesn’t Work?
Don’t force the modification if the dress exposes too much of the bra.
Depending on the outfit and the amount of support required, other options include a commercially designed low-back bra, convertible bra, adhesive cups, fashion tape or a garment with built-in cups.
Another elegant solution is having a tailor add cups or additional support directly inside a dress.
Sometimes modifying the garment is more effective than modifying the bra.
🌿 An Easy Upcycling Project
There’s another reason this project is interesting beyond solving a fashion problem.
It demonstrates how an item destined for the trash can sometimes be transformed with only scissors, thread and a little creativity.
An old bra can become an inexpensive practice piece for learning basic sewing and clothing alterations.
And if the first attempt doesn’t work perfectly? You haven’t ruined an expensive new bra.
❓ Frequently Asked Questions
Can I really turn a normal bra into a backless bra?
Sometimes—but low-back bra is the more accurate description. The success of the alteration depends on the original bra and how much of your back the clothing exposes.
Can I use fabric glue instead of sewing?
Fabric glue may help with decorative or non-structural details, but straps experience considerable tension. Secure stitching is preferable for the main attachment points.
Which bra is best for this DIY?
Choose an older bra that still fits properly and has good elastic. Simpler constructions are generally easier for beginners to alter.
Can I cut off the entire back band?
Be careful. The band provides much of a traditional bra’s support. Removing it fundamentally changes how the bra functions and may make it unstable.
Will the modification work with a completely backless dress?
Not necessarily. Very low or completely open-back dresses may require another solution, such as specialty lingerie or support incorporated into the dress.
Can I wash the altered bra normally?
That depends on the original bra and your stitching. Hand washing in cool or lukewarm water is generally gentler on altered lingerie. Always follow the care instructions for the original garment where possible.
Is this suitable for beginners?
Yes, particularly if you start with an old bra and make small changes. Pinning and testing before permanent sewing makes the project much easier.
✨ Final Thoughts
Cutting up an old bra might sound strange at first, but careful repositioning of the straps can turn an unused piece of lingerie into something much more practical for certain outfits.
The secret isn’t simply grabbing scissors and cutting. 👙✂️
Measure, pin, try on, adjust—and only then sew.
That approach gives you a much better chance of creating a comfortable result while preserving the support you need.
So before throwing away an old bra, take another look at it. With a few thoughtful alterations, it might become exactly what you need for your next low-back summer outfit. ✨